Everything in reach
Pin apps and folders, keep running apps visible, and browse files without leaving the dock.
Docktopus for macOS
Your apps, useful little tools, and the things you reach for all day. Together in a dock that feels like yours.
Three distinct themes. Light and dark presets. One place to make your Mac yours.

01 / Your everyday dock
Launch your favorites, switch windows, and keep the right tools beside them. Use Docktopus as a compact dock or a full taskbar, on the screens you choose.
Pin apps and folders, keep running apps visible, and browse files without leaving the dock.
Find the right window, jump between desktops, and give regular workflows their own launch profiles.
Choose any screen edge, adjust size and magnification, and add only the widgets you need.

Place the dock at the bottom, top, left, or right. Choose alignment, scale, magnification, auto-hide, and fullscreen behavior.
Import your macOS Dock, pin apps and folders, show running apps and badges, and browse folders as lists or grids. Right-click for app actions and Finder.
Create named launchers for apps, websites, files, folders, and commands. Configure launch options and supported app profile folders, or open a website in an isolated web app.
Window Switcher
Recognize the window you need in a visual grid, navigate by keyboard, and switch when you release the modifier. Preview capture uses Screen Recording access; focusing individual windows uses Accessibility.
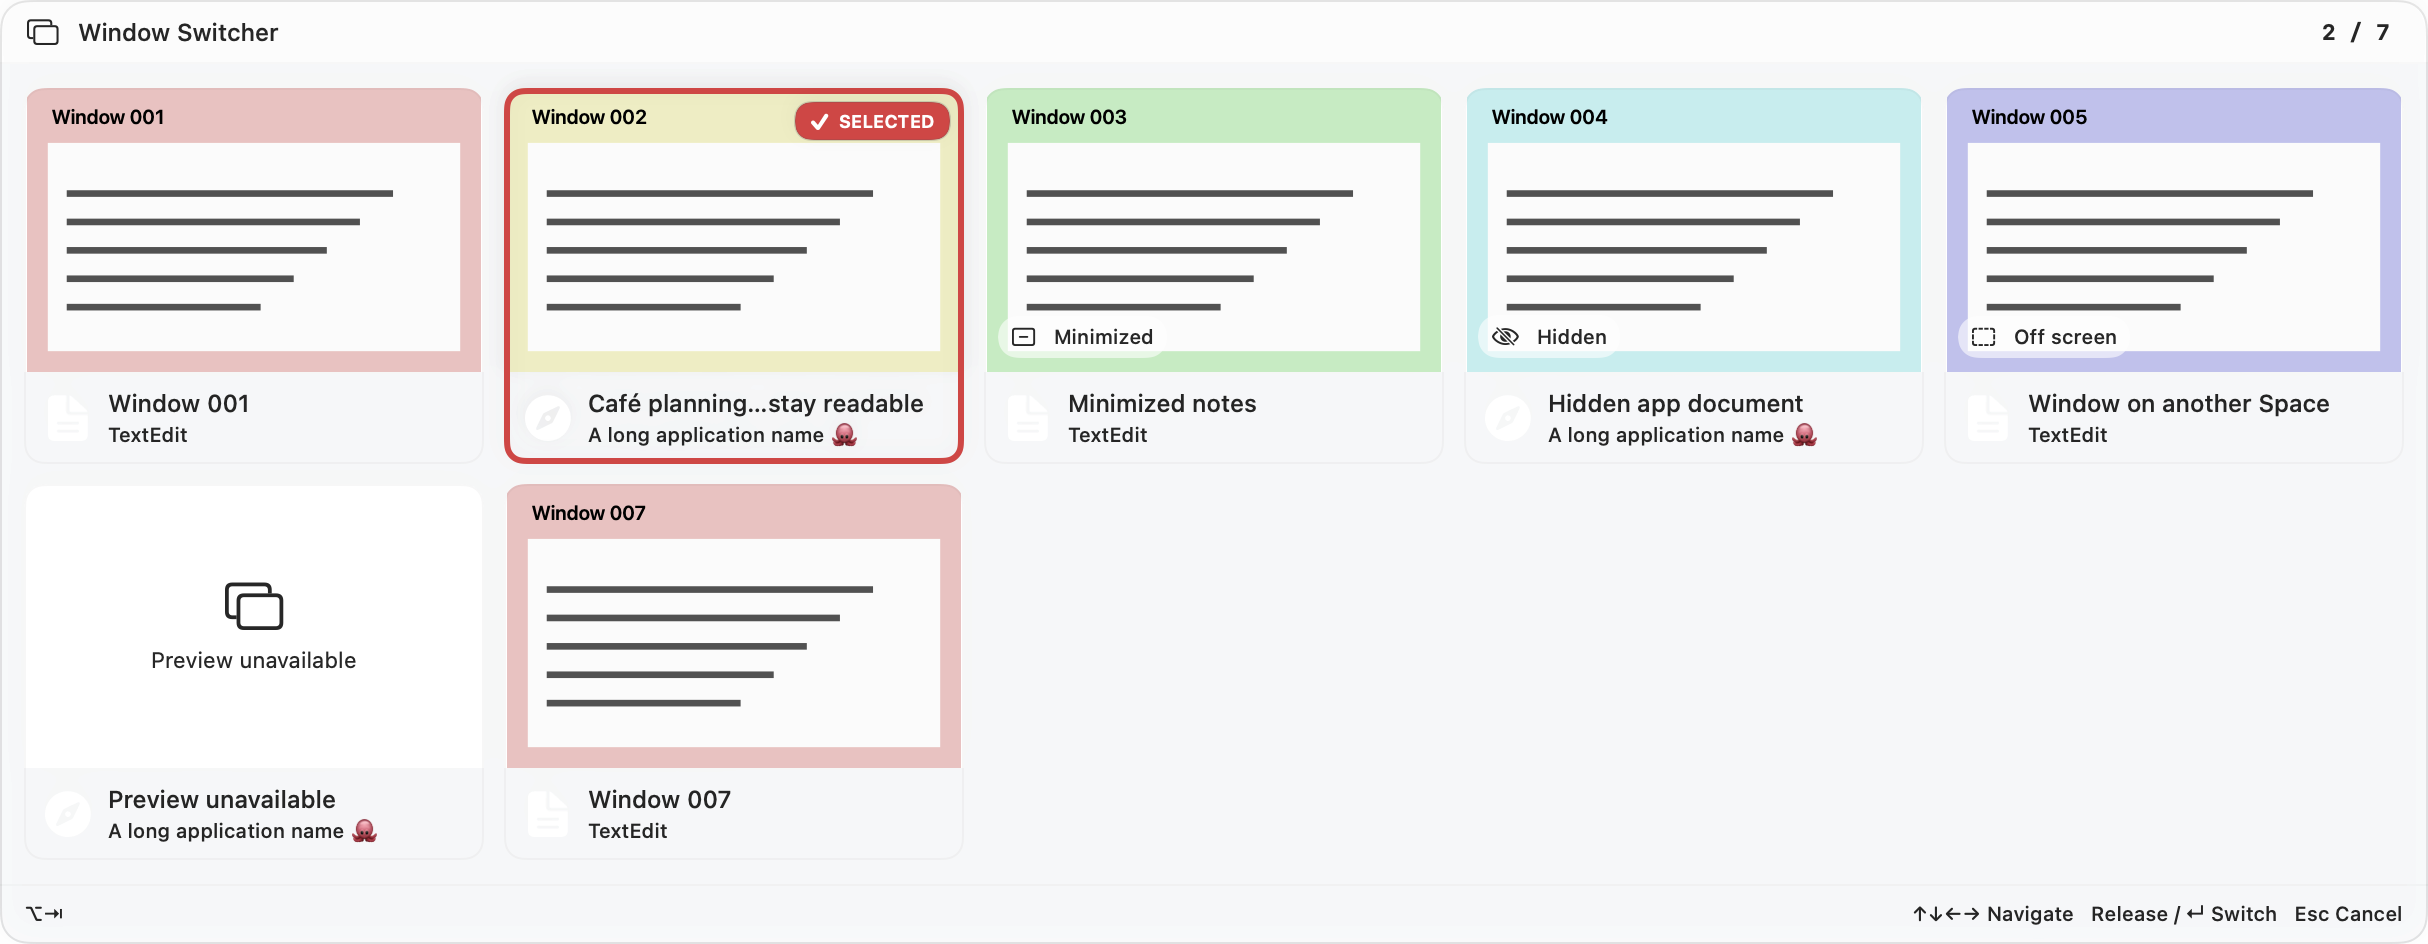
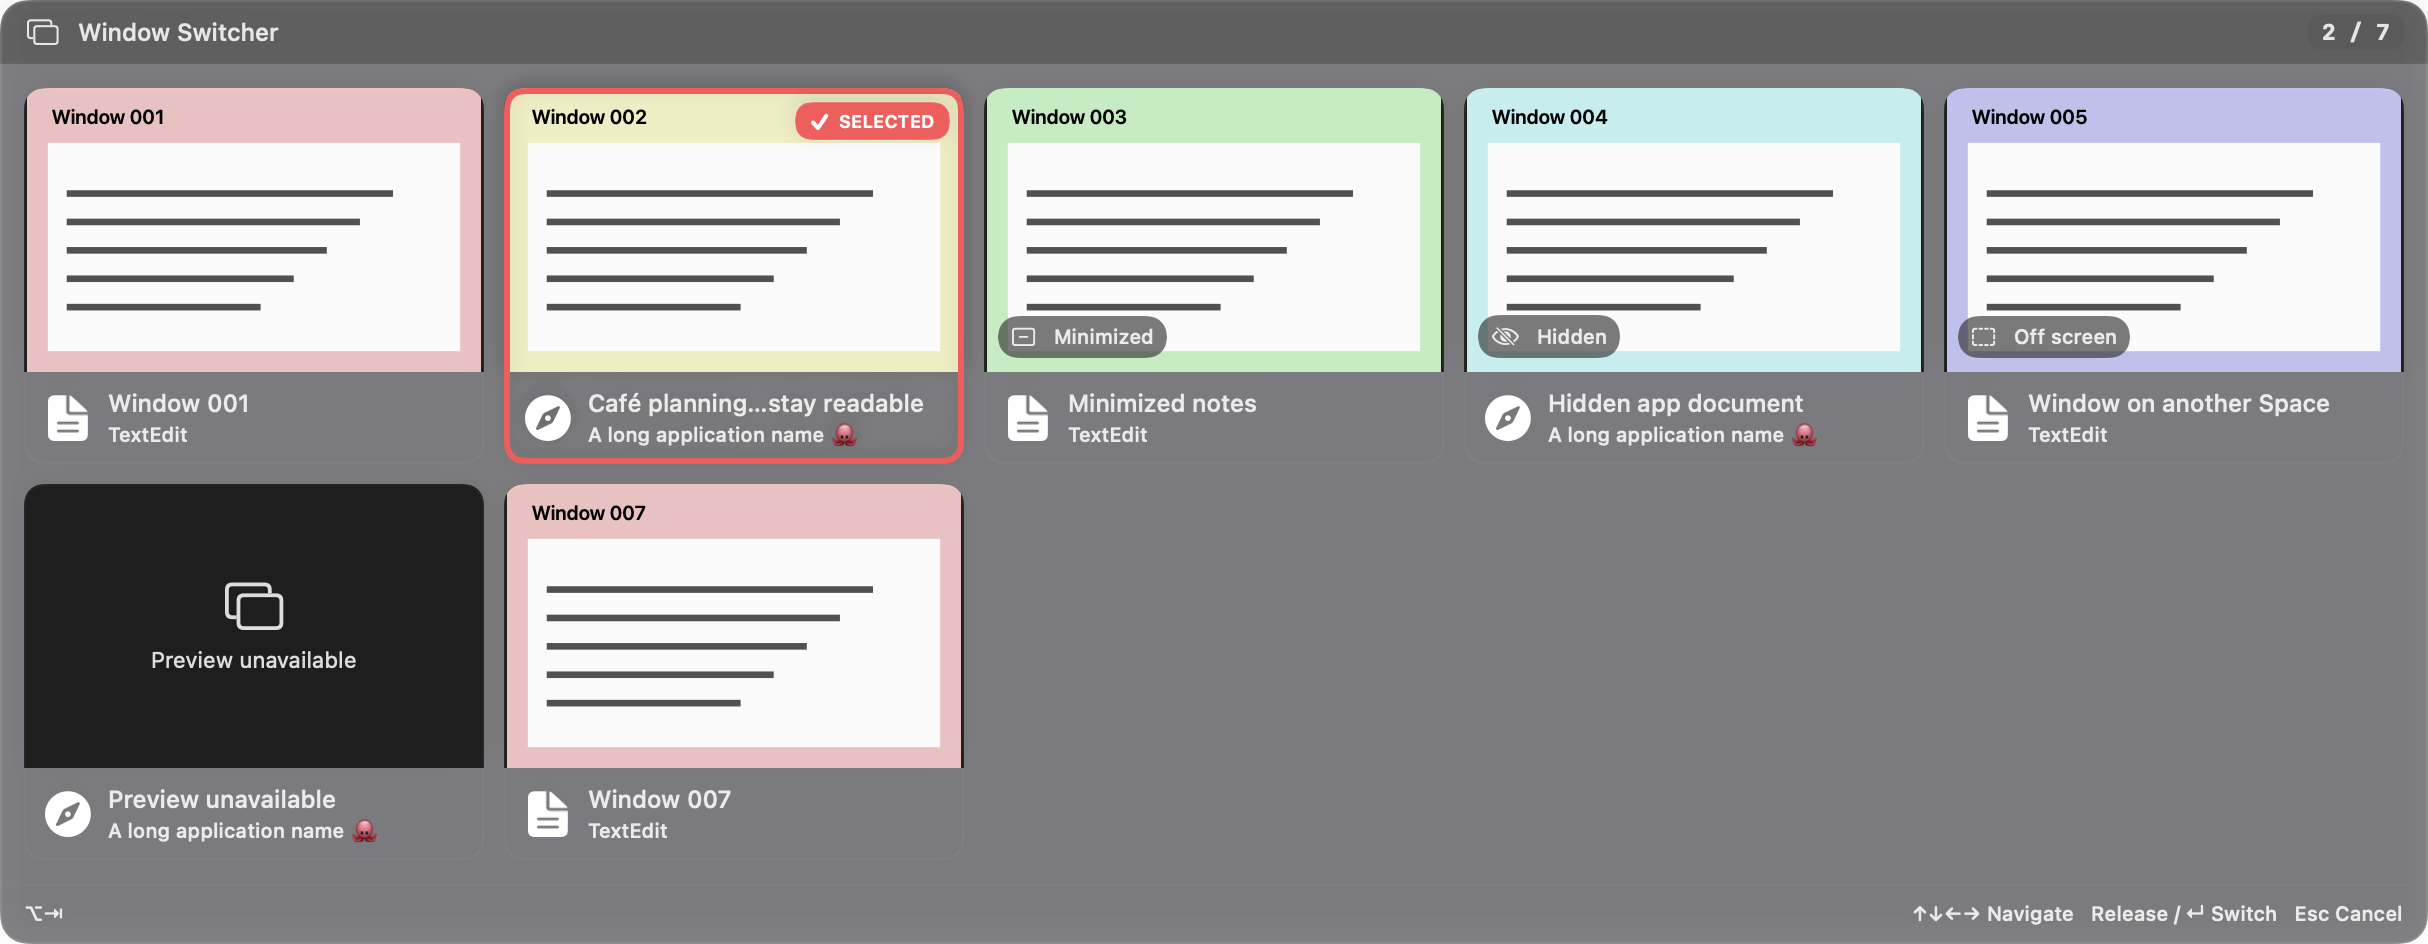
The default is Option + Tab. Choose another modifier and key pair in Settings → Window Switcher. Repeated presses cycle through windows; add Shift to cycle backwards when Shift is not already part of your chosen modifier.
Use ↑, ↓, ←, and → to move through the grid, or Home and End for the first and last window. Selection scrolls into view. Press Return or release the modifier to switch, click a card to choose it directly, or press Esc or click outside to cancel.
Window titles, application names, app icons, and a position counter help distinguish similar windows. Hover for the full title. Where an eligible window’s state is known, badges identify Minimized, Hidden, or Off screen. The available windows depend on what macOS and each app expose.
The switcher opens on the display under your pointer and fits within its visible area. The adaptive grid shows up to five columns and three rows before scrolling. It starts with the current window and uses front-to-back window stacking order, with minimized windows at the end. Updated details and thumbnails preserve your selection and the session’s order.
Window names and icons appear before thumbnails finish loading. Inactive cards use cached still images; the selected, visible window updates live after a brief pause. Minimized, hidden, and off-screen windows keep still previews or a Preview unavailable message. Screen Recording access enables preview capture. Accessibility access lets Docktopus focus a specific window and restore it when minimized; without that access, switching activates its app.
Follow your active Liquid Glass, CDE, or Windows 95 theme, including light, dark, and custom presets. Theme fonts, colors, spacing, bevels, and motion apply to the switcher. The window-name frame can be turned off while titles and app names remain visible. The switcher respects Reduce Motion, Reduce Transparency, and Increase Contrast, with descriptive accessibility labels for window identity, state, and selection.
Multi-monitor support
Choose the screens that get a dock, then place it on the edge that suits you. Your selections stay remembered when you disconnect and reconnect a display.
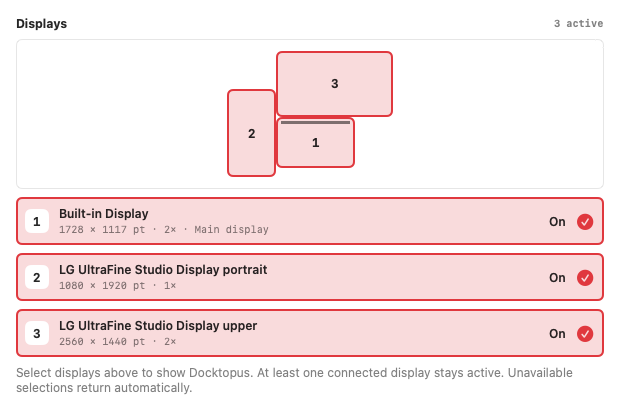
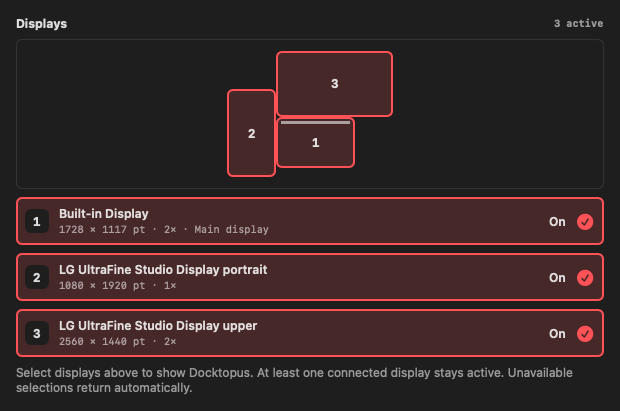
In Settings → Dock, select one display or several. A numbered map follows your desktop arrangement, while readable rows show each monitor’s name, logical size, scale, and main-display status. Choose Dynamic Island’s displays separately, so the dock and Island can appear where each works best for you.
Place the dock along the bottom, top, left, or right edge and choose its alignment. Your dock layout, theme, position, and scale settings are shared across selected screens, with the layout fitted to each display’s available space. Auto-hide reveals the dock on the screen you approach.
App Starter, folder panels, and dock-anchored tools open on their source display. Clipboard history opens on the screen under your pointer and keeps that screen for the session. Panels fit the available space, and window previews adapt to Retina and standard displays.
Your display selections stay remembered when a monitor disconnects. If none of your selected screens are connected, the dock and Island temporarily fall back to the main display. Reconnect a selected monitor and its saved selection returns automatically. Settings show the temporary fallback and remembered disconnected displays.
For brightness, resolution, rotation, and monitor arrangement, explore Display Controls.
02 / Clipboard manager
Keep the text, images, files, and links you copy ready for the next task. Search your history, pin favorites, and paste with or without formatting.
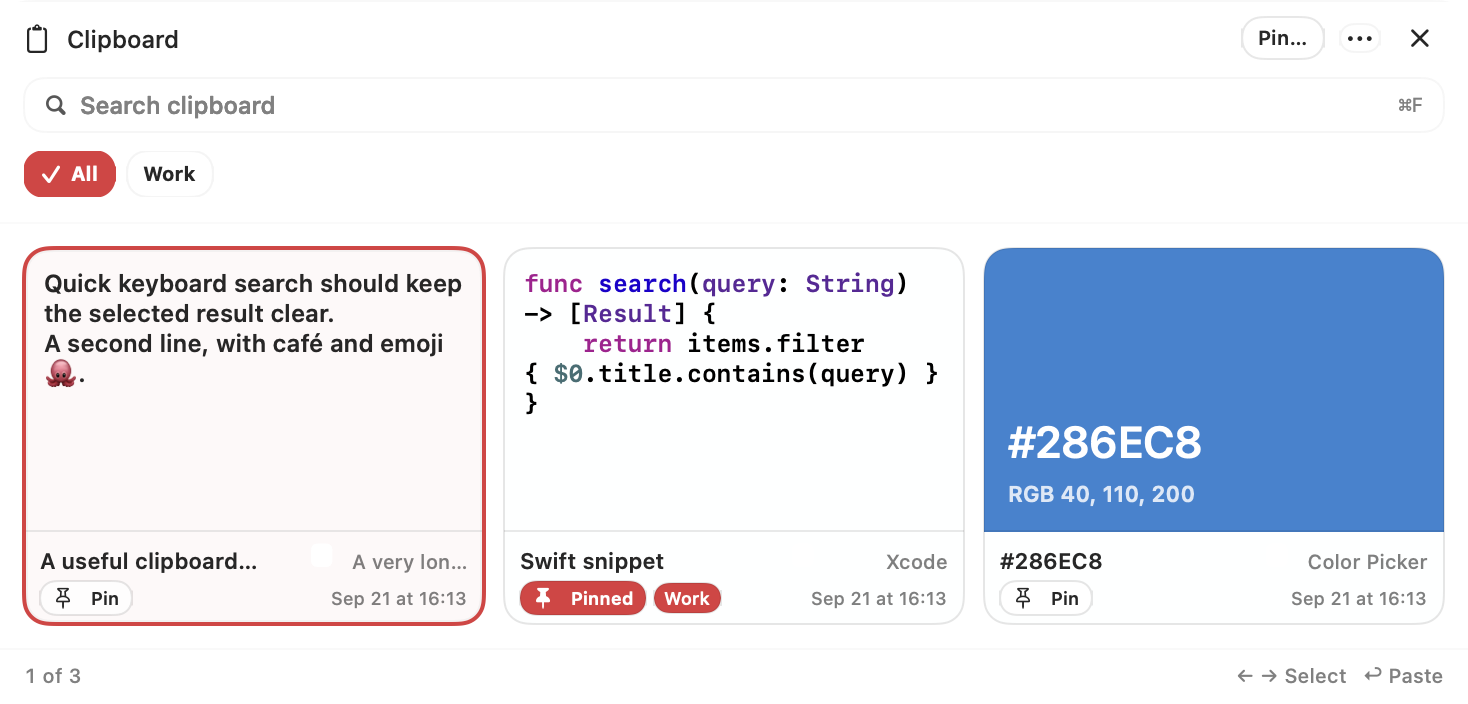
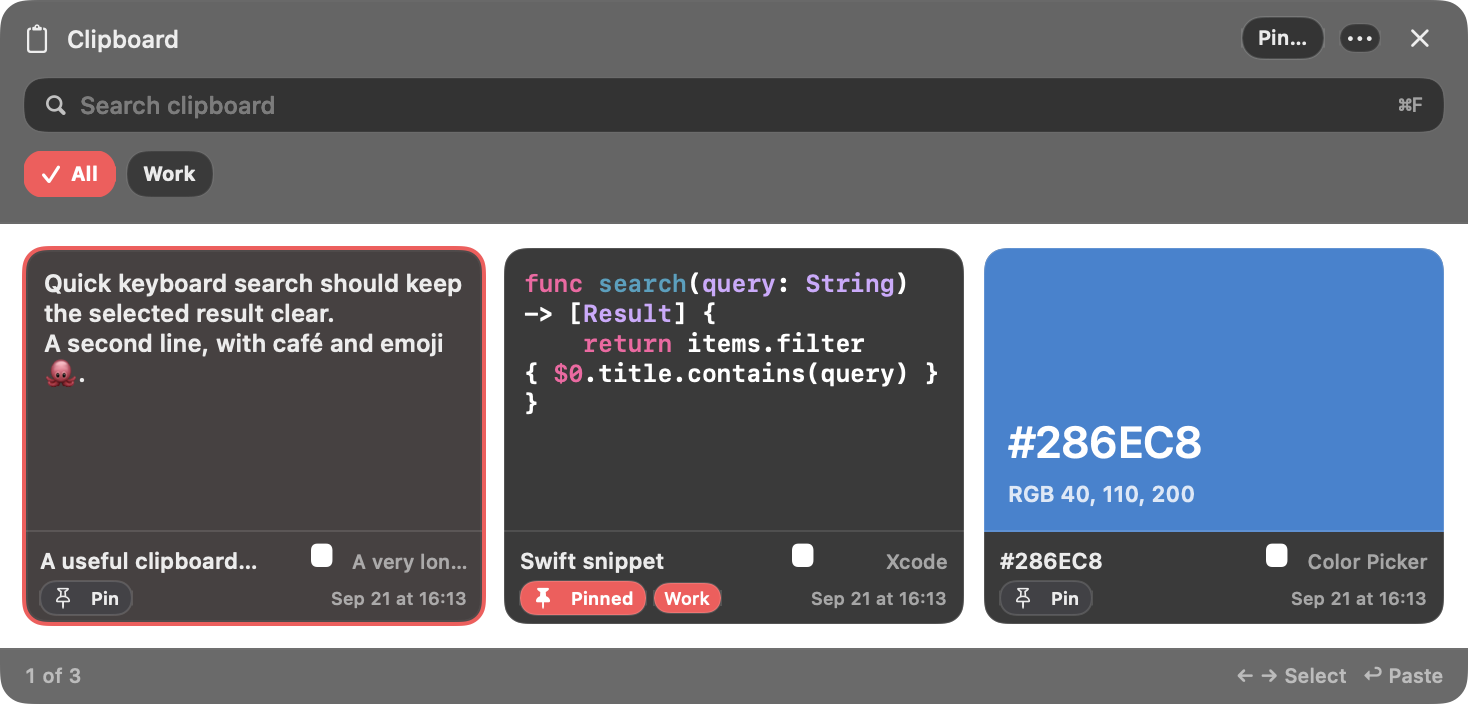
Clipboard capture is off by default. Enable it in Settings, then open history with ⌘⇧V or choose a custom keyboard shortcut.
Start typing or press ⌘F to search copied snippets, clip titles, source apps, filenames, and categories. Combine several words, in any order, to narrow the results. Matching text is highlighted in previews, including recognized text in images.
Use ↑ and ↓ directly from search to select a result, then press Return. If results are still loading, Return waits for the current search and keeps your arrow-key selection. Outside search editing, all four arrow keys browse cards. Esc leaves search editing, then closes the panel.
Browse text snippets, image thumbnails, file previews, and website cards, with source-app icons and timestamps. Recognized code snippets get syntax highlighting; copied hex colors in #RGB or #RRGGBB form show a swatch and RGB values. A selection counter keeps your place in the results.
On-device text recognition makes copied images searchable by the words they contain. Matching text regions are highlighted directly on the image preview, so you can find a screenshot without remembering when you copied it.
Use ⌘P to pin or unpin reusable clips. Keep them in Main or a named category and filter from the category bar. Rename a clip’s label without changing its copied content; saved titles survive copying it again. Copying the same content again updates the existing clip, keeping its pinned category and custom title. Pinned clips are preserved during history cleanup.
Return restores the selected clip and pastes it into the app you were using. Automatic pasting requires Accessibility permission; Restore Selection to Clipboard Only lets you paste manually without it. Choose Paste as Plain Text to remove formatting. ⌘⇧C copies a clip while editing search; ⌘C does the same while browsing cards. Copy Item also works from the actions menu without closing the manager.
Optionally remove recognized tracking parameters, including UTM tags and common advertising click IDs, when pasting. Supported redirect links are unwrapped to their destination. This setting changes the pasted link without rewriting the saved clip.
Drag supported text, links, images, and files into another app. Clipboard history is also available in Docktopus’s Island, with the same search and category controls. File clips reference the original files; previews and dragging depend on the file type and continued access to those files. Files in protected Desktop and Documents folders show a lightweight filename card instead of loading their contents for a preview.
Unpinned history is kept for one month by default. Choose 1, 2, 4, 6, 8, or 12 months, or choose Unlimited. Expired clips are cleaned up at startup and every 12 hours. Delete individual unpinned clips or confirm Clear Unpinned History in the actions menu. Pinned items and their categories are kept.
Clipboard history and text recognition stay on your Mac. Keychain Access and common password-manager apps are excluded automatically; copies carrying recognized sensitive clipboard markers are skipped. Exclude other apps in Settings, disable the manager, or use Privacy Pause for 5, 15, 30, or 60 minutes.
Automatic website previews are on by default. Turn them off, exclude hosts and their subdomains, or use Load preview for an individual link. Loading a preview contacts the website and may contact other hosts used by the page, which can receive your IP address and requested URL. Saved previews remain visible when automatic loading is off.
03 / Dynamic Island
Music, clipboard history, a file shelf, system controls, and your next meeting—one expandable space at the top of your display. Hover to open it, or pin it while you work. Enable it when you want it in Settings → Dynamic Island.
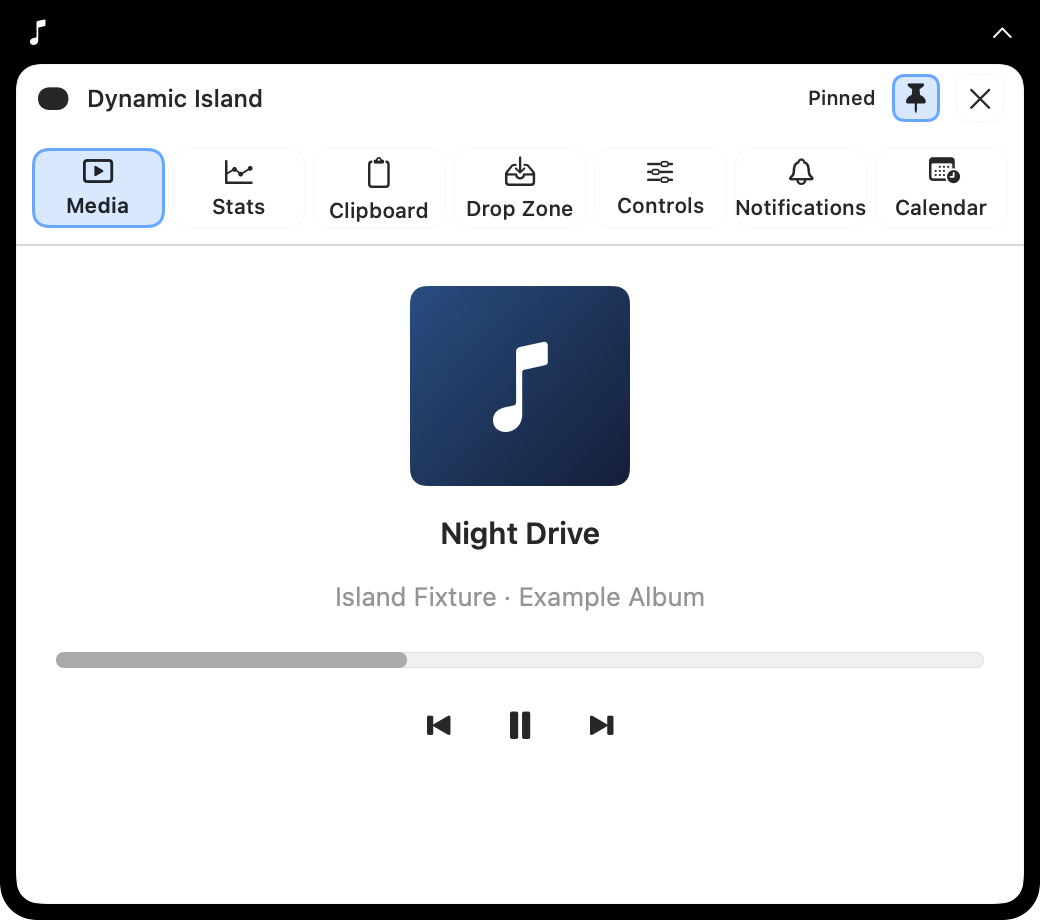
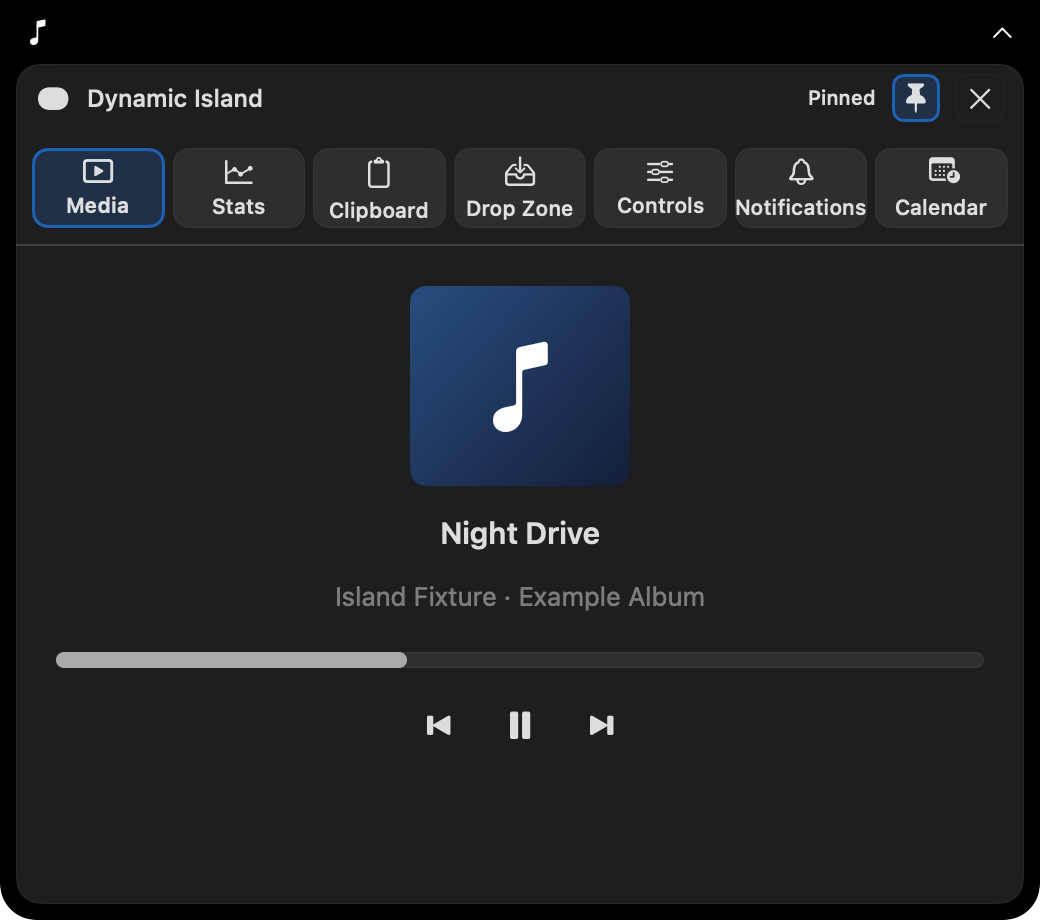
Dynamic Island is off by default. Enable it in Settings → Dynamic Island and choose its displays independently from your dock.
See artwork, track and artist information, playback state, and read-only playback progress from apps that publish macOS Now Playing information. Use play/pause, previous, and next where the source app supports them. Explore the dock’s Now Playing widget. In the collapsed Island, the optional React to playing audio setting makes the bars follow the current source on macOS 14.2 or later and may require audio capture permission. The regular animation remains available when live audio is unavailable; Reduce Motion keeps the bars still.
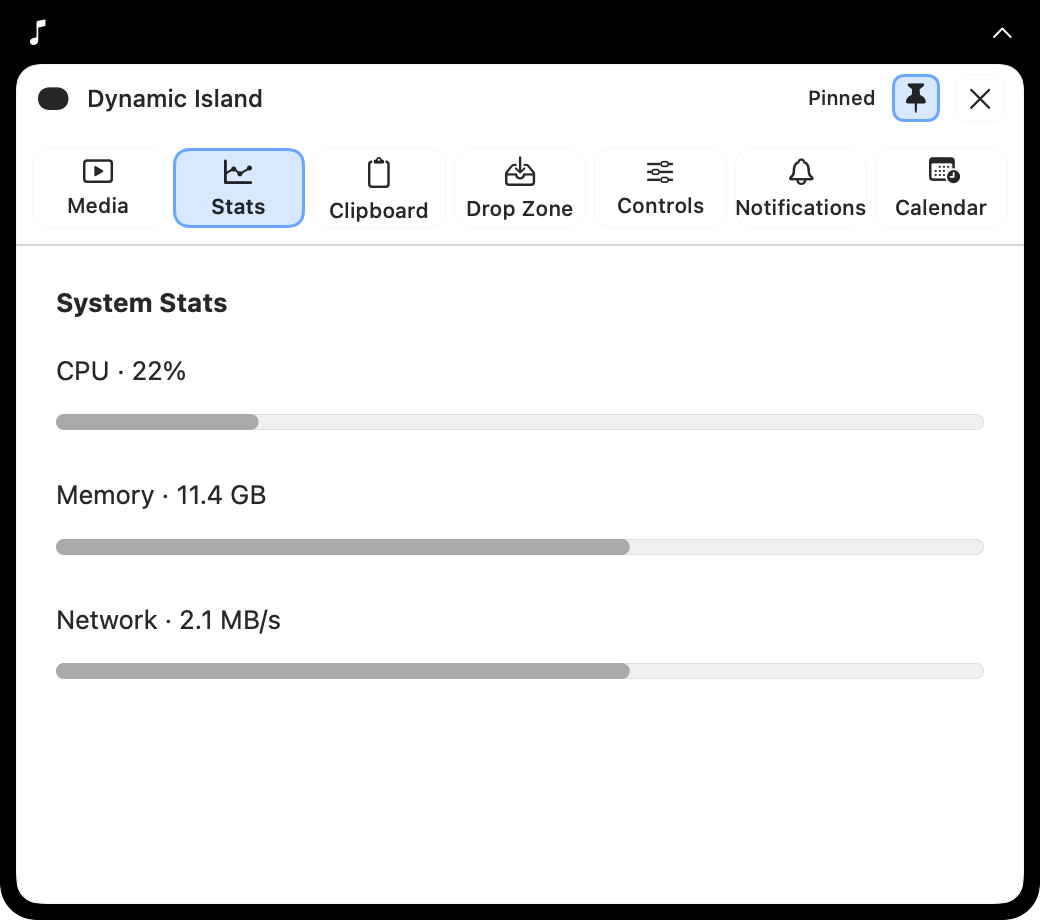
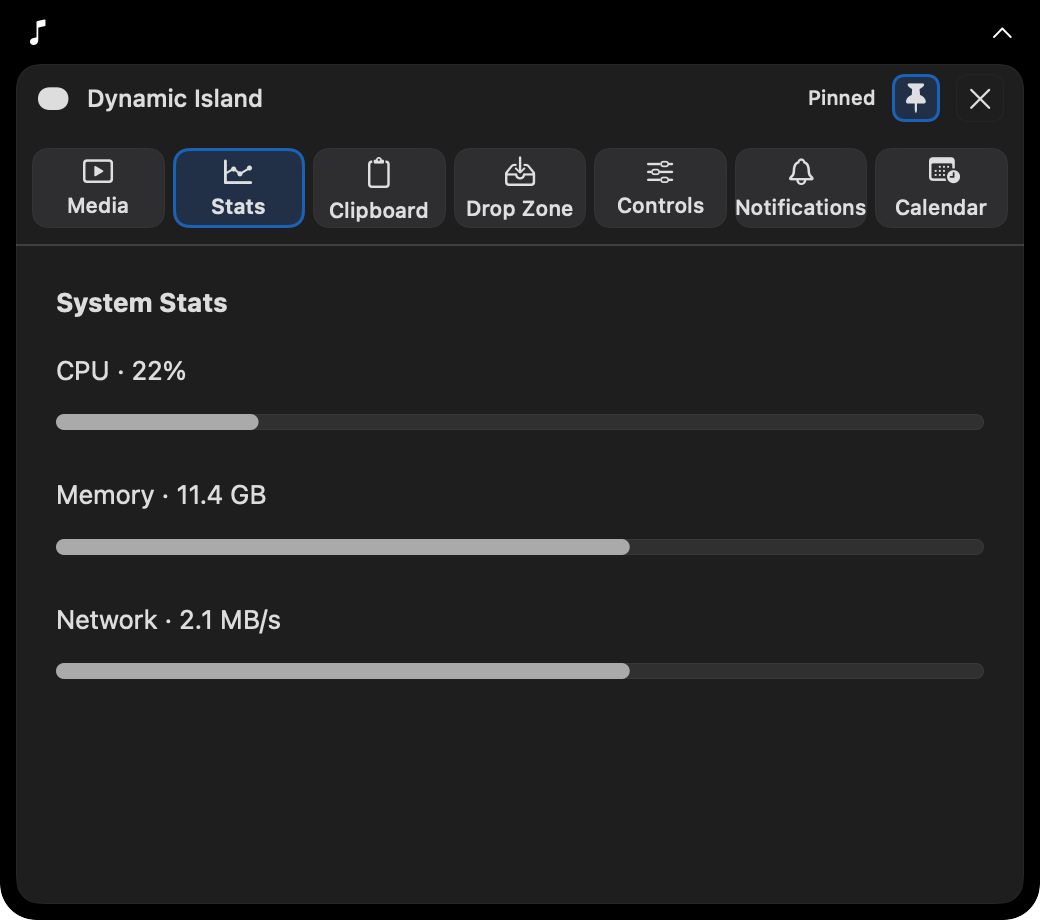
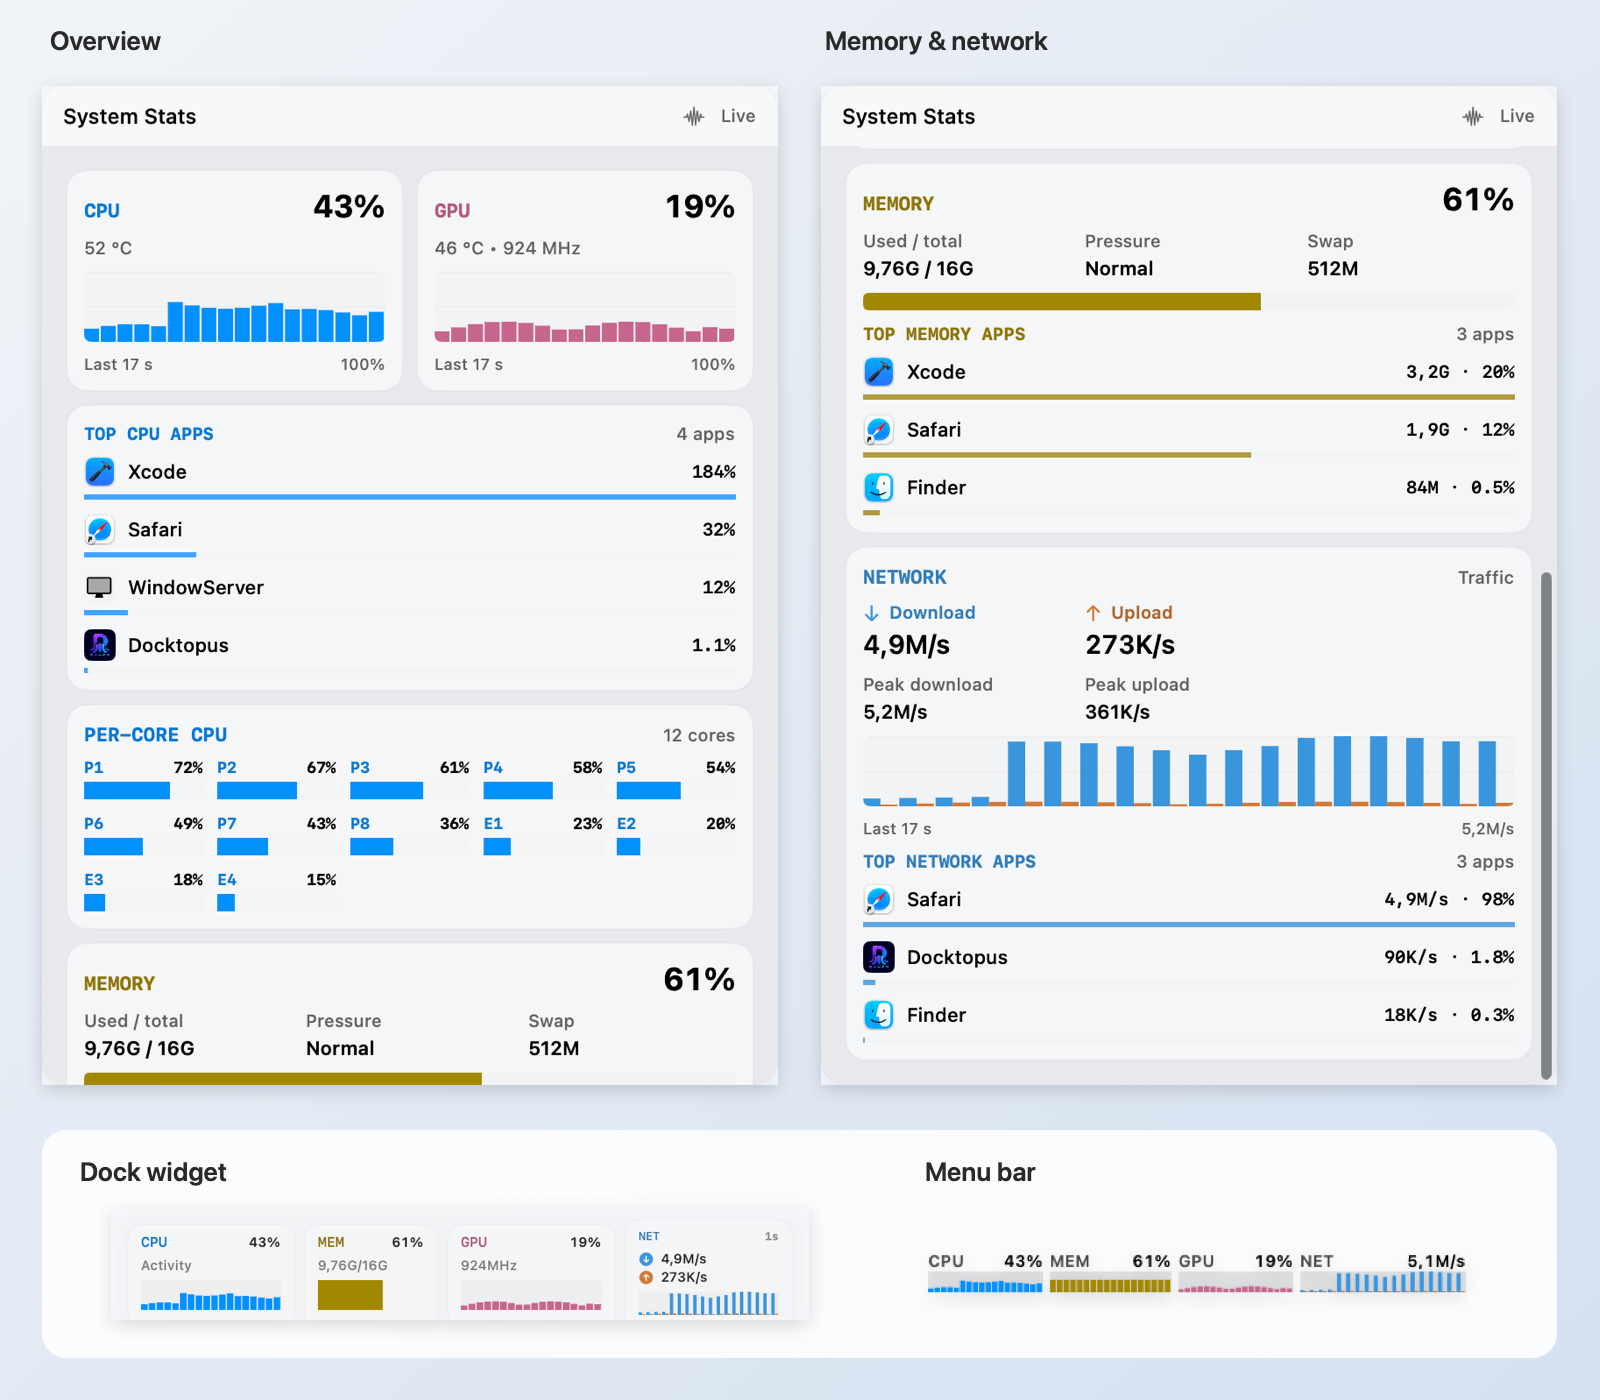
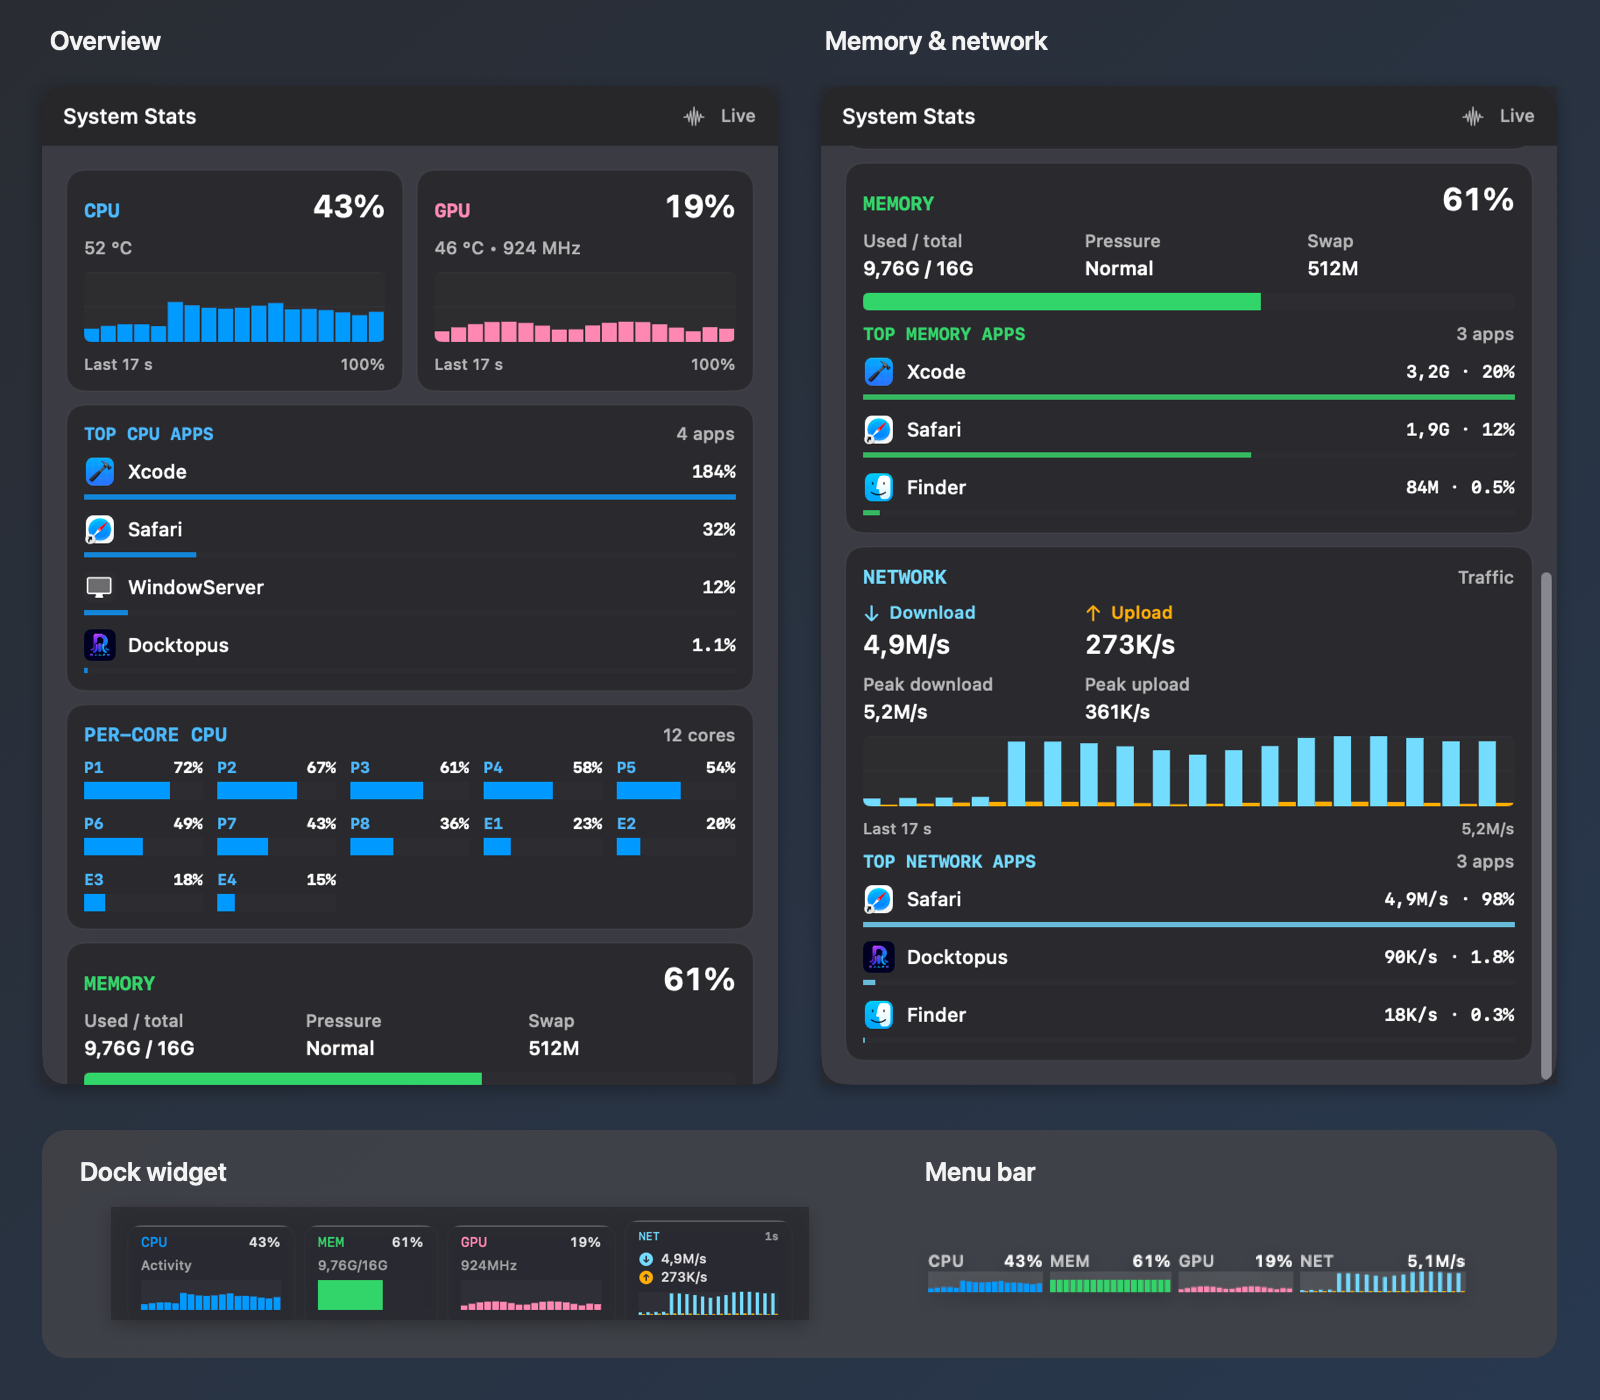
Open the shared System Stats panel for CPU and available GPU readings, per-core activity, memory, network graphs, and top CPU apps. The Island uses the same detailed dashboard as Docktopus’s other Stats surfaces.
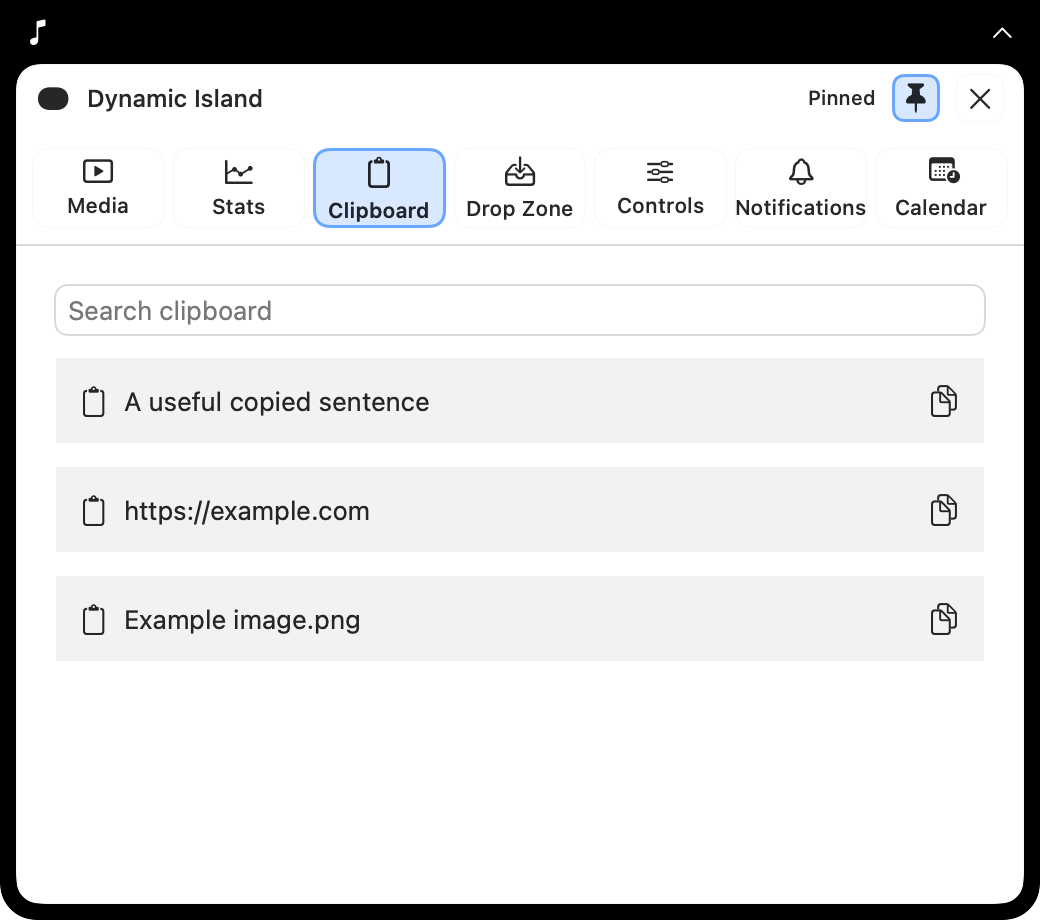
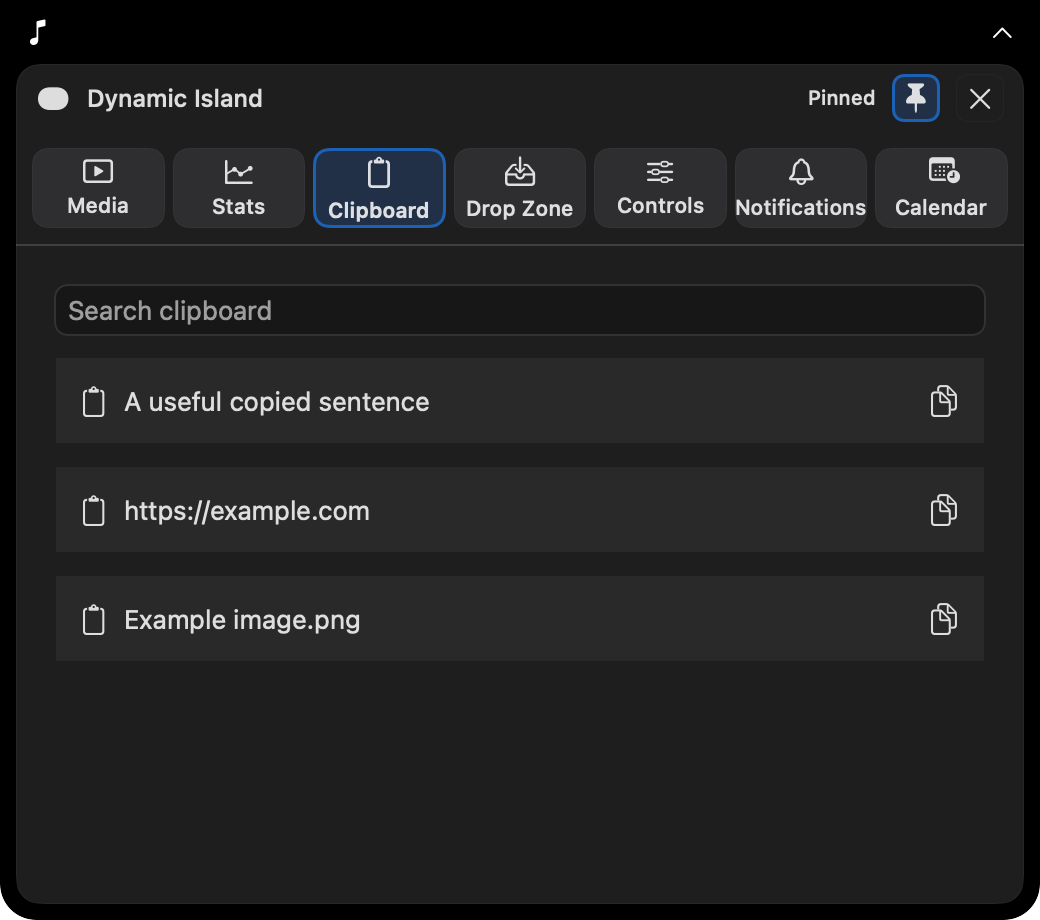
Search and reuse your existing Clipboard Manager history, including pinned clips and category controls. Clipboard Manager must be enabled separately. When it is off, the Island provides a direct link to its settings.
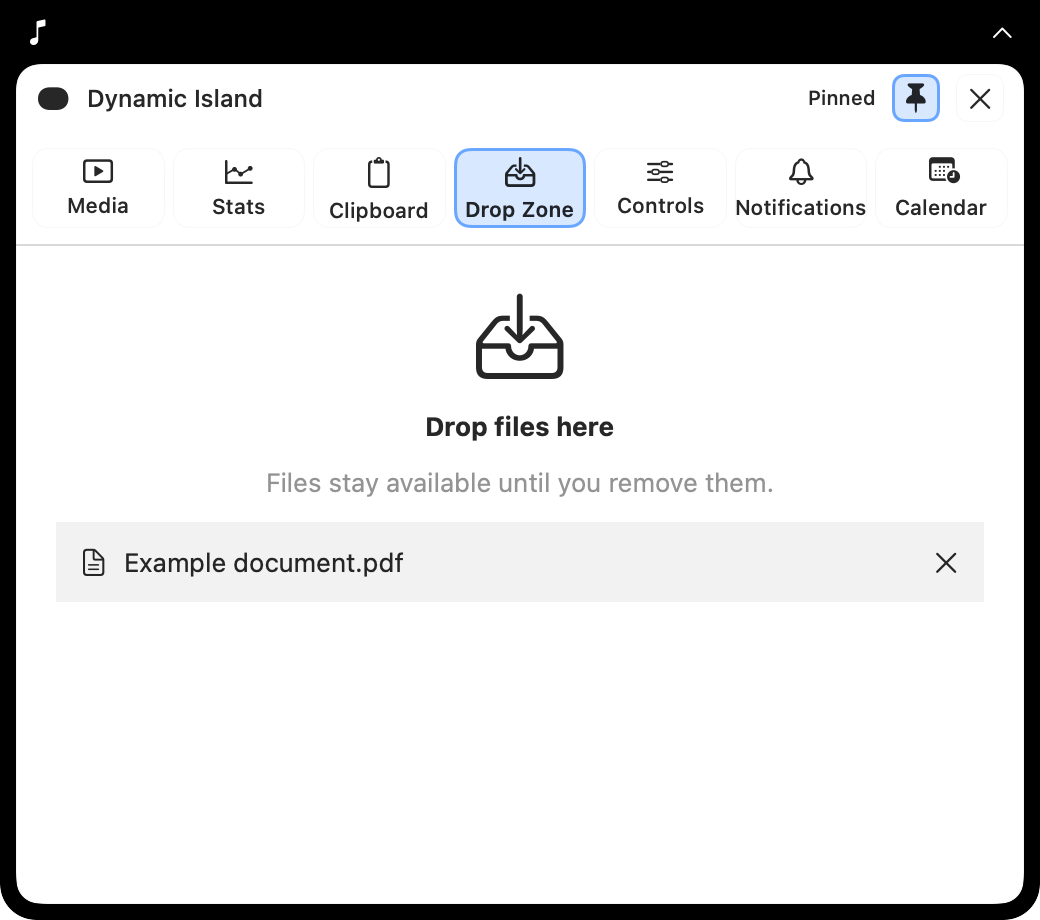
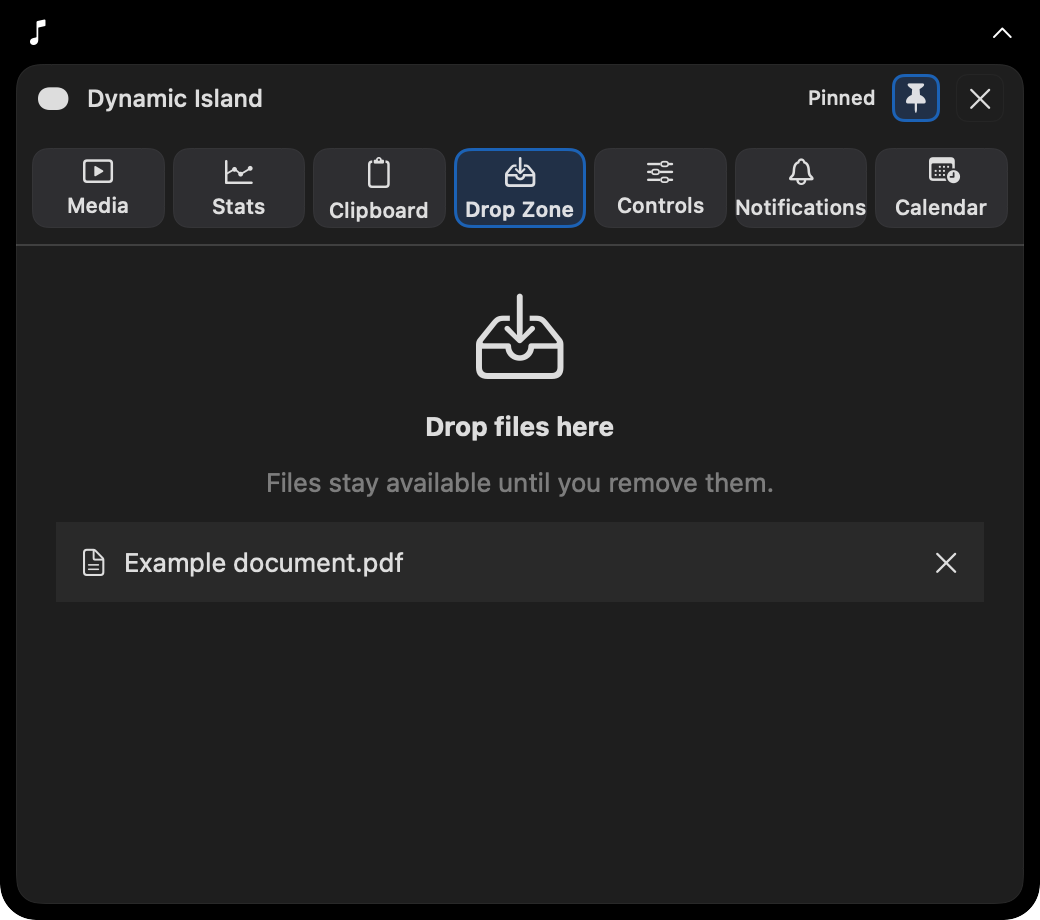
Collect files, folders, links, text, and images in the shelf shared with the dock and menu bar. Items restore after restarting Docktopus. Drag an item out, open it, copy it, or reveal it in Finder. Explore Drop Zone, its saved copies, and recovery controls.
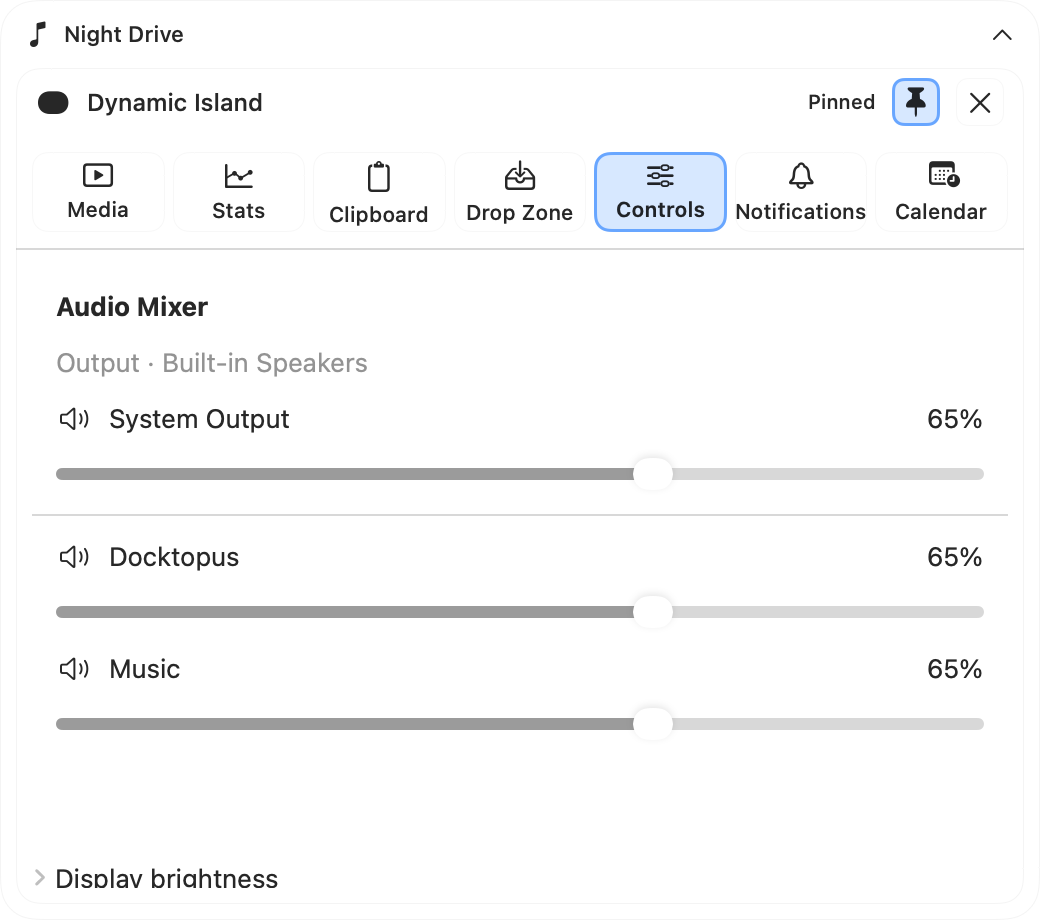
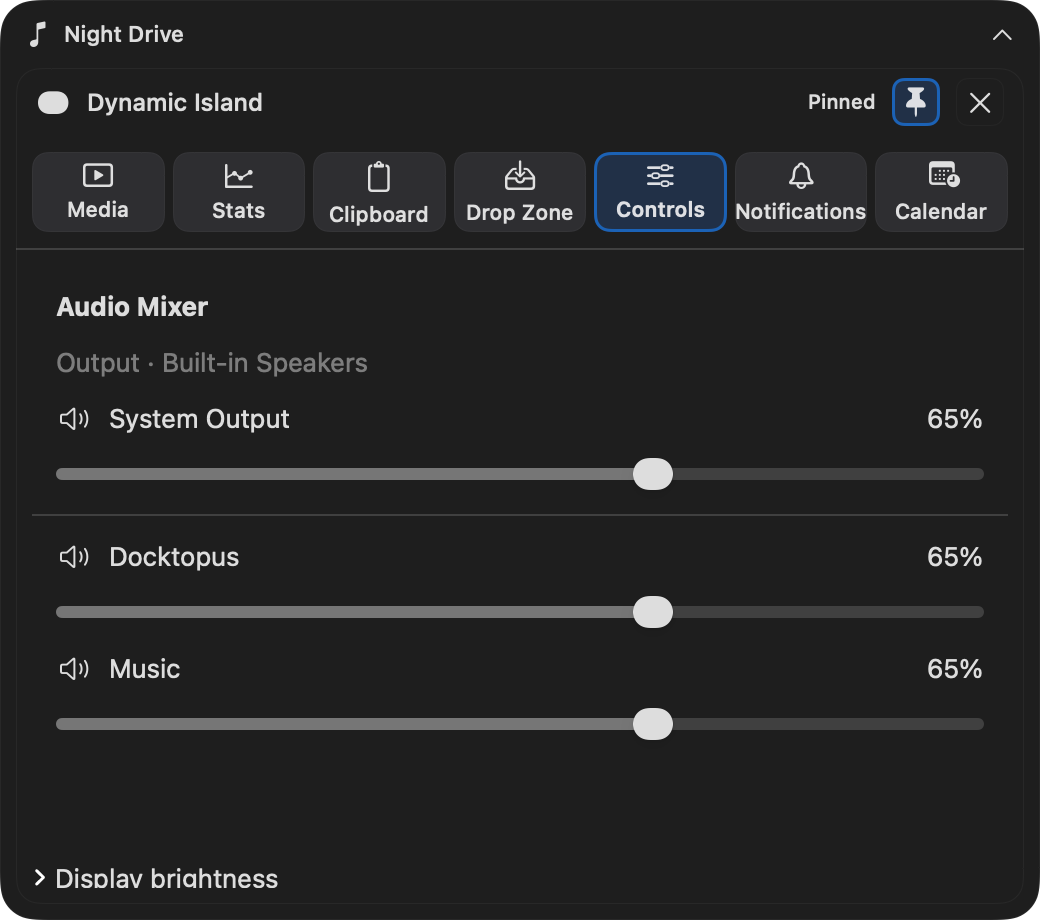
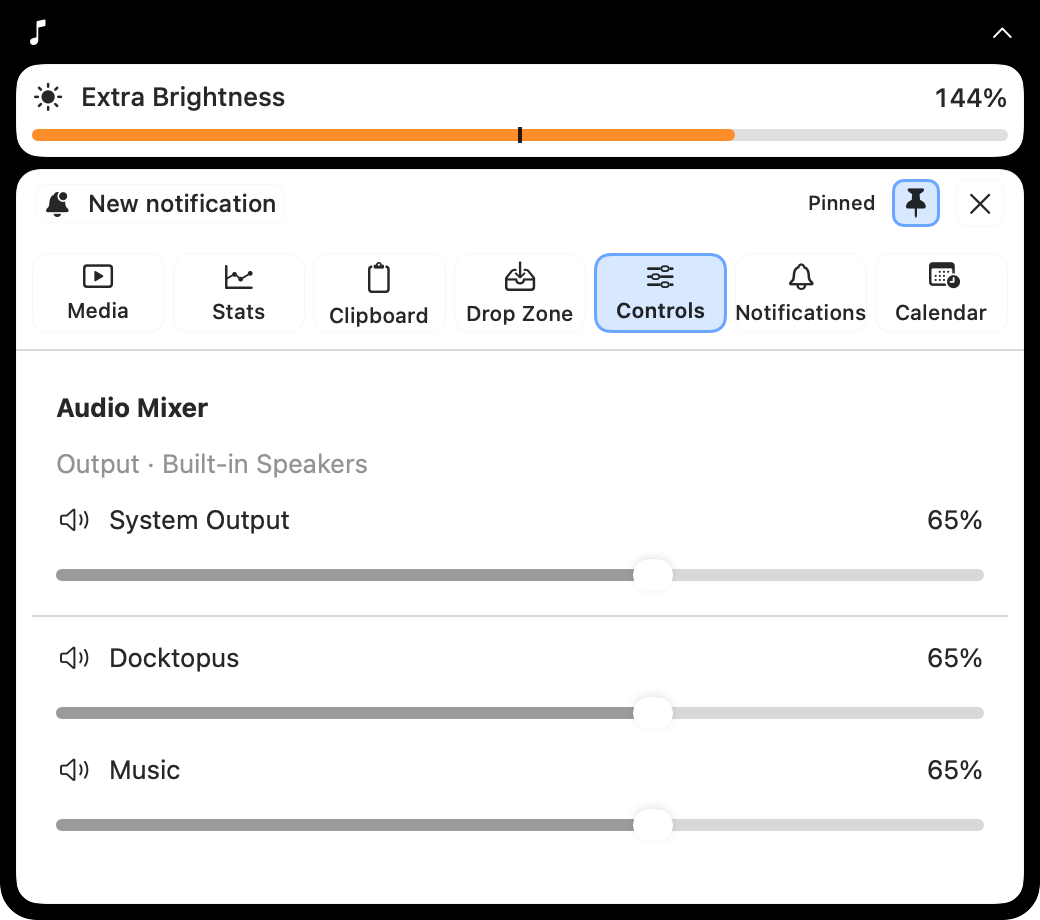
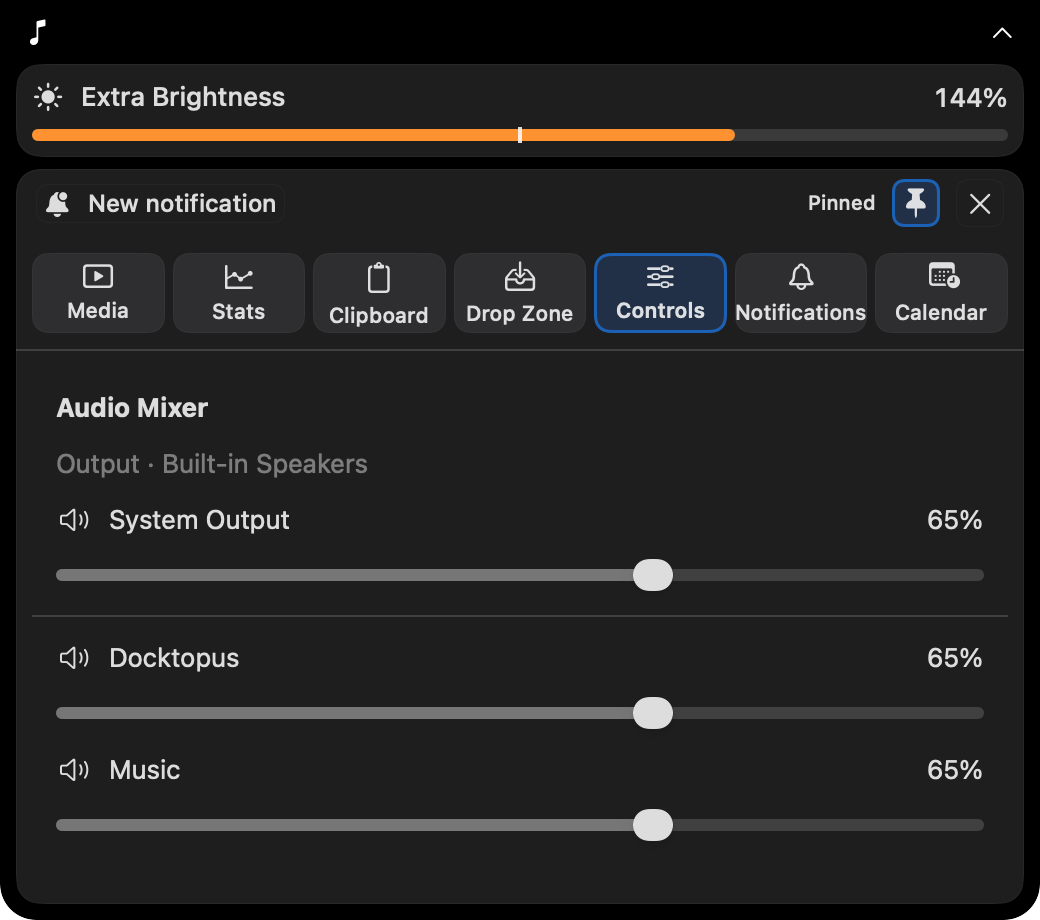
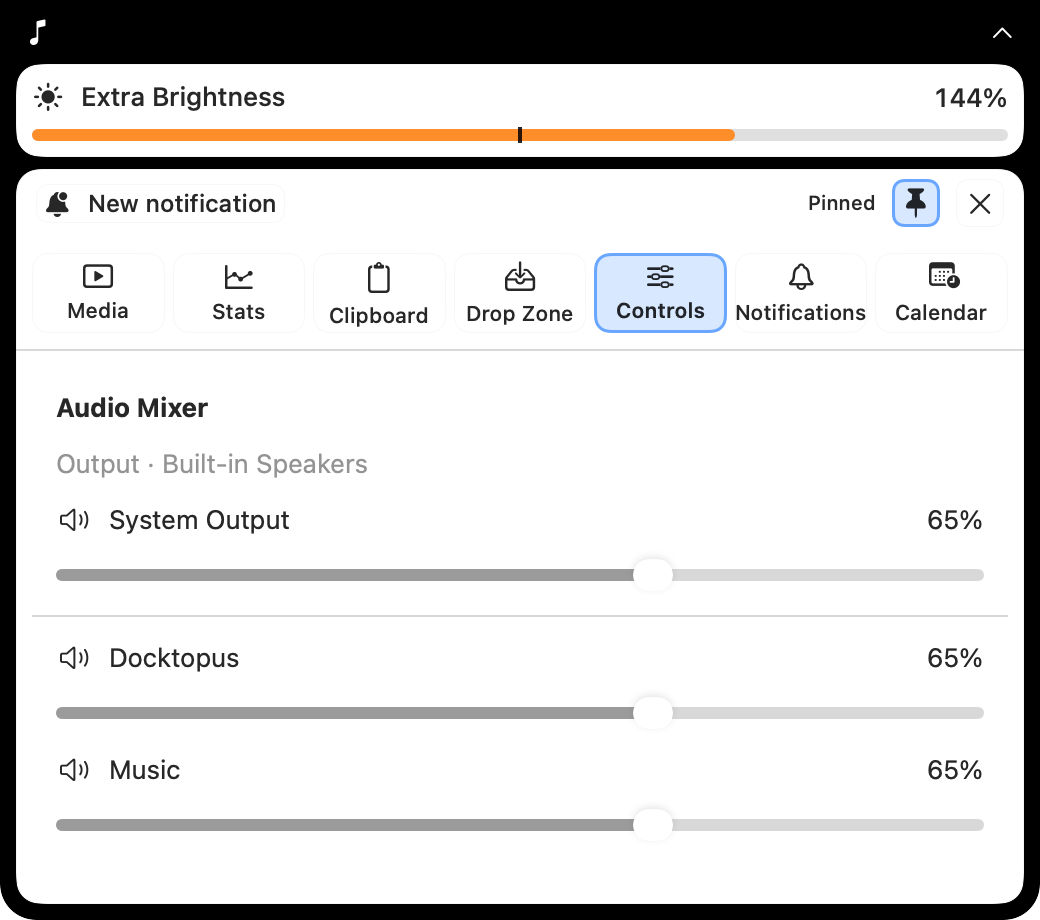
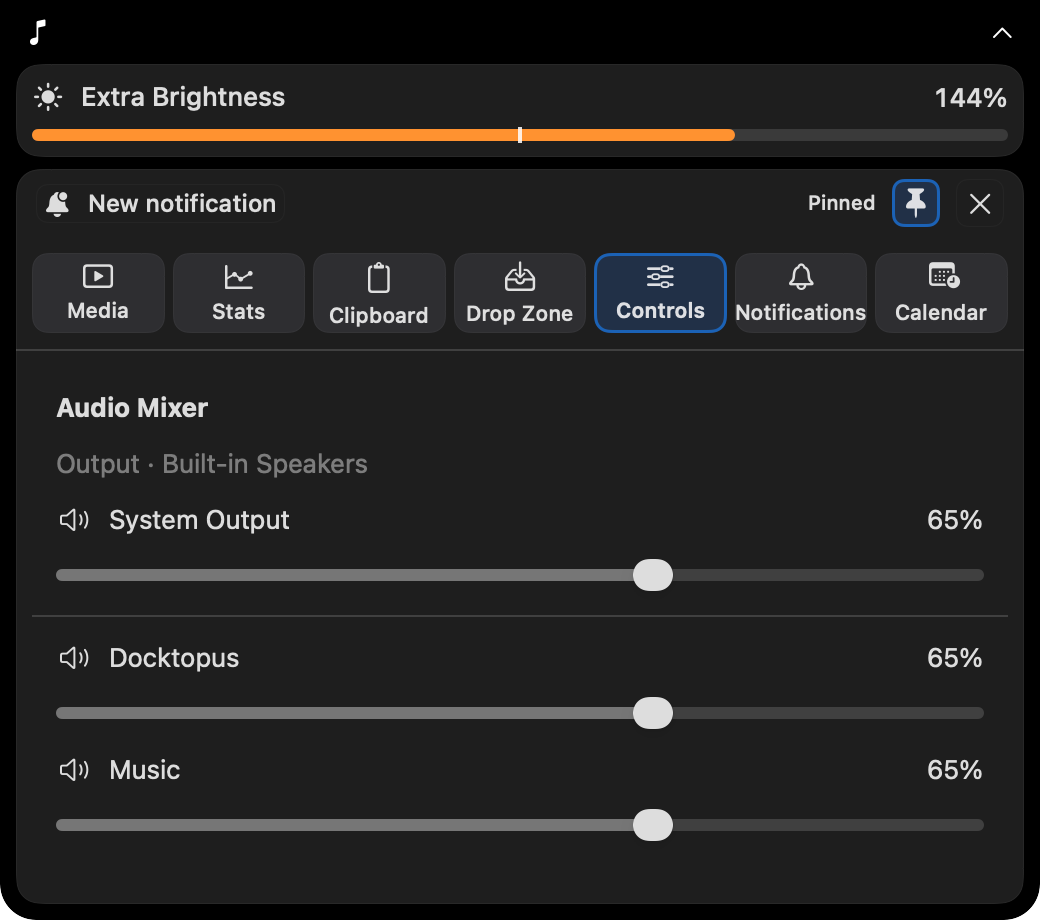
Choose an audio output, adjust supported system volume, and balance application audio and enabled Docktopus keyboard and mouse sounds through the shared Audio Mixer. Per-app controls require macOS 14.2 or later. Expand Display brightness for compatible displays; the section scrolls alongside the mixer so application controls remain reachable. Explore Display Controls and full display settings.
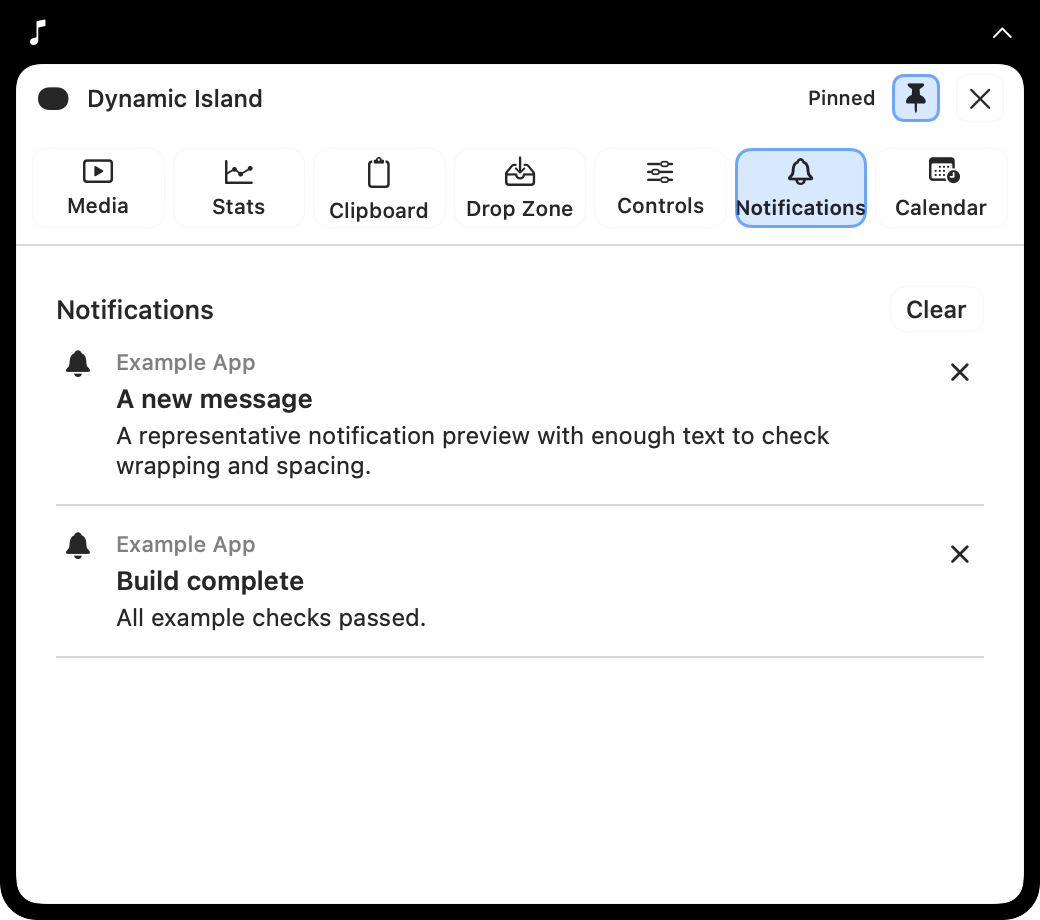
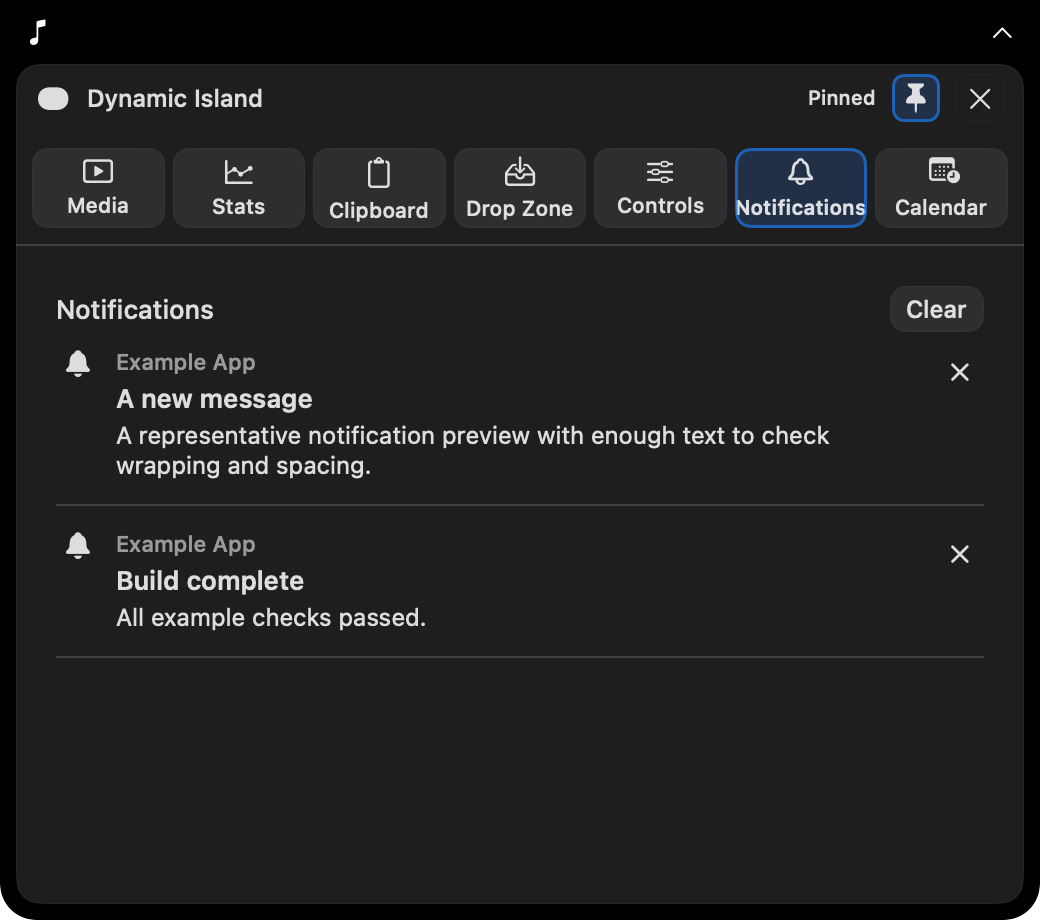
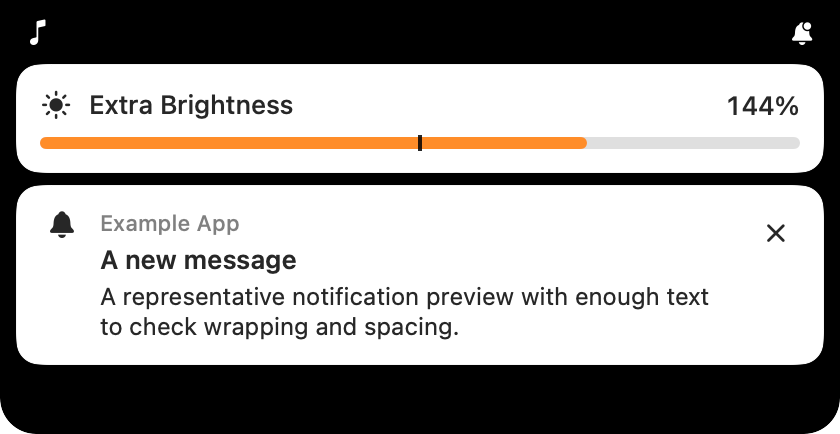
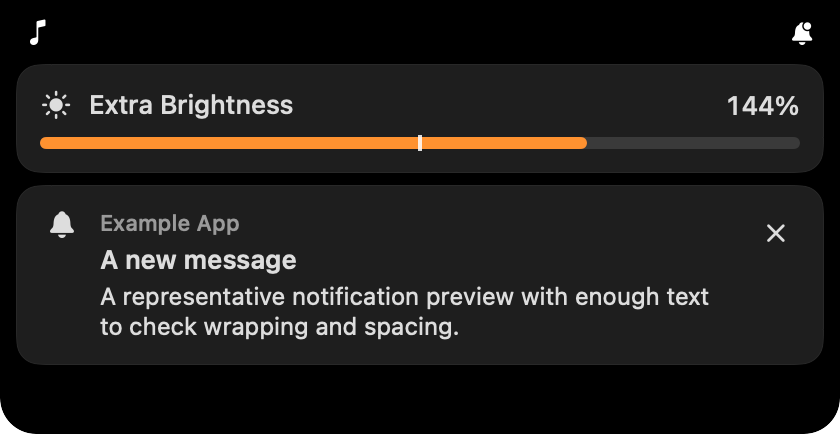
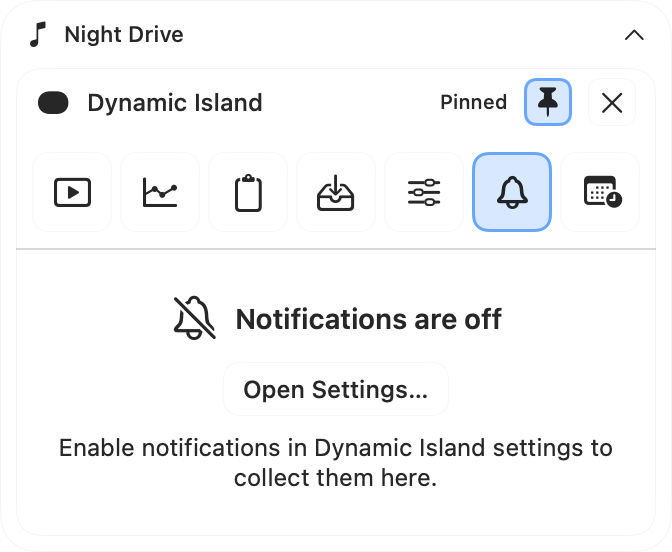
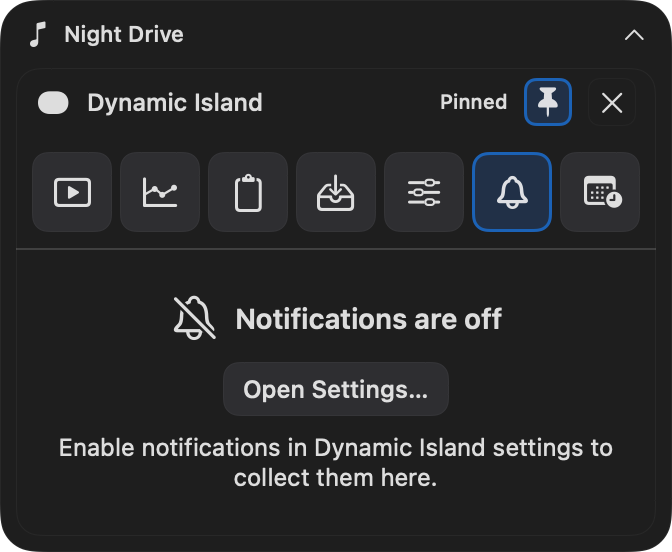
Enable notifications separately to see incoming previews and up to 100 recent entries in memory. A collapsed Island shows the preview; an expanded Island offers a New notification button while keeping your selected activity usable. Open the source app, hide a preview, remove history entries, or exclude an app.
See a compact countdown before a timed event, then Now while it is in progress. Calendar previews start 15 minutes before by default; choose 5, 15, 30, or 60 minutes in Settings → Dynamic Island, or turn them off. Click the countdown to pin Calendar and reach event details, the agenda, and Join. Explore Calendar and its previews. All-day events stay in calendar views; keyboard feedback and incoming notifications keep priority in the compact strip.
Choose Hover or click, or Click only. A brief hover opens the Island without taking keyboard focus. Click the header or pin button to keep it open; click again, use Close, or press Esc to dismiss it. A deliberate close stays closed until the pointer leaves. When the Island is focused, ⌥1 through ⌥7 select its seven activities.
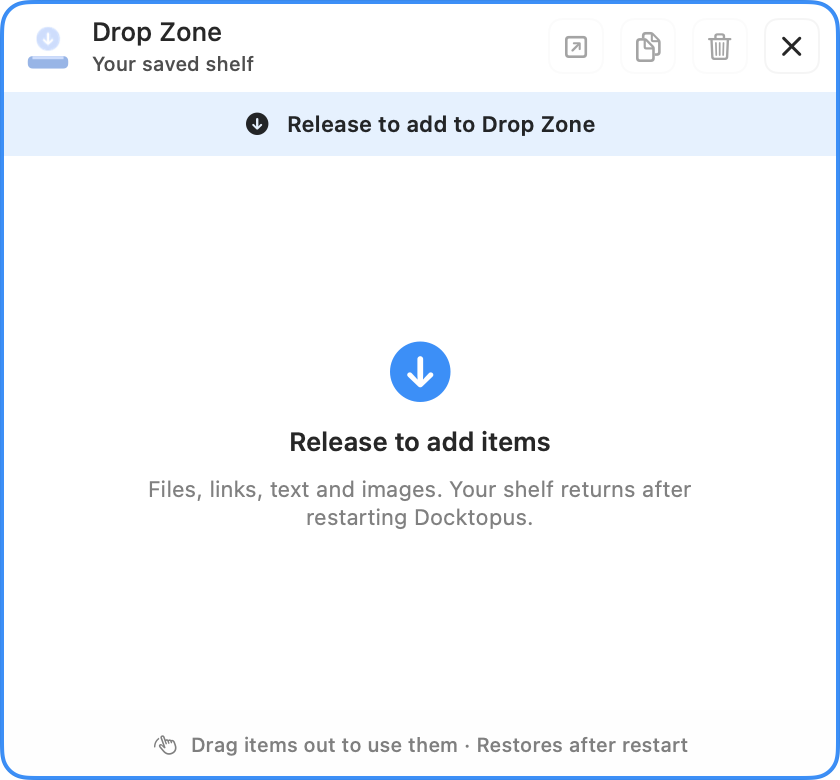
Dragging a supported item over the Island previews Drop Zone, including in Click only mode. An accepted drop keeps it open and pinned. Cancel the drag to return to your previous activity and pin state.
Use Liquid Glass, CDE, or Windows 95, with light and dark presets. The physical notch surround stays black while the content, controls, and keyboard feedback use your theme. Displays without a notch get a compact Island at the top center. Enable one or several displays; if every selected screen is disconnected, the primary display provides a fallback. Display changes preserve surviving Islands’ activity and pin state.
Opt in to brightness and volume keyboard overlays with Accessibility access. Feedback appears in the Island on the affected display, or in a standalone themed overlay when that screen has no Island. Unsupported audio outputs keep their macOS controls. Display Controls can be enabled independently of Dynamic Island.
Hidden activities release their live presentation work, and display brightness refreshes only while its disclosure is open. Reduce Motion makes expansion immediate and stops animated playback bars. Upcoming Calendar checks continue while the Island and its Calendar previews are enabled, including when collapsed. Enabled Clipboard and notification capture keep their own settings and may continue when the Island is closed.
Opening the Island does not enable Clipboard Manager or notification capture. Calendar requires macOS Calendar access; opening an event may also ask for Automation permission for Calendar. Banner capture requires Accessibility. Experimental quiet delivery requires Full Disk Access and a restart; it reads Notification Center records, temporarily manages included apps’ desktop banners, and can read stored message text even when macOS hides previews. Delivery can take several seconds and support depends on macOS. Per-app audio and optional audio-reactive bars may require audio recording access.




04 / System Stats
Keep one metric in a Small Stats tile, show CPU, memory, GPU, and network together in the wide dock module, or enable the menu bar readout. Click any stats widget or the menu bar item to open the detailed panel; hover for full values.
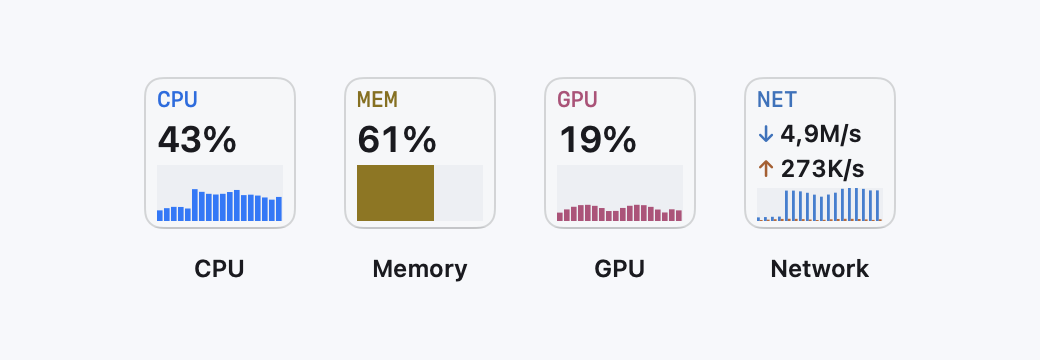
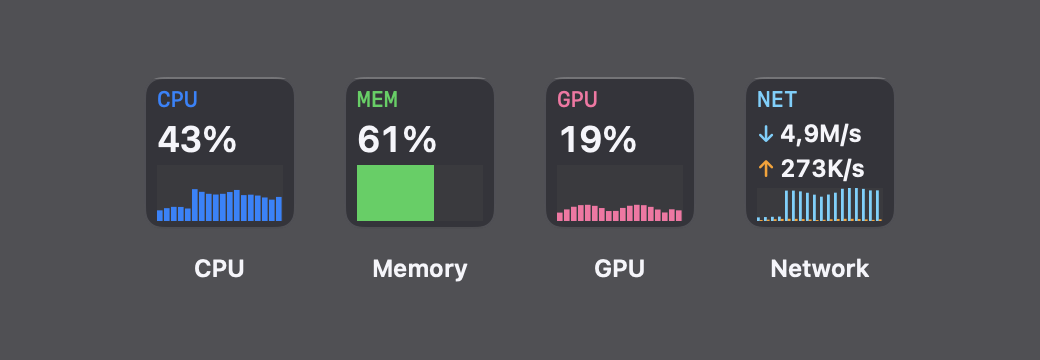
Choose CPU, memory, GPU, or network for a single dock tile. Right-click to switch the metric, or use the Metric picker in the panel editor. Add multiple Small Stats tiles to keep your favorite readings together. Network shows both download and upload rates; CPU, GPU, and network include recent activity graphs when space allows.
Click a tile to open System Stats details, or hover for full values. Tiles adapt to horizontal and side docks, share the regular widget’s refresh interval and metric colors, and support their own background, border, and text colors in the theme editor.
Follow recent CPU activity, inspect individual cores, and see which apps are busiest. Performance and efficiency cores are labeled when your Mac exposes that information. Overall CPU is a share of all cores; app CPU follows Activity Monitor, where 100% means one fully used core and an app can exceed 100%.
See used and total RAM, swap usage, the memory pressure reported by macOS, and the apps using the most resident memory. Pressure is separate from the percentage of RAM in use. App rankings group related processes; shared memory can be counted in more than one process.
Check recent GPU activity alongside CPU and GPU temperatures and the GPU clock when those readings are available. GPU usage and sensor coverage depend on your Mac and the values exposed by macOS. Missing readings are marked unavailable instead of appearing as zero activity.
See transfer rates in bytes per second on the primary network interface, with a fallback to active interfaces, and peak rates for the current System Stats session. Download and upload share one graph scale, so their heights can be compared. Top Network Apps combines each app’s attributed download and upload; its totals can differ from system traffic, and unavailable attribution leaves system totals visible.
Set dock and menu bar refresh to 2–15 seconds in Settings. System totals update about once per second while the detailed panel is open; app rankings, sensors, and compact GPU readings refresh less often to limit background work. Graphs show recent samples from the current run. Sampling stops when all stats views and the menu bar readout are closed or disabled.
Use Liquid Glass, CDE, or Windows 95, with light and dark presets. Customize CPU, GPU, memory, download, and upload colors across the dock, details panel, and menu bar; titles adapt for readable contrast. Restore Stats Colors returns the selected theme’s metric colors. Opened details stay available while you scroll; close them with Esc or a click outside.
05 / Time Spent & Remembrance
Understand how you spent your time, or find something you remember seeing. Both histories stay on your Mac; choose what you capture and when to pause.
Time Spent
See where your day went, compare app usage, and add manual time or timers. Your activity history stays on your Mac. Automatic tracking is off by default; turn it on when you choose.
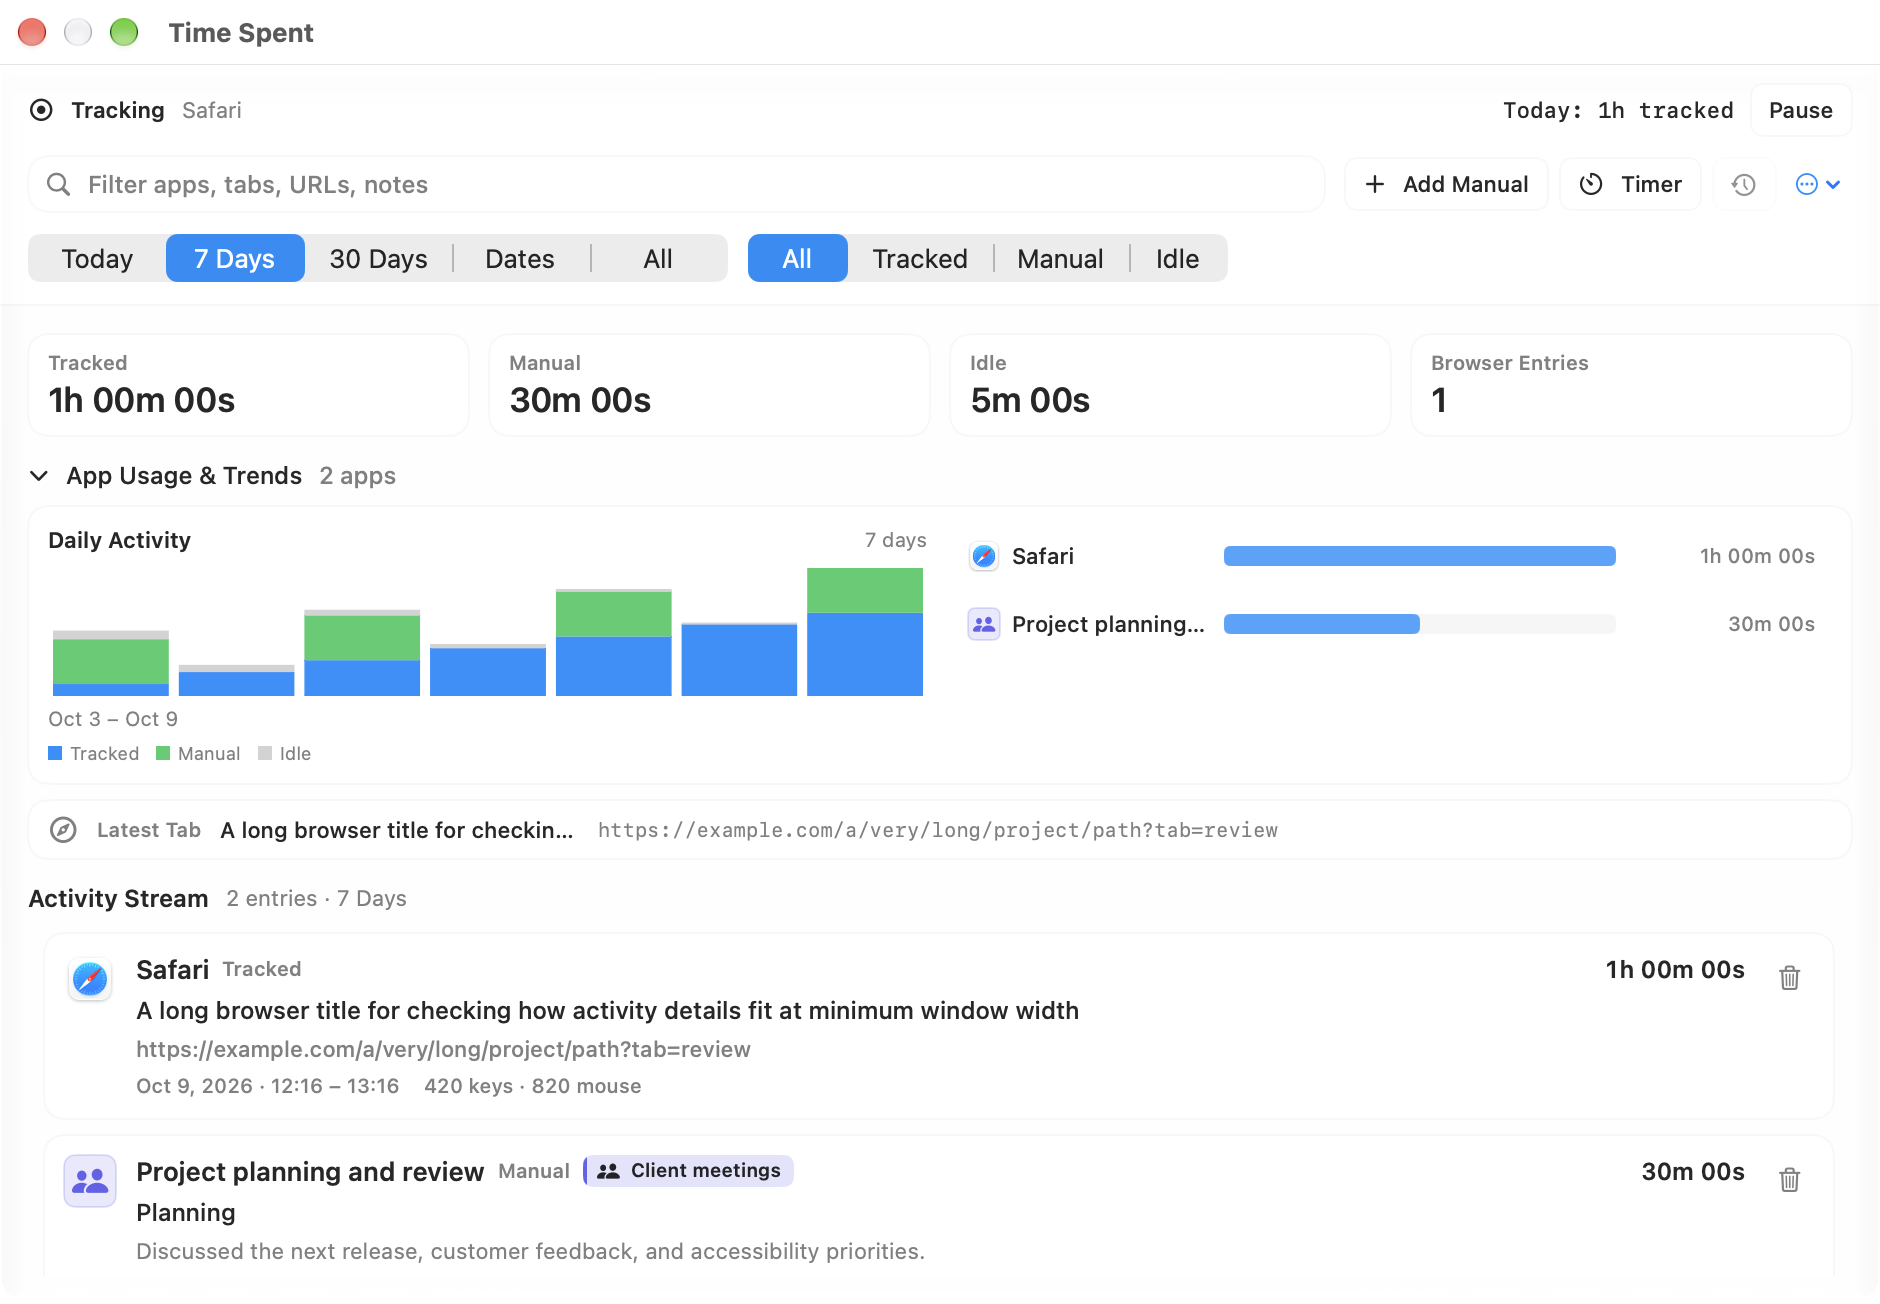
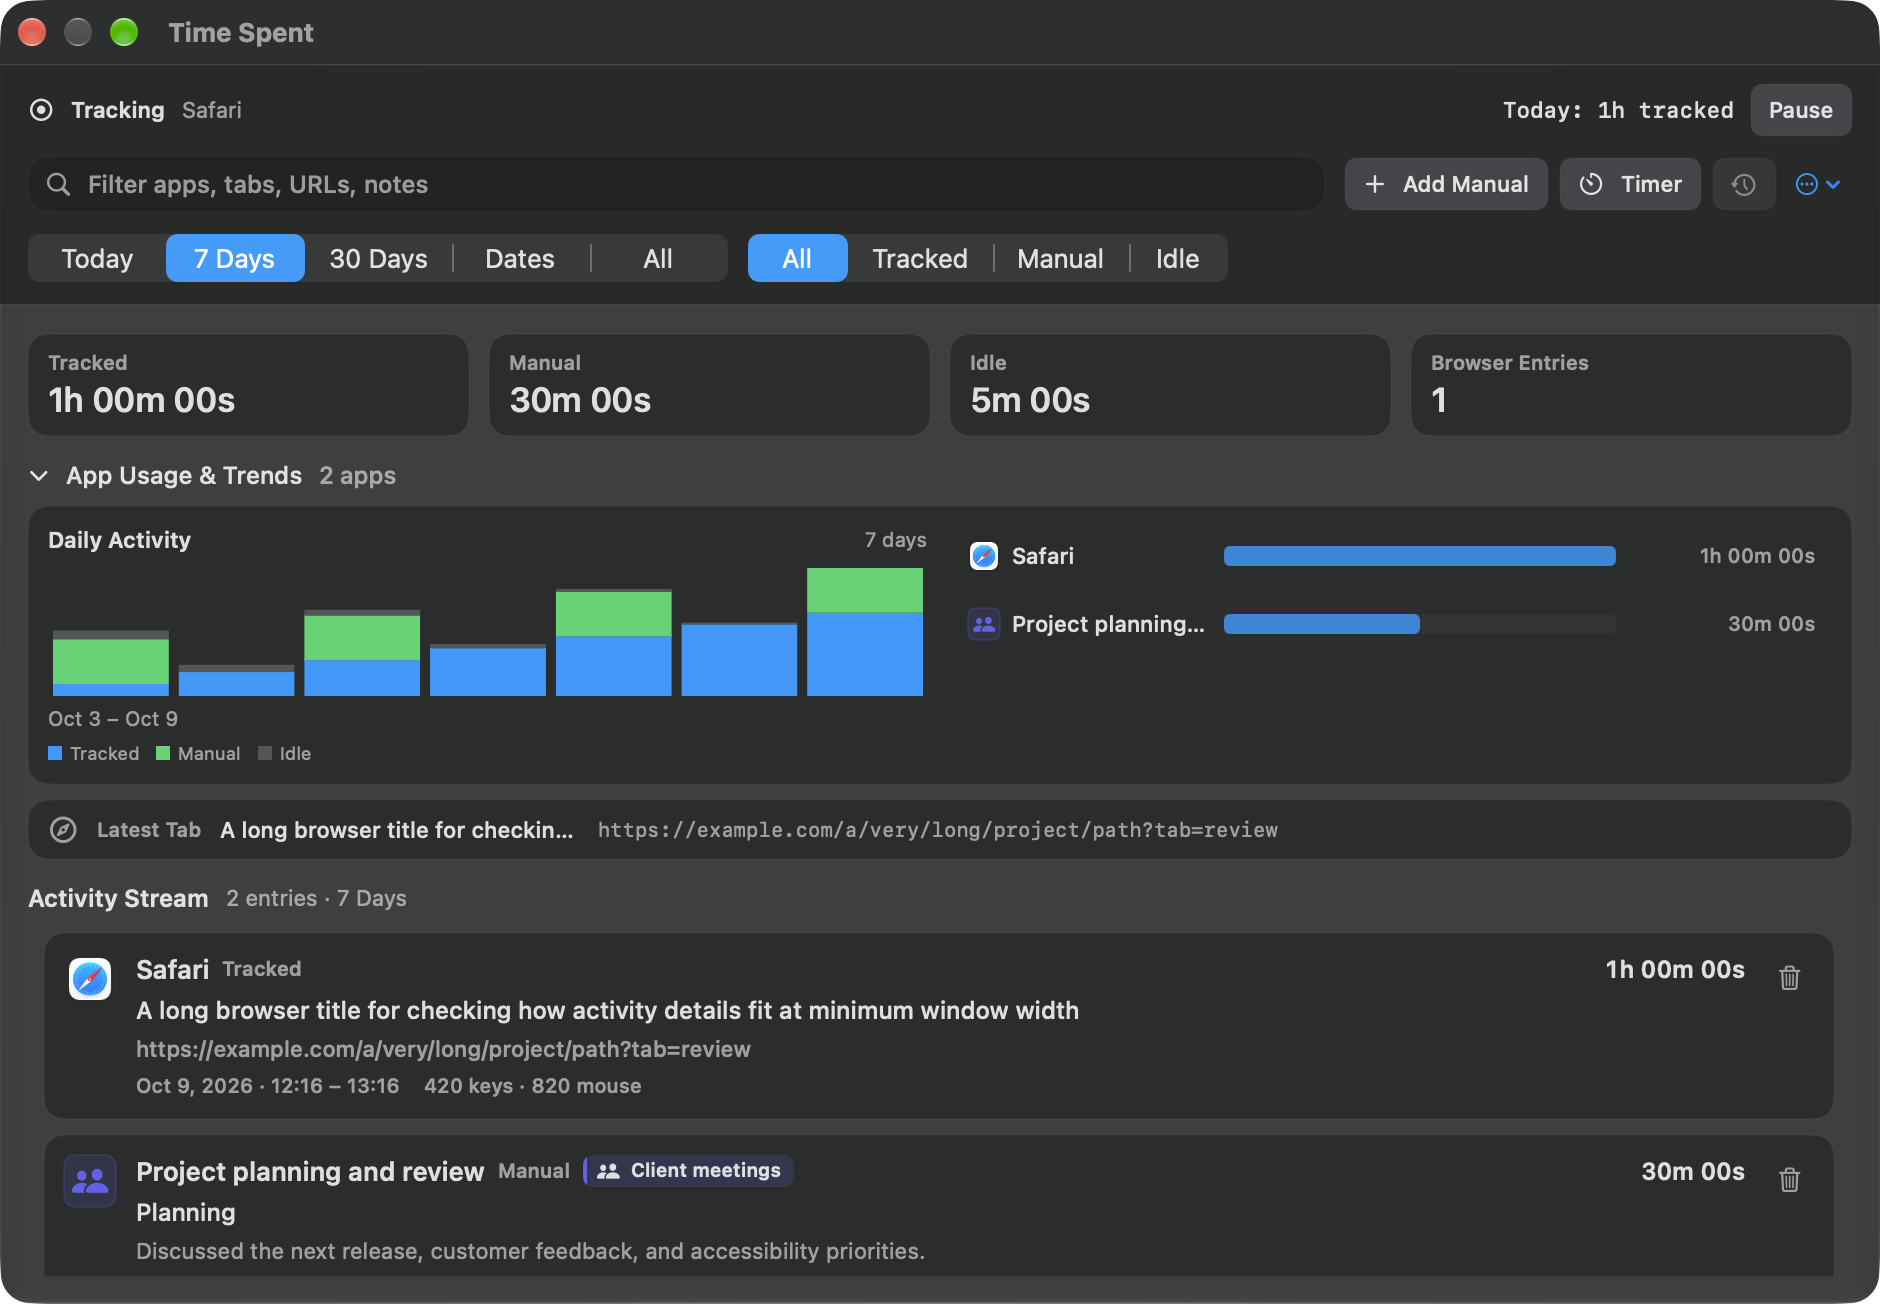
Keep today’s tracked total in view, compare time by app, and see Daily Activity across your selected dates. Tracked, manual, and idle time stay clearly separated. Browser Entries counts records containing URLs, rather than unique websites.
Choose Today, 7 Days, 30 Days, All, or a custom date range. App Usage & Trends opens expanded; select an app to filter the stream, or choose Show All Apps to clear that selection. Press ⌘F to search apps, browser titles, URLs, and notes. Clear search with Escape, or use Reset Filters to clear the app, entry type, and search together.
Record foreground-app time, available titles and URLs from supported browsers, idle periods, and keyboard and mouse event counts. Browser details depend on browser support and macOS Automation or Accessibility permissions; app time continues if those details are unavailable. Input Monitoring access is needed for idle detection and input counts.
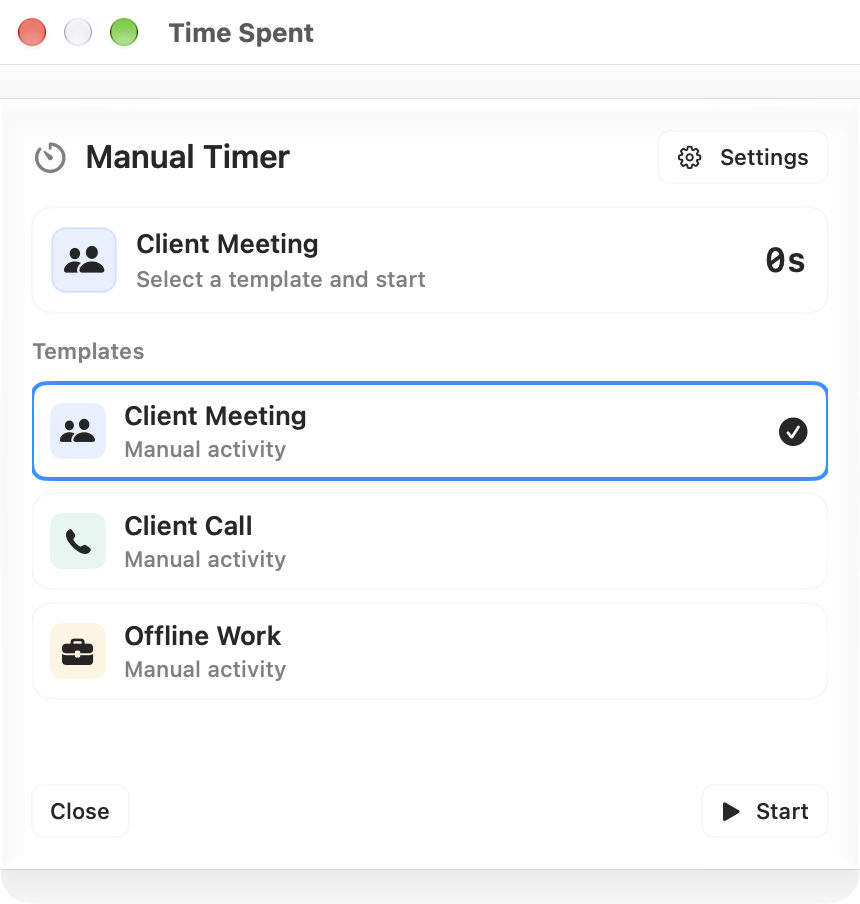
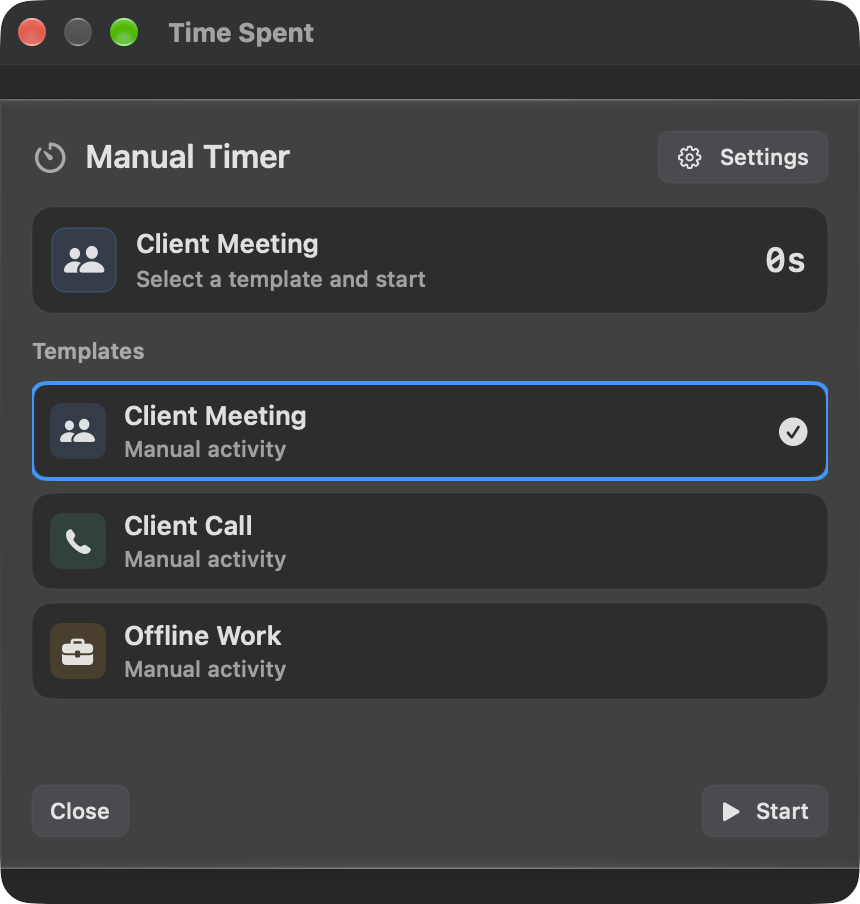
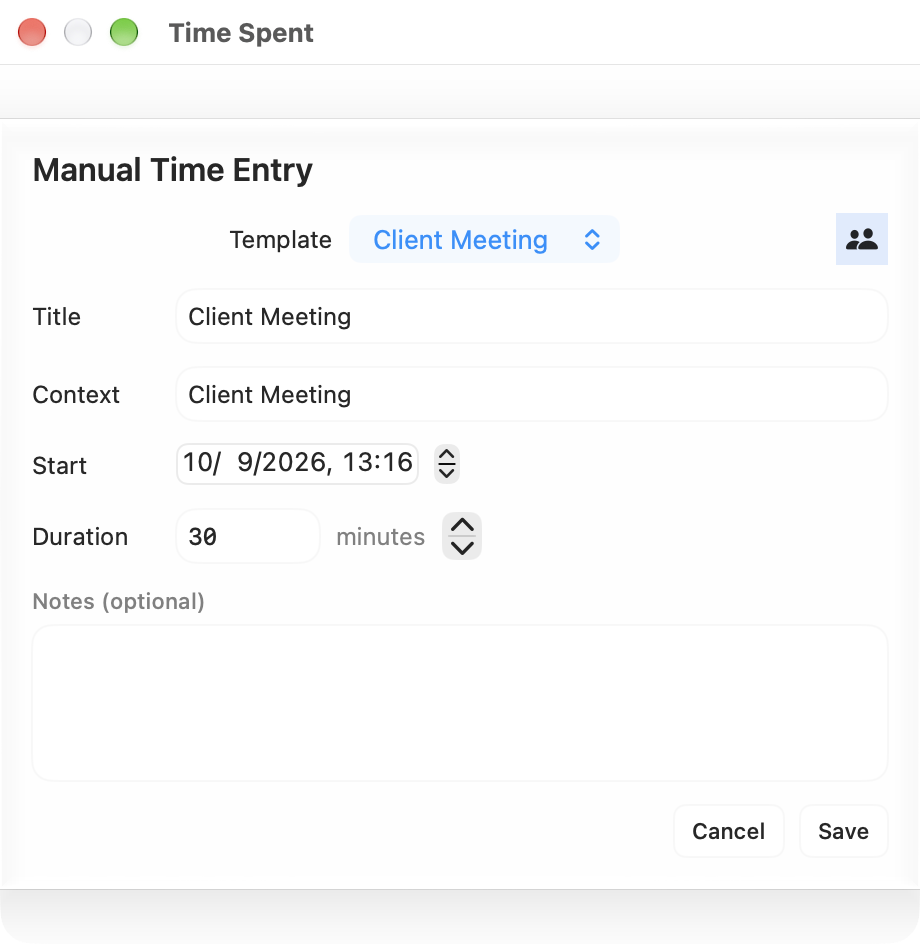
Add manual entries with a title, start time, duration, context, and notes, or start a timer with independent pause, resume, and stop controls. Reusable templates supply a category, icon, and color. Both tools work when automatic tracking is off. Manual time can overlap tracked time, so the reports keep those totals separate.
Check today’s activity and tracking state in the dock widget, including in a side dock. Open the overview and manual tools from the optional menu bar item, or manage tracking and templates in Settings. Pause and resume automatic Time Spent and Remembrance together; saved history remains available when tracking is paused or off.
Exclude apps or URL patterns, including wildcards for hosts and paths. Ignore Private Browser Sessions skips detected private sessions in supported browsers and is enabled by default. Privacy Pause temporarily pauses automatic Time Spent, Remembrance, and clipboard capture for 5, 15, 30, or 60 minutes. Saved history, exclusions, and enabled settings remain intact; manual timers stay independent.
Export every record matching your current filters as CSV to a location you choose. Exports retain original timestamps and full record durations, including records that span your selected dates. Select or copy activity details and URLs, delete individual entries, or clear the full Time Spent history with confirmation. Excluding an app later does not hide its saved records or dates.
Reports load in the background while you refine your filters. The activity stream shows the latest 500 matches; filtered totals and CSV exports include every match. Low Power Time Spent Updates refreshes the dock widget less often while automatic tracking stays active.
Daily charts show up to 30 days. Date reports allocate spanning records to the selected interval. When exact active intervals are unavailable, the allocation is proportional and the overview identifies the estimate. CSV exports keep the full original records.
A manual entry accepts 1–1,440 whole minutes. A timer keeps running when you close its window; reopen it to pause, resume, or stop the session.
Remembrance
Find a screen you remember by searching its text, app, or date. Optional screenshots and text recognition build a searchable history that stays on your Mac, with exclusions, retention limits, and a privacy pause.
Remembrance is off by default. Enable it alongside automatic Time Spent tracking and allow macOS Screen Recording access to capture active windows from tracked apps. It waits for available browser metadata to settle, compresses screenshots, and skips unchanged windows to reduce repeated captures.
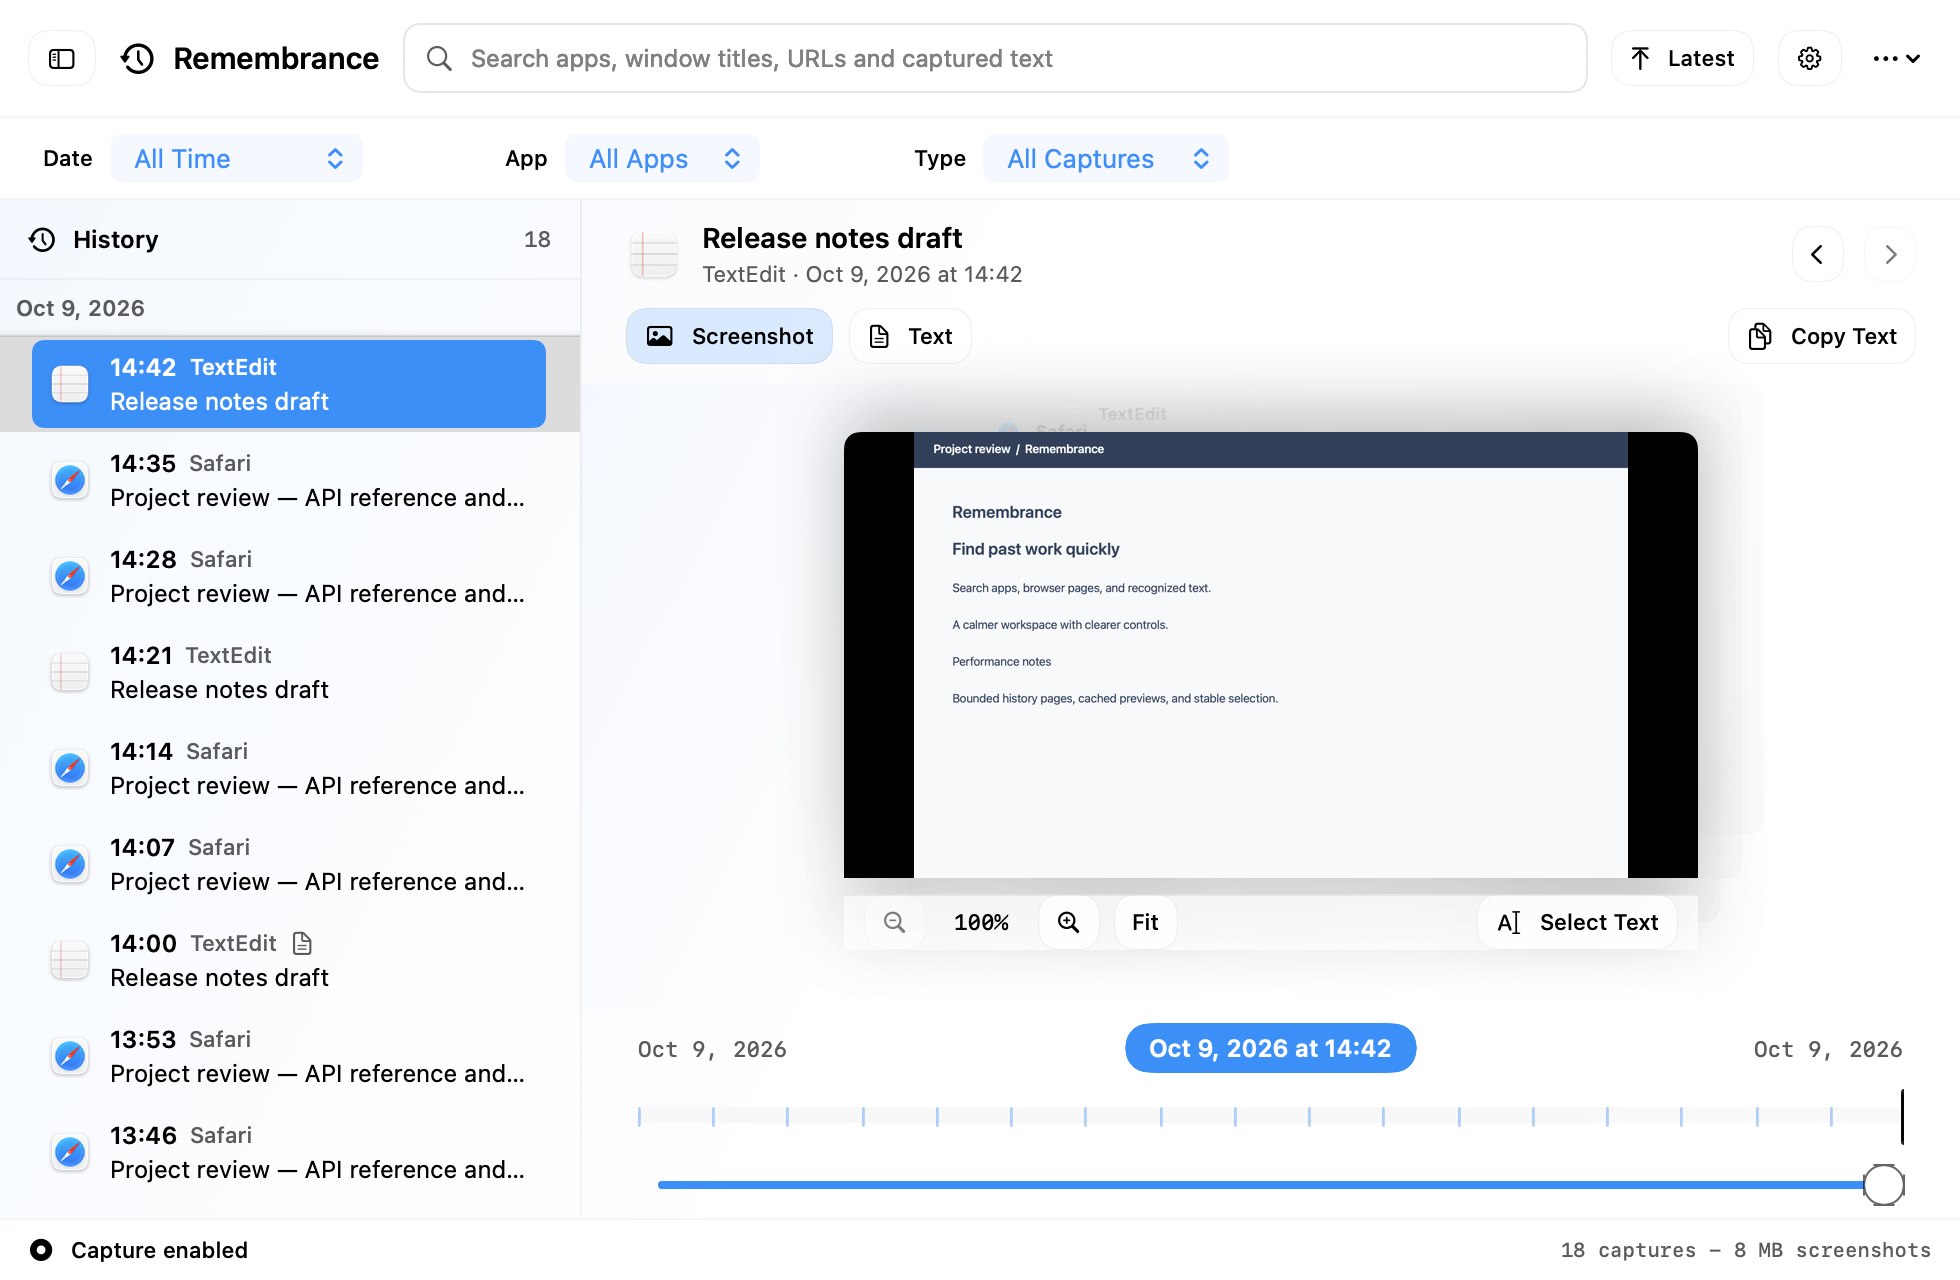
Press ⌘F to search app names, window titles, URLs, and captured text across your saved history. Combine words in any order to narrow the results; search also matches differences in case and accents. Matching words are highlighted, and Escape clears the search. Apple’s Vision framework recognizes text on your Mac without uploading the image.
Choose All Time, Today, Last 7 Days, Last 30 Days, or Choose Day for one specific day. Filter by an app from your saved history, then show All Captures, Screenshots, or Text Only. Combine these filters with search, or use Reset Filters to clear search, date, app, and capture type together.
Browse history grouped by day, load earlier captures as you scroll, and move between moments with the timeline or previous and next controls. The timeline reflects the captures you have loaded. Hide the sidebar for more viewing space. Latest clears all filters and jumps to the newest capture; ⌘R refreshes history while retaining an older selection.
Zoom and pan a screenshot, or use Fit to reset the view. Switch to Text to read and select the full captured text; text-only records open in that view automatically. Select Text enables selection of recognized words on the image, and Copy Text copies the capture’s saved text. When a web URL is available, use Page to copy it or open the original page in your browser.
Set a capture interval from 5 seconds to 5 minutes. Low Power Remembrance Capture reduces capture activity, and quiet windows are checked less frequently. Time Spent’s app and URL exclusions also apply to Remembrance, including detected private browser sessions when Ignore Private Browser Sessions is enabled.
Saved captures remain available when capture is off or automatic tracking is paused. Privacy Pause stops new clipboard, Remembrance, and automatic Time Spent capture for 5, 15, 30, or 60 minutes while keeping saved history, exclusions, and enabled settings intact. The panel shows capture status, the pause countdown, and a Resume action; it also points you to Settings when capture is off or Screen Recording access is missing.
Set a screenshot storage budget and optionally convert older screenshots to text-only records after a chosen age. Saved recognized text stays searchable after its image is removed. Enable Delete Text-Only Captures Later to remove those records once the capture reaches the screenshot-retention age plus an additional delay.
Check the stored capture count and screenshot usage, select and delete individual or multiple captures, or clear all history with confirmation. Deletion permanently removes saved screenshots and recognized text. Exclude App and Delete History also excludes that app from future Time Spent tracking and Remembrance capture. Deletion runs in the background; if only part succeeds, the panel reports it and keeps the remaining history available.
06 / Widgets
Choose what earns a place in your dock. Many tools also work from the menu bar; wider modules make room for music, calendars, and system activity.
App Starter
Find an app by name, browse your collection, or jump straight to a favorite. App Starter keeps launching close to the dock and your keyboard.
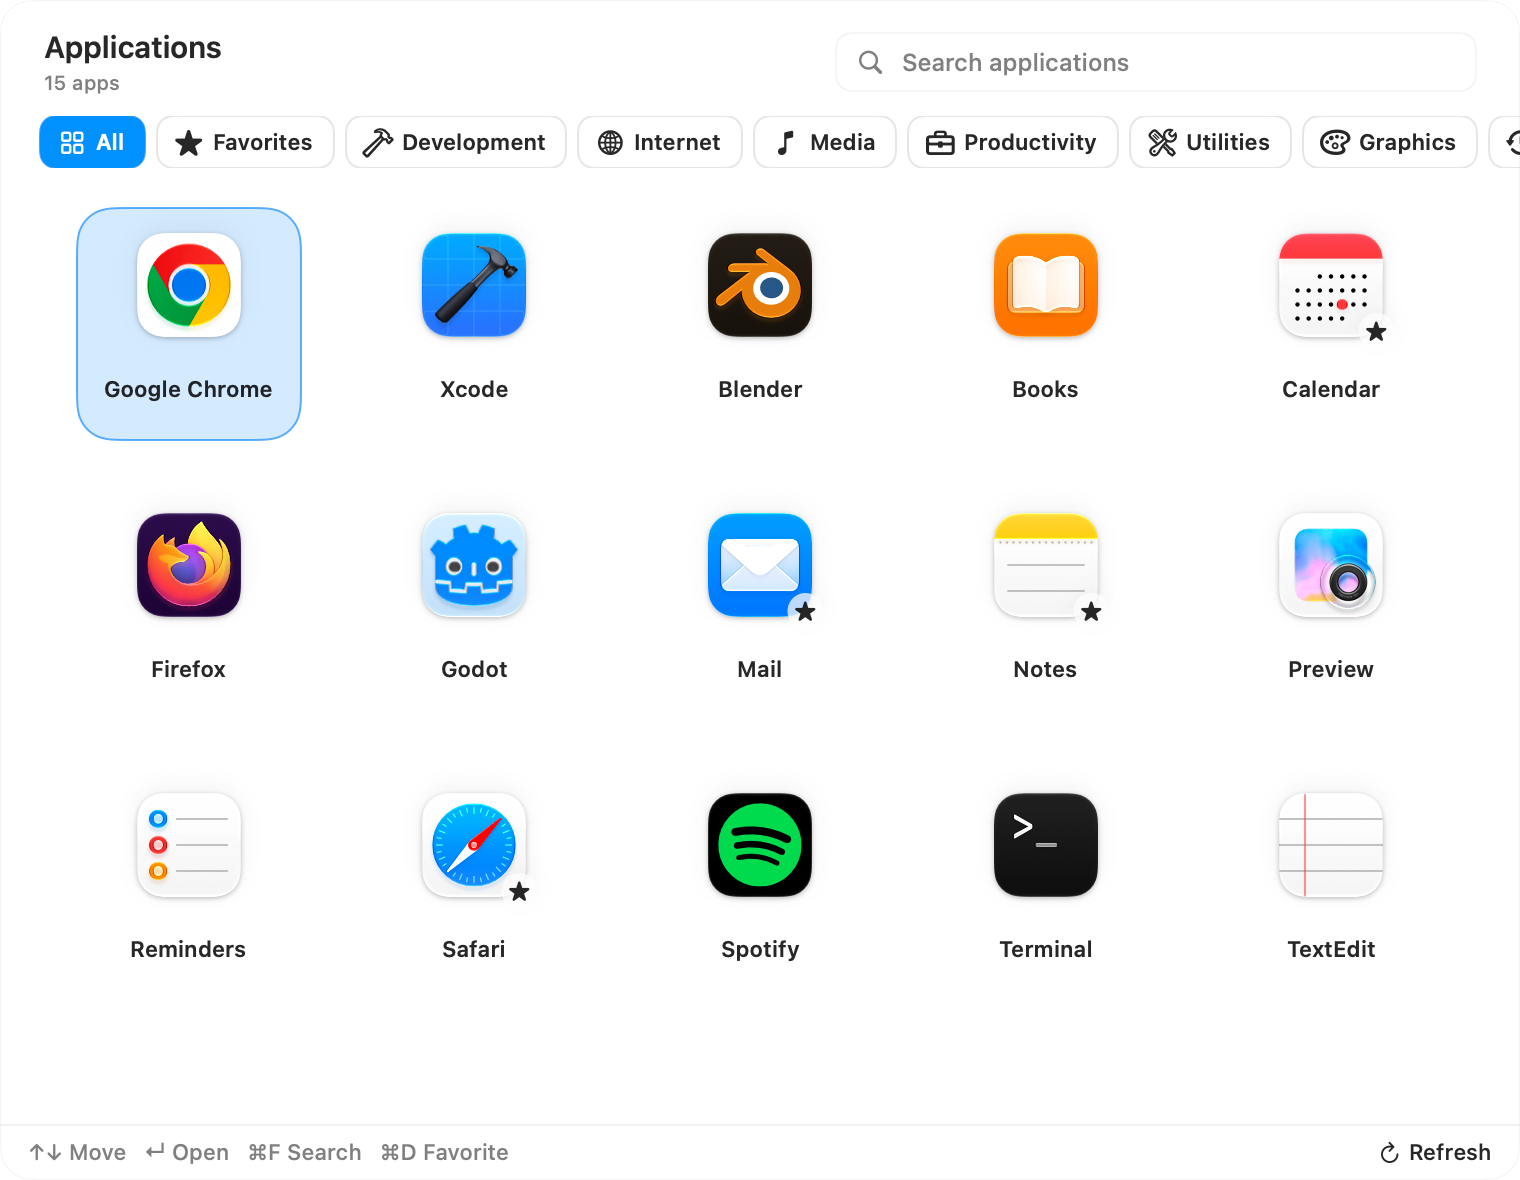
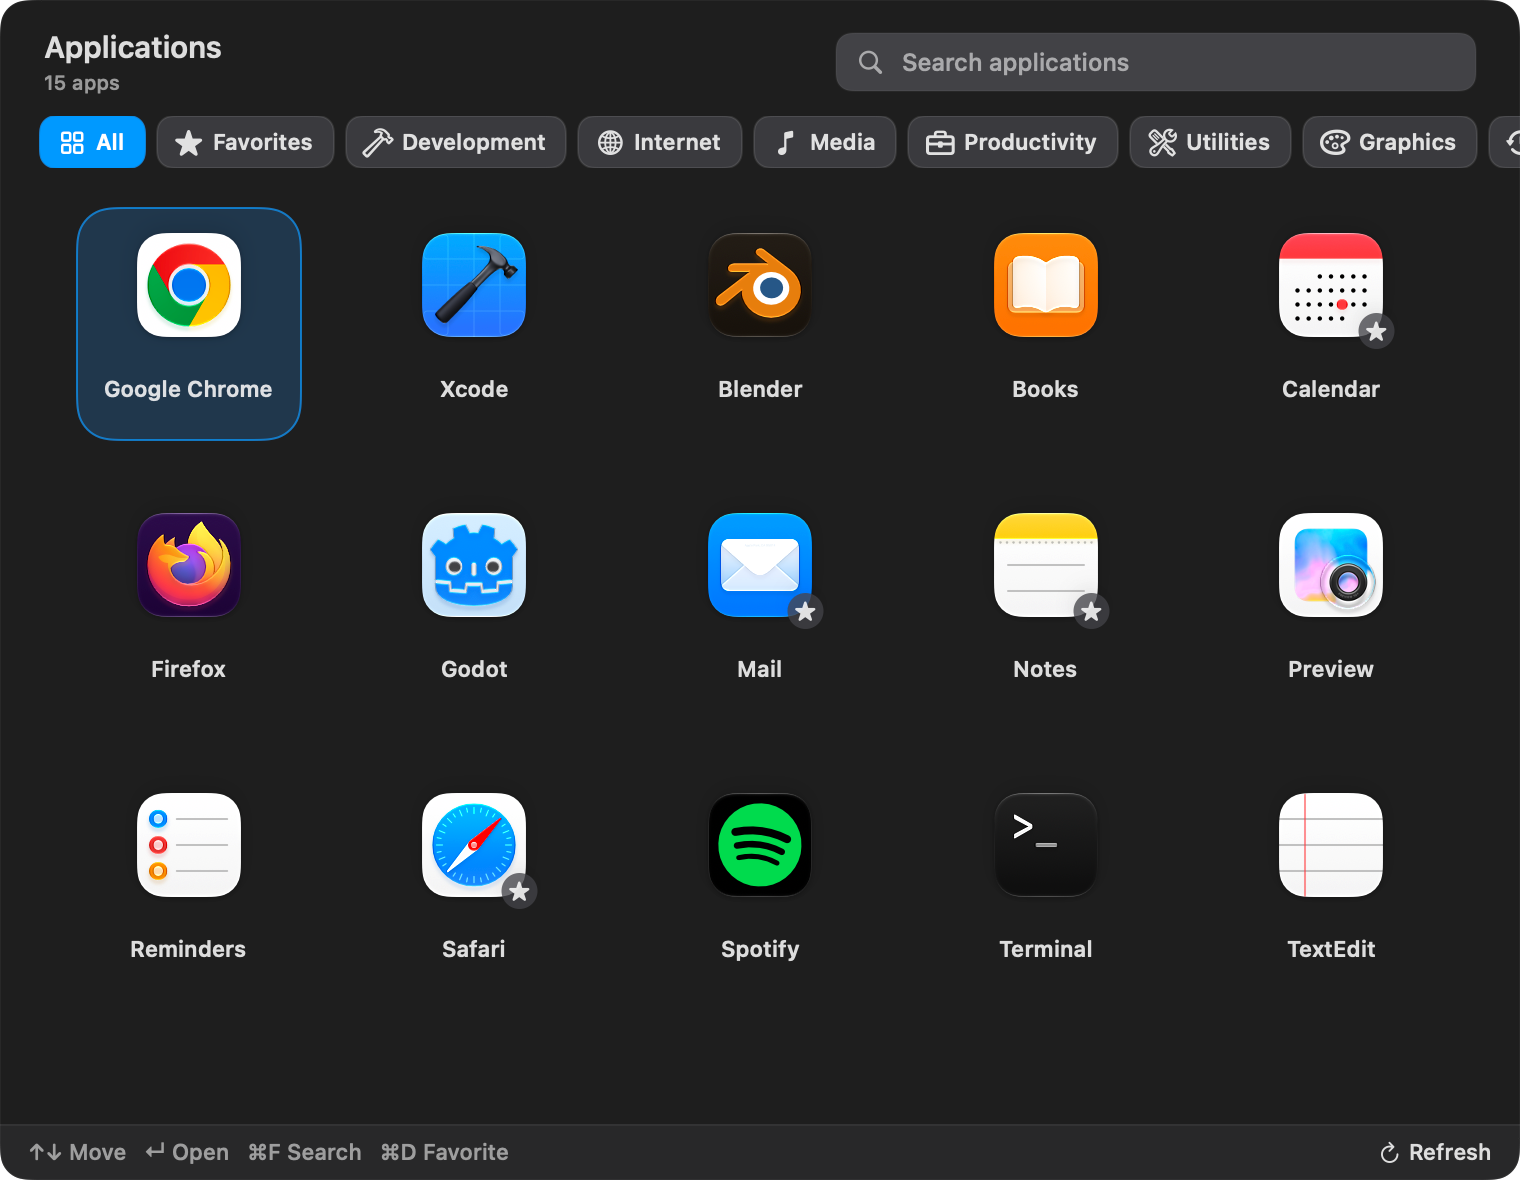
Search all installed apps even while browsing a category. Match names, bundle identifiers, paths, and app category information. Combine multiple search words without worrying about accents or capitalization; exact names and name prefixes rank higher.
Browse Development, Internet, Media, Productivity, Utilities, and Graphics, or choose Favorites and Recent. Right-click an app to add or remove a favorite, or press ⌘D for the selected app. Favorites carry across themes. Recent shows successful launches from App Starter, or recently added apps when no launch history is available.
Search is ready when the panel opens. Use ↑ and ↓ to select an app and Return to open it. In search, ← and → move the text cursor. ⌘F focuses search, Control + Tab cycles categories, and ⌘1–9 jumps to a category. Escape dismisses an open app menu, clears an active search, or closes the panel.
Drag an app from App Starter into the dock to add a launcher. Drop supported files onto an app to open them with it. The right-click menu also offers Open and Show in Finder, so you can launch an app or locate its application bundle.
Liquid Glass presents an icon grid. CDE groups apps into Favorites, Recent, Frequent, and app categories. Windows 95 uses a Start menu with categories and app lists. Each has light and dark presets and follows your theme’s colors, fonts, and icon overrides.
Press ⌘R to refresh the list after installing or moving an app. A busy indicator shows when a launch is in progress. If macOS cannot open the app, App Starter keeps the panel open and shows the error so you can choose another app or try again.
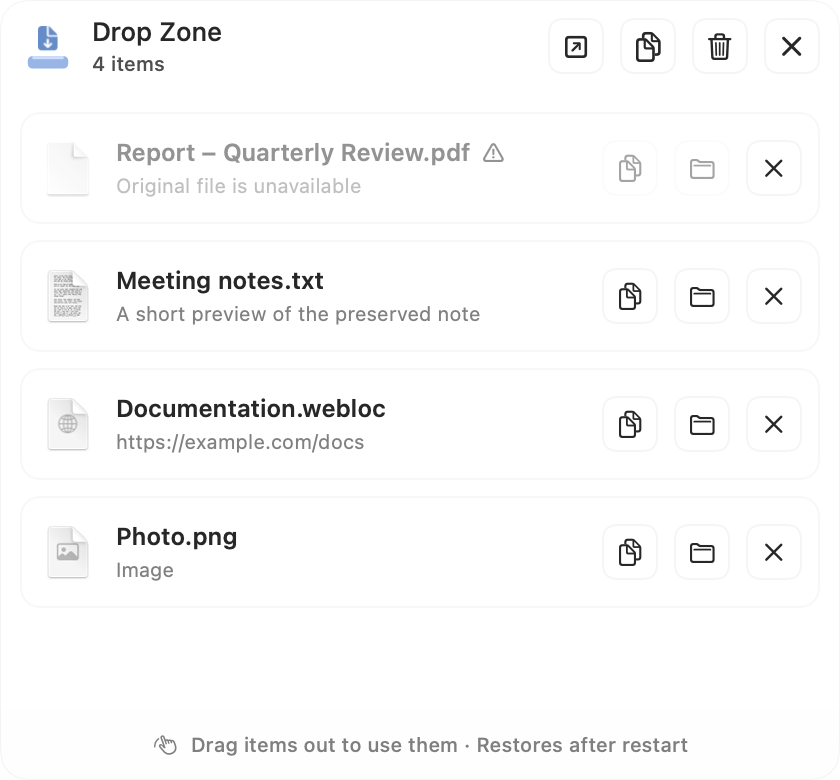
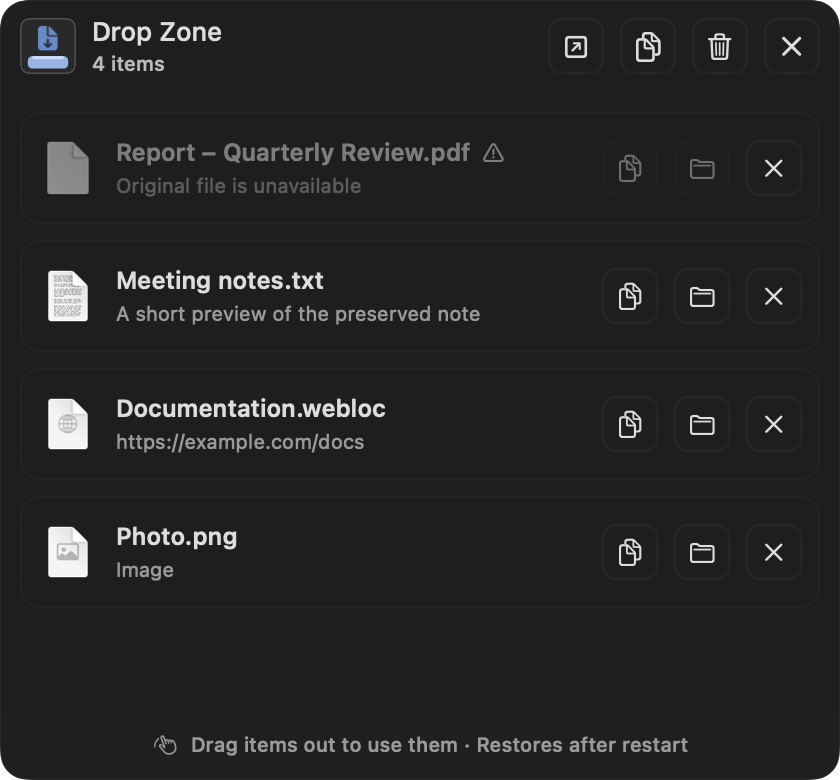
Drop Zone
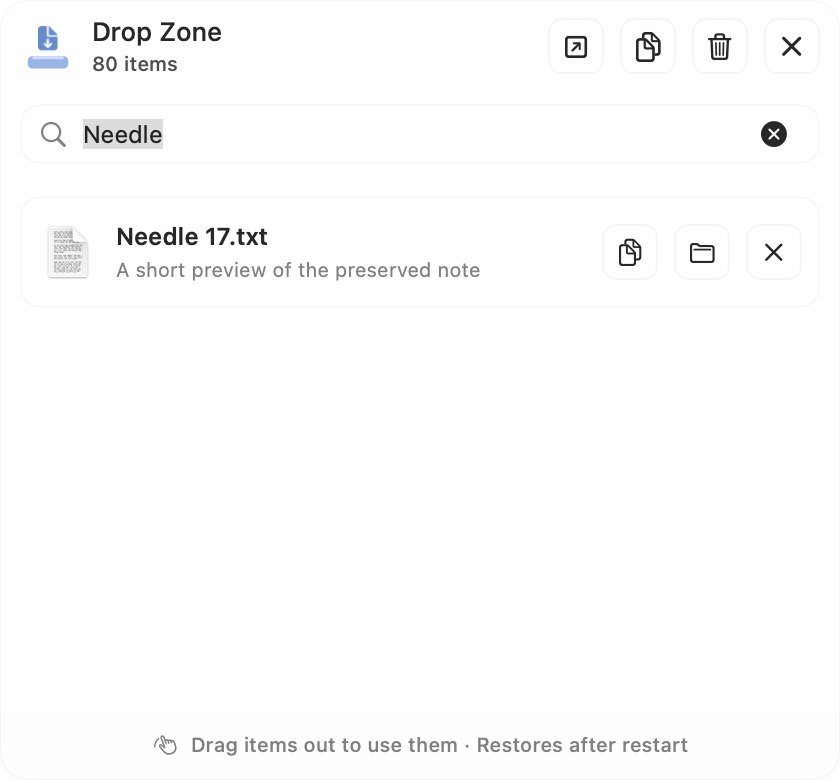
Set aside files, links, images, and text while you work. Pick them up again from the dock, menu bar, or Dynamic Island.
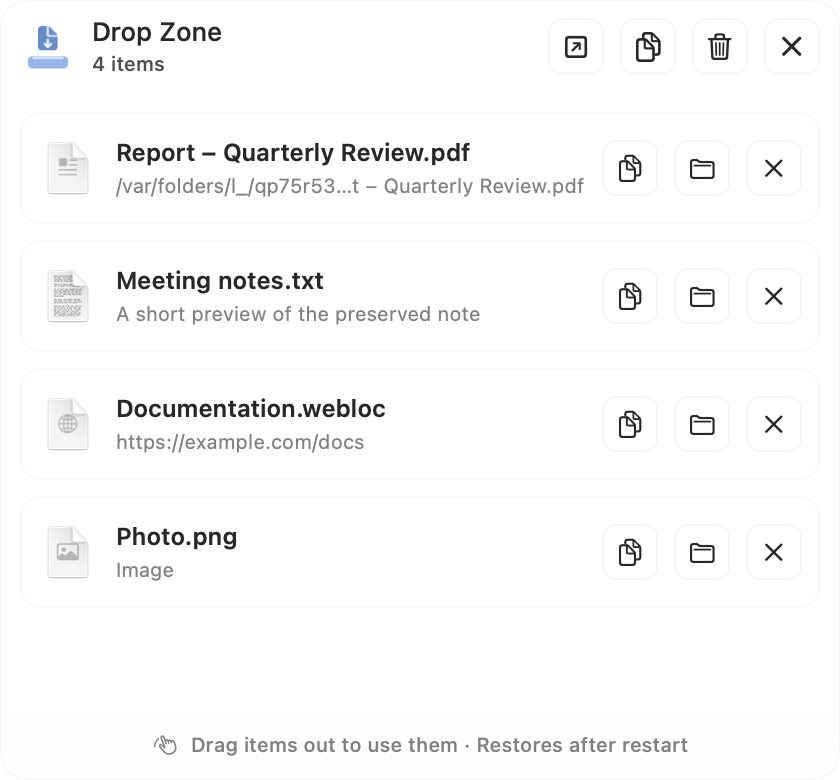
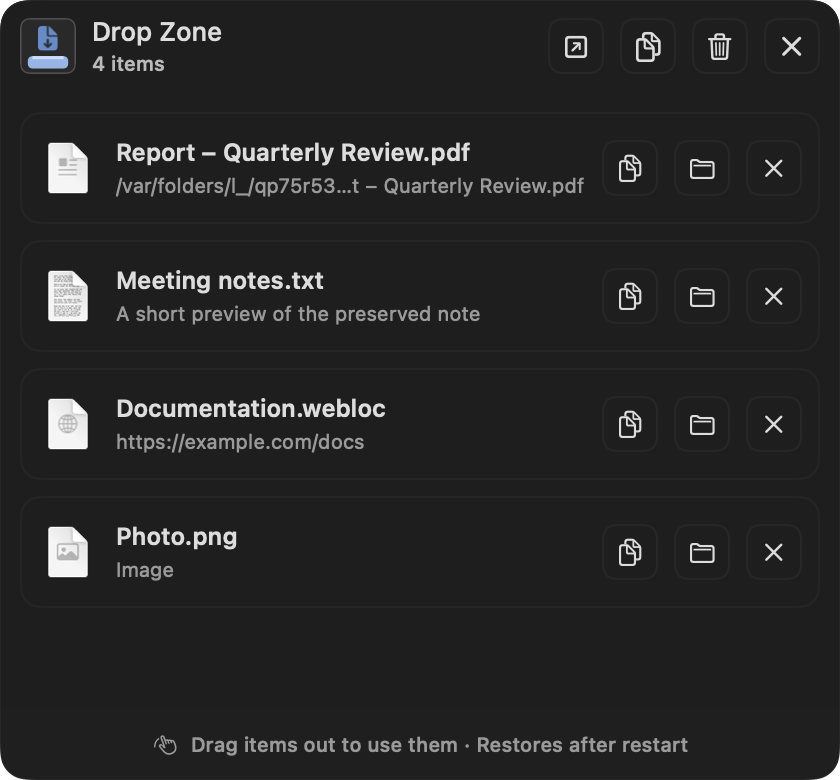
Drop files and folders, links, plain text, or PNG, JPEG, and TIFF images. Files and folders stay in their original location. Text, image, and link drops receive local saved copies that you can reuse from the shelf.
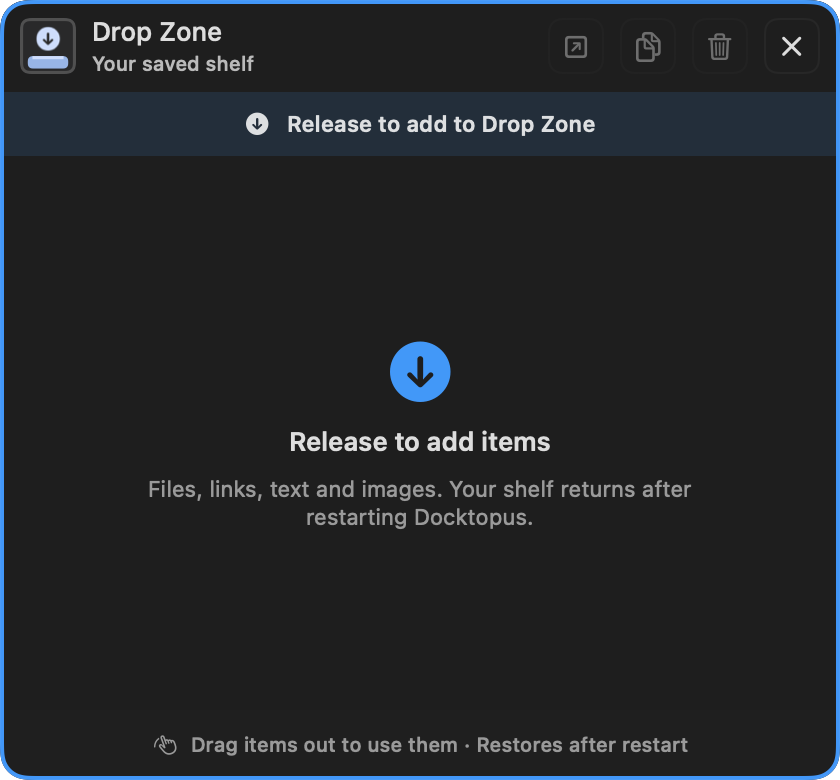
The dock widget, optional menu bar item, and Dynamic Island share the same items. Add Drop Zone in Dock settings, enable it under Settings → Menu Bar, or select its activity in an enabled Island. Dragging onto the Island previews the shelf; an accepted drop keeps it open and pinned.
Your shelf restores locally after restarting Docktopus. Saved text, images, and links remain available through their shelf copies. Original file and folder references need continued access to the originals; the shelf does not track files moved elsewhere.
Drag an item into a compatible app, click its row to open it, copy it, or reveal its file in Finder. Item Copy includes text, link, or image content where available, alongside its file reference. Header controls open all available items, copy all available file references, or clear the shelf.
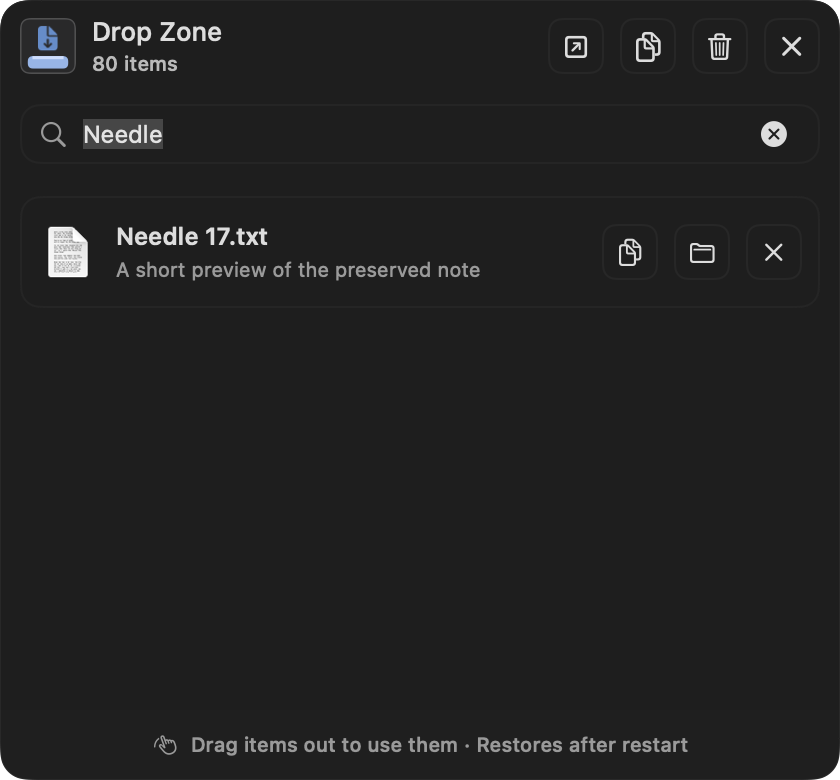
At eight items, a search field appears. Filter by filename, path, link address, or a short preview of saved text. Compact rows keep item names, type or location details, and individual actions together.
Remove an entry or clear the shelf while original files and folders remain untouched. Removing saved text, images, or links deletes their shelf copies after the change is saved. Missing files stay visible as unavailable entries: access actions are disabled, and Remove remains available.
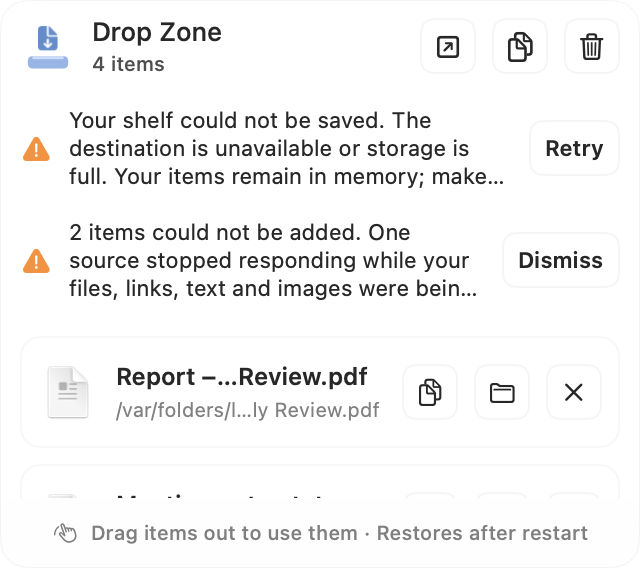
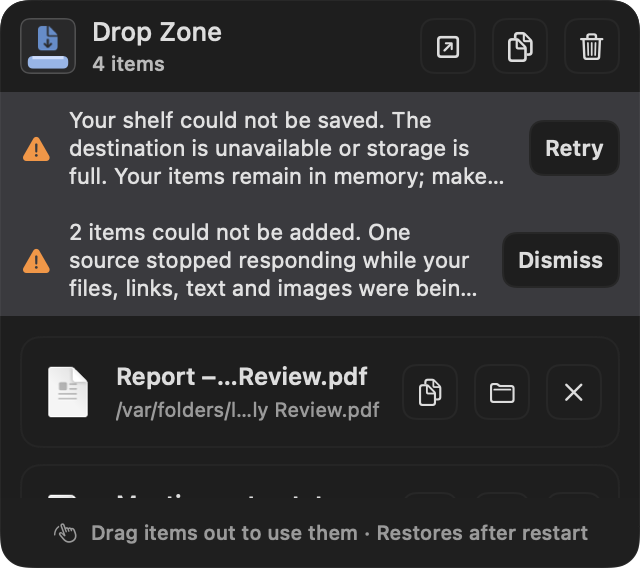
Import progress appears while items are added, and each drop keeps its incoming order. Adding the same original file again reuses its entry. Storage errors offer Retry for restoring, saving, or cleaning up the shelf. Import errors can be dismissed; drop the affected item again to try another import.
Use Liquid Glass, CDE, or Windows 95, with light and dark presets. The shelf follows your app theme with readable rows, labeled controls, and visible drag feedback. In the standalone panel, press Esc to close it.
Potato Timer
Give focused work and proper breaks their own time. One shared countdown follows you between the dock, menu bar, and Clock panel.
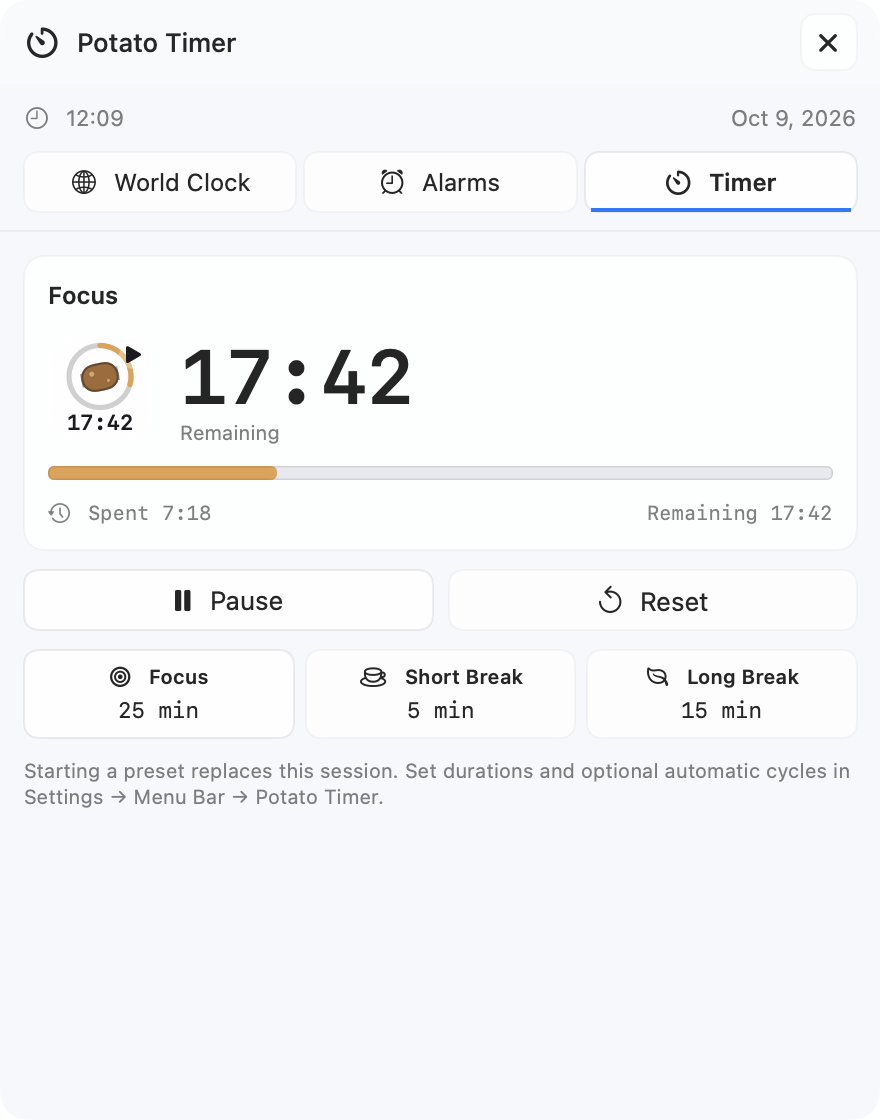
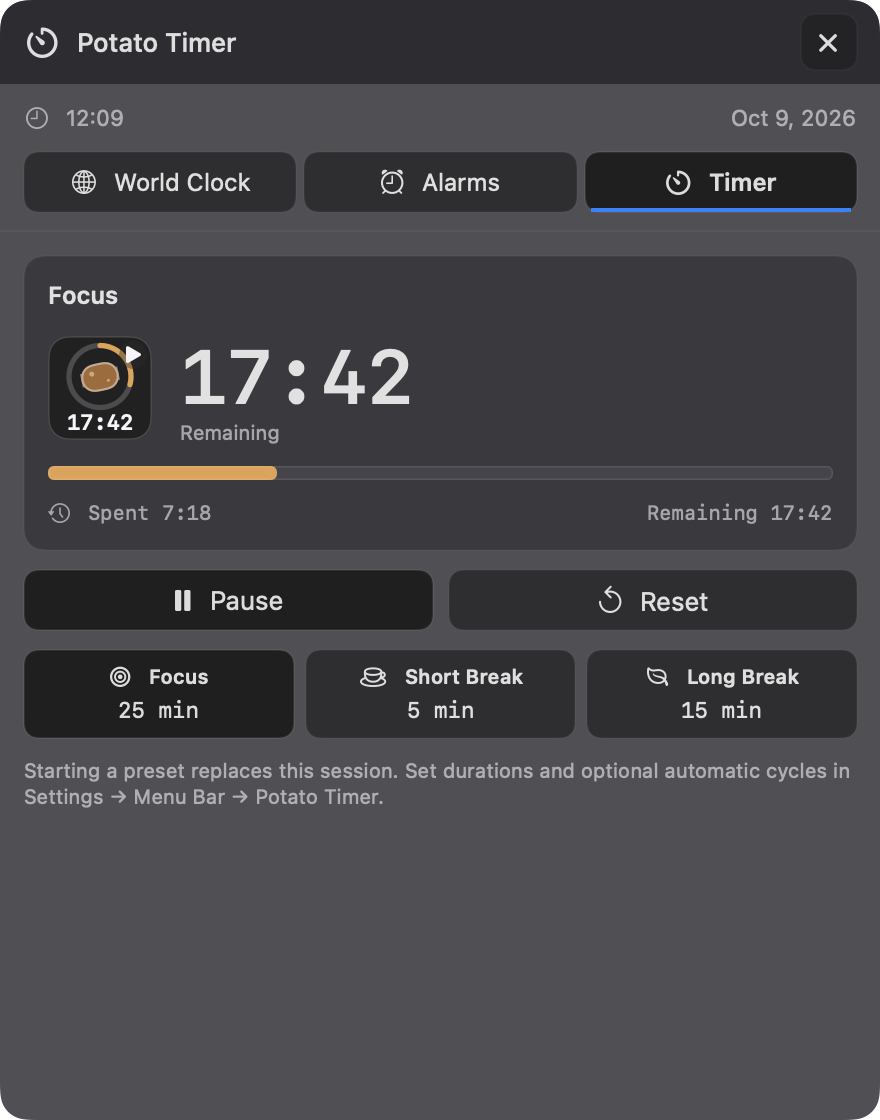
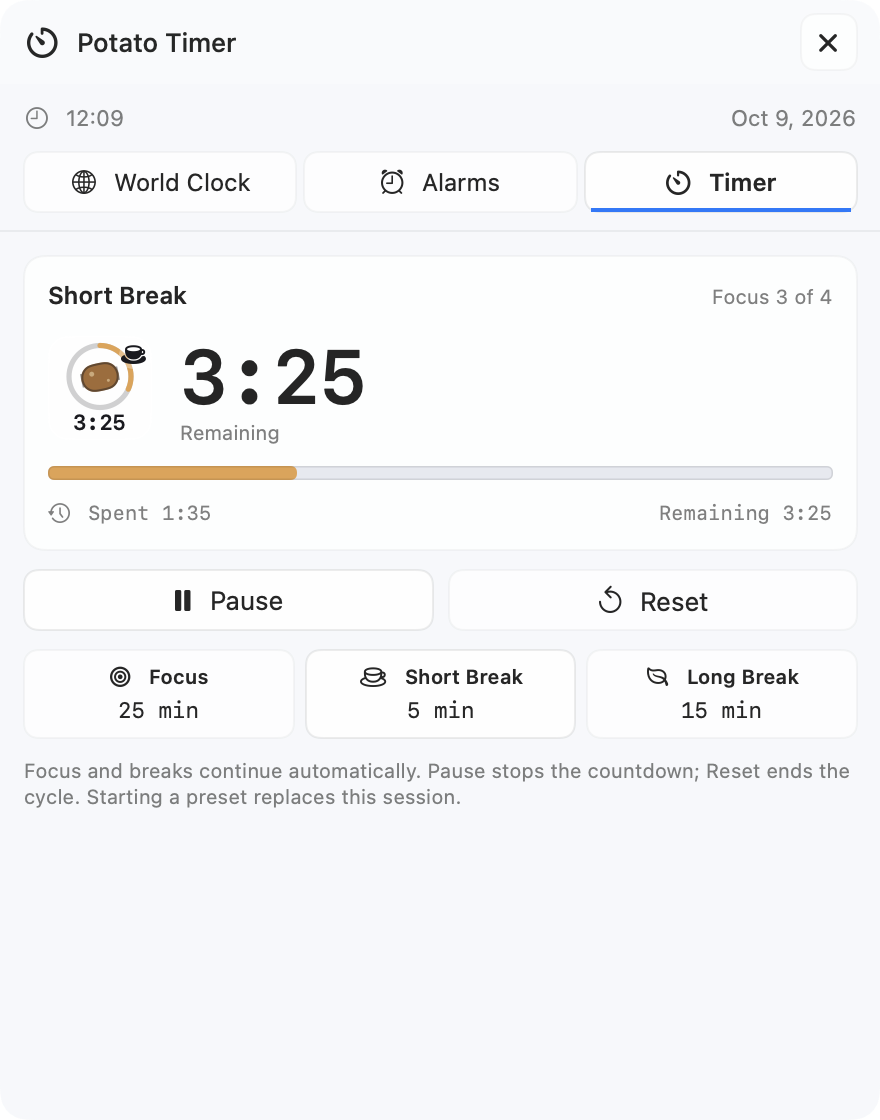
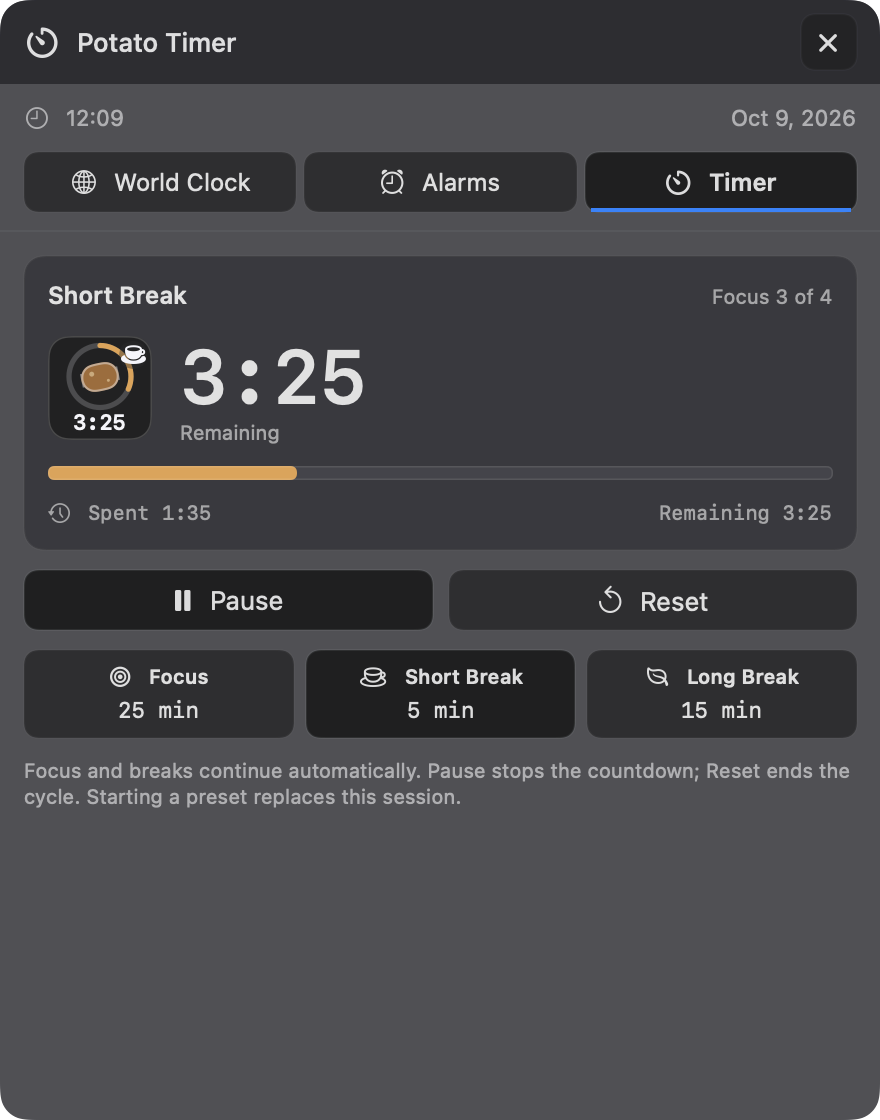
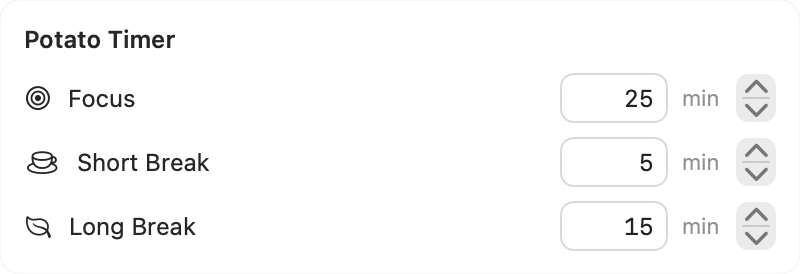
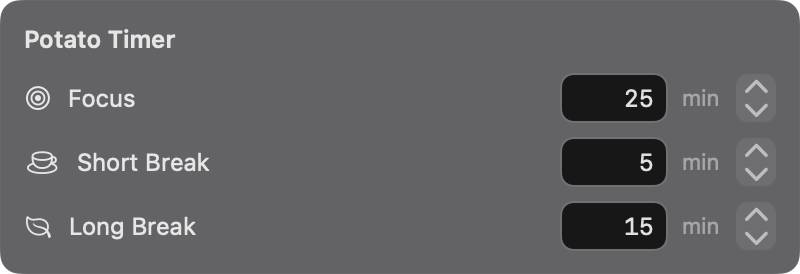
Start with a 25-minute Focus session, a 5-minute Short Break, or a 15-minute Long Break. Set each duration to 1–180 minutes using typed values or steppers in Settings → Menu Bar → Potato Timer. Duration changes apply to the next session, keeping an active or paused countdown intact.
Automatic focus/break cycles are off by default. Enable them to move from Focus to a Short Break and back, with a Long Break after four focus sessions by default. Choose 2–12 focus sessions between long breaks. Pause holds your place, Reset ends the cycle, and starting a preset begins a new sequence. Turning cycles off lets the current session finish.
Click the dock widget or menu bar item to start Focus, pause, or resume. Right-click or Control-click for configured presets, Reset, and Open Timer Controls. The same timer appears in the Clock panel, so changing it from one place updates the others. Spent time is elapsed time for the current session.
Completion sound and macOS notifications have independent switches. Enable either, both, or neither. Notification permission and macOS notification settings control banner delivery; Settings provides guidance and a link to Notification Settings if access is blocked. Sound remains independent of notification access.
Restoration is off by default. When enabled, running timers count time while Docktopus is closed and paused timers keep their remaining time. An expired restored timer shows Done, uses your enabled completion alerts once, and waits for you to start again. Automatic cycles continue while Docktopus is running; reopening the app does not start a new session after an expired timer.
In the Timer panel, Space starts, pauses, or resumes; ⌘1, ⌘2, and ⌘3 start Focus, Short Break, and Long Break. ⌘R resets and Esc closes the panel. With the dock timer focused, Shift-F10 or the Context Menu key opens its options. VoiceOver labels describe the timer state and available actions.
Color Picker
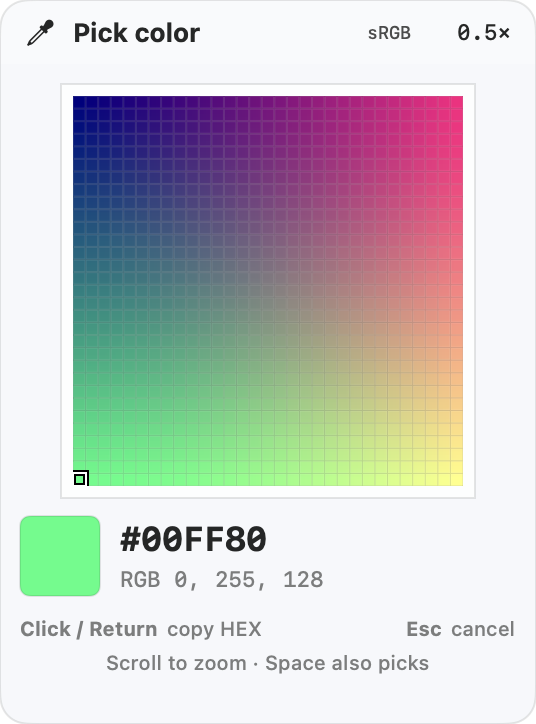
Click the dock widget or optional menu bar item to sample a screen pixel. Scroll to zoom from 0.5× to 3×; click or press Return or Space to copy HEX. Esc cancels.
Right-click for your latest 25 colors, or save up to 12 favorites in your palette. Copy HEX, RGB, or HSB and keep your colors between launches.
Screen sampling needs macOS Screen Recording permission.
Dev Servers
Find your local development servers in one panel. Open a port, copy its address, reveal the project, or review a stop request without hunting through terminals.
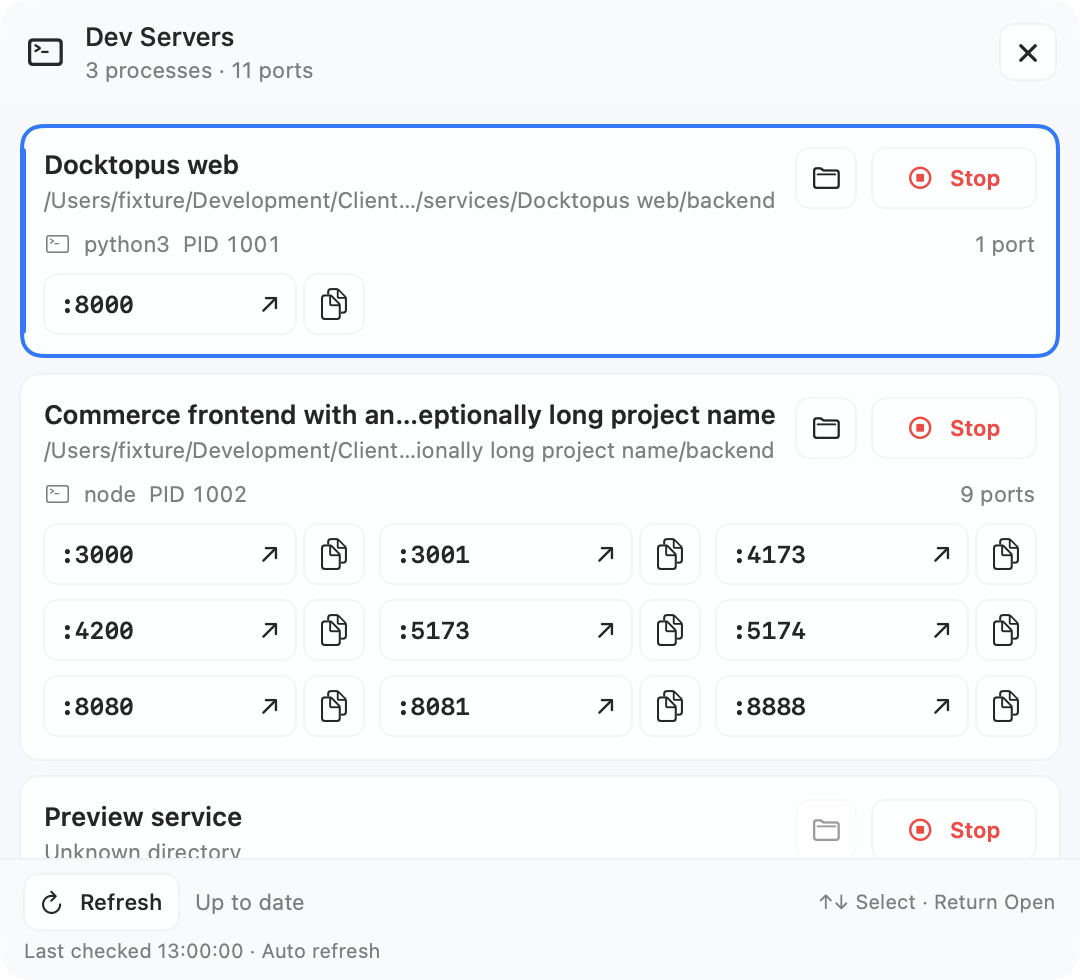
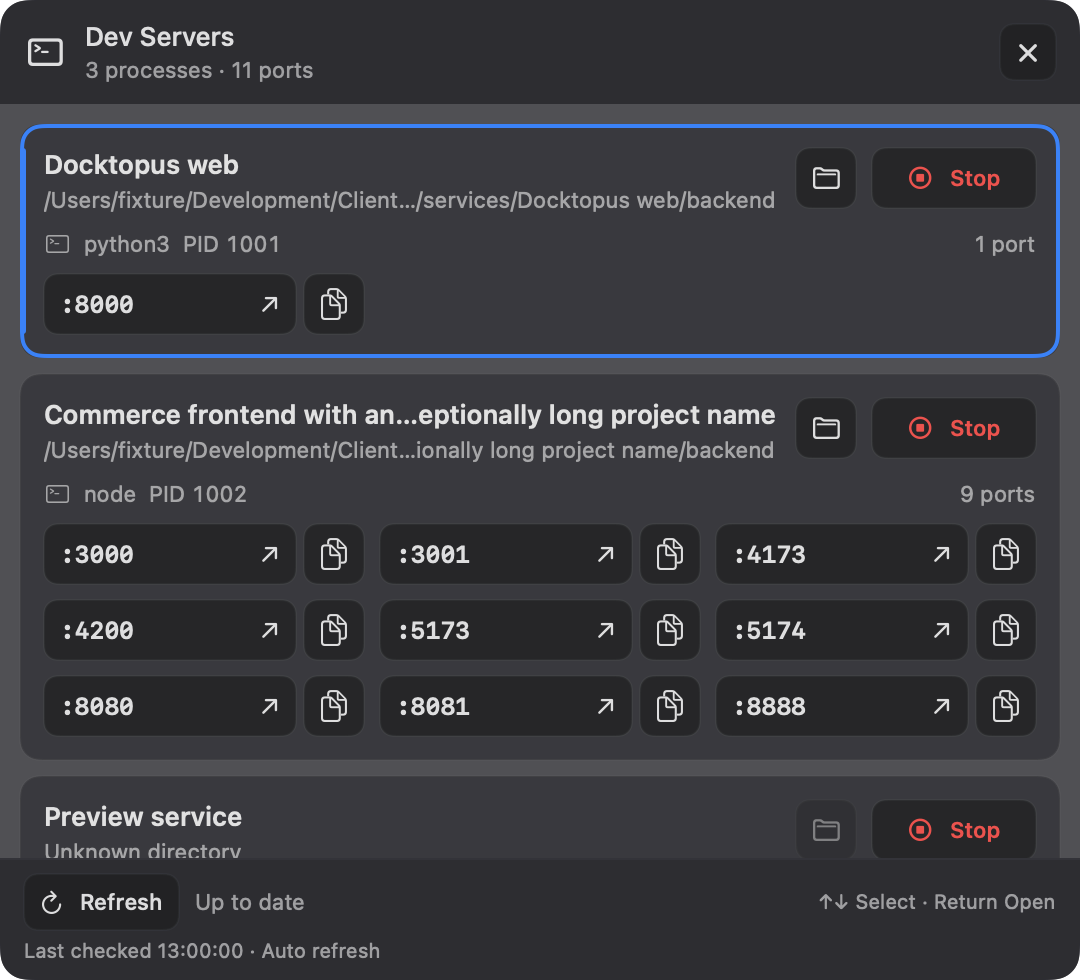
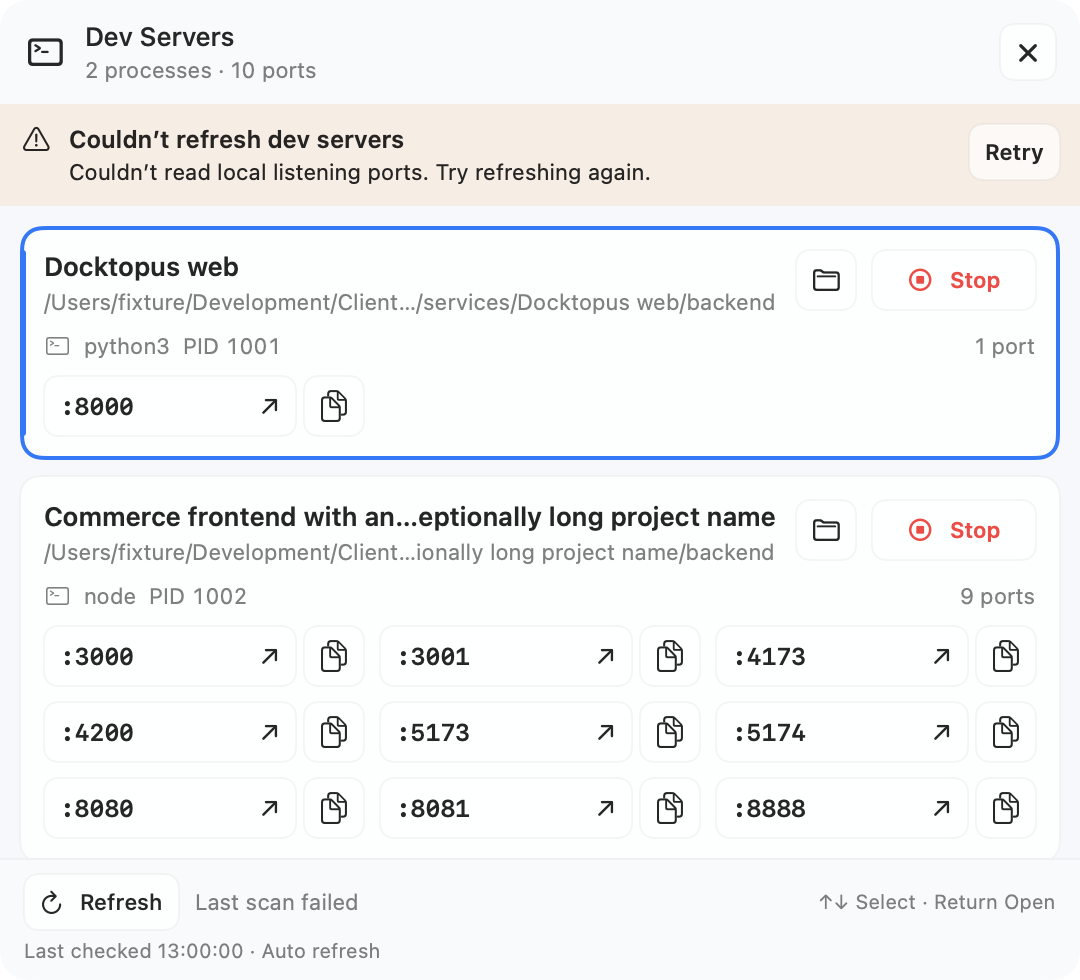
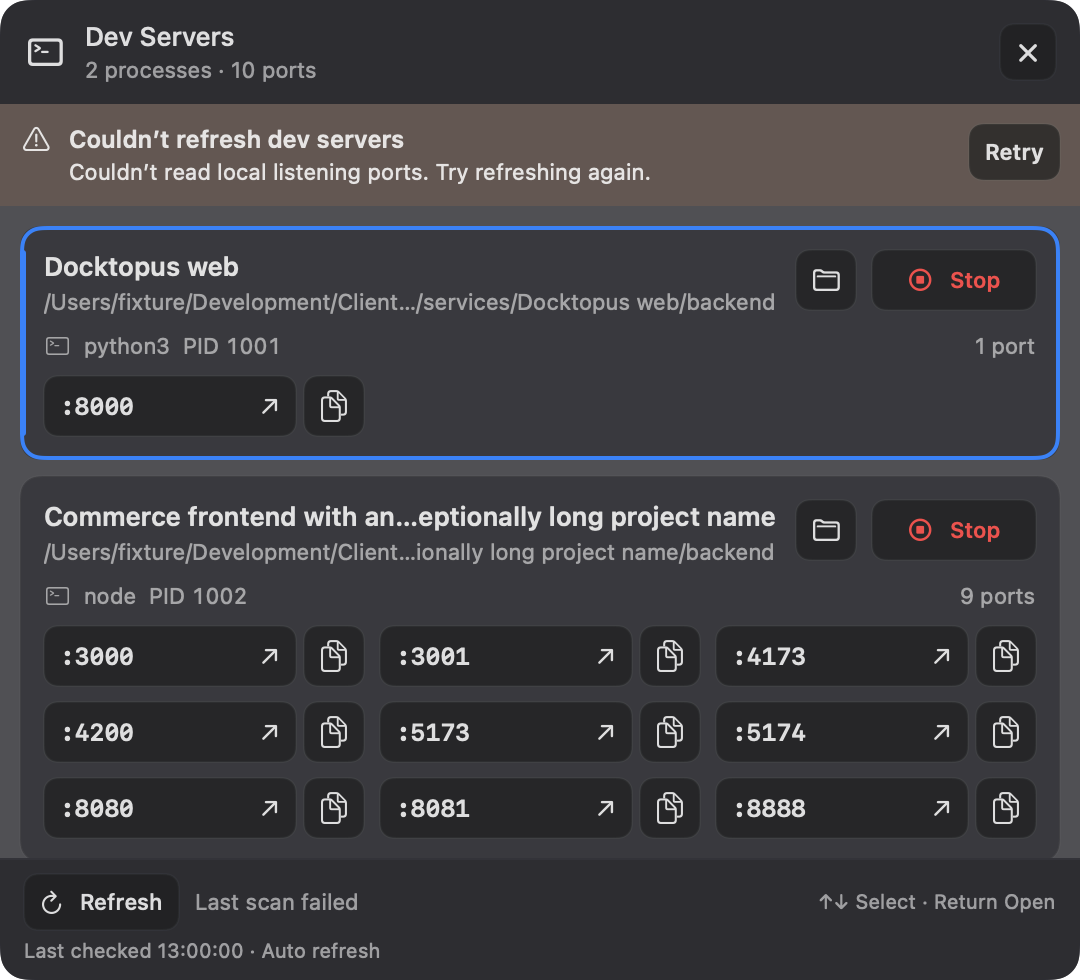
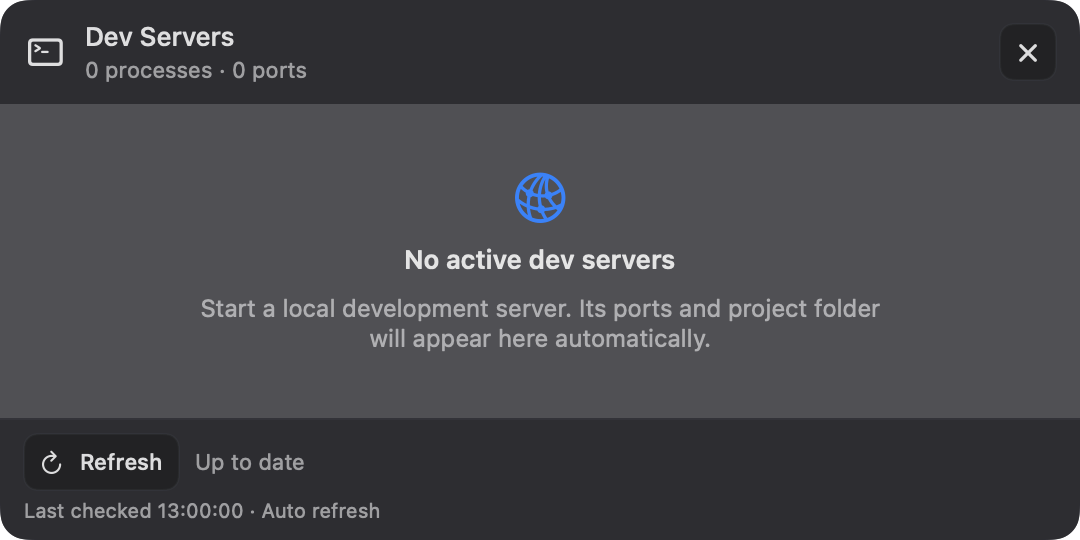
See detected servers grouped by process, with a project name, folder path, process name, PID, and listening ports. A process with several ports keeps them in one card. The dock badge and menu bar count show detected ports; the panel also shows how many processes are running them.
Click a port to open its local HTTP address in your default browser. Each port has a copy menu with Copy URL and Copy Port, so you can share an address or use just the port number in another tool. IPv4 and IPv6 loopback addresses are supported, and copy feedback appears in the panel.
Use the folder button to reveal the detected project directory in Finder. The path is visible in the card, with the full path available on hover. If no directory is available, Finder stays disabled; a folder that has since disappeared produces visible feedback.
Stop shows the process and affected ports before you confirm. Docktopus checks that the process still matches the selected server, then sends a graceful stop request to that process. The panel reports the request or an error and checks the list again. Shutdown depends on how the server responds.
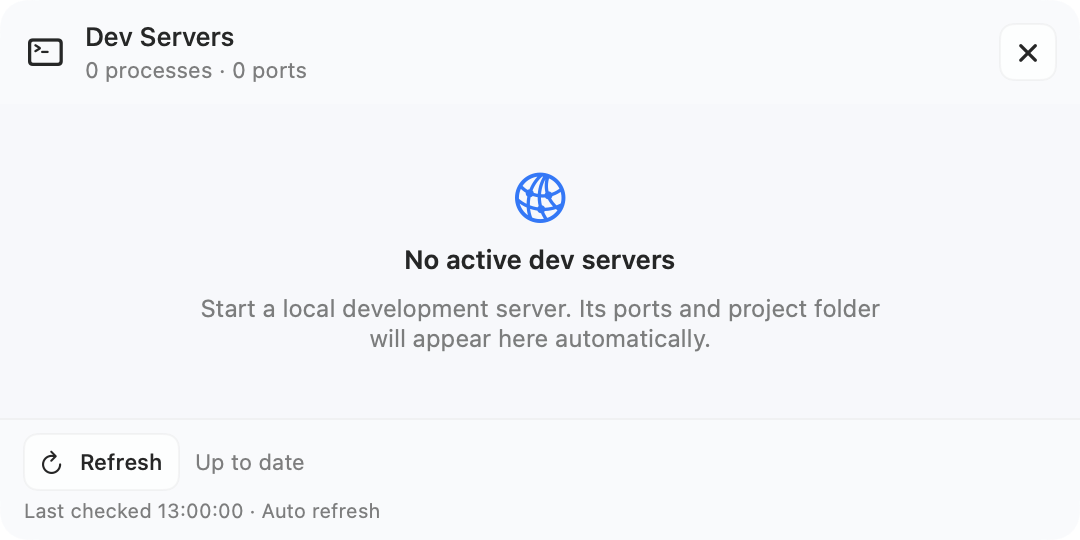
The list updates automatically while the dock widget or menu bar item is enabled, with more frequent checks while the panel is open. Use Refresh to check now and see the last checked time. A failed scan keeps the last successful results visible with a Retry button, while loading and an empty list have their own states.
Use ↑ and ↓ to select a process and Return to open its first, lowest-numbered port. ⌘R refreshes, ⌘C copies that port’s URL, ⌘⇧C copies its number, and ⌘O reveals the project in Finder. Press Esc to close the panel. Each port’s on-screen controls remain available when a process has several ports.
Discovery looks for local TCP listeners owned by your current macOS user on ports 1024 and above, using development runtimes and project-folder clues. A listed port means it is listening; it does not confirm that the website is healthy.
Display Controls
Bring brightness, resolution, and display arrangement into one place. Adjust screens together or individually, with the controls supported by each display.
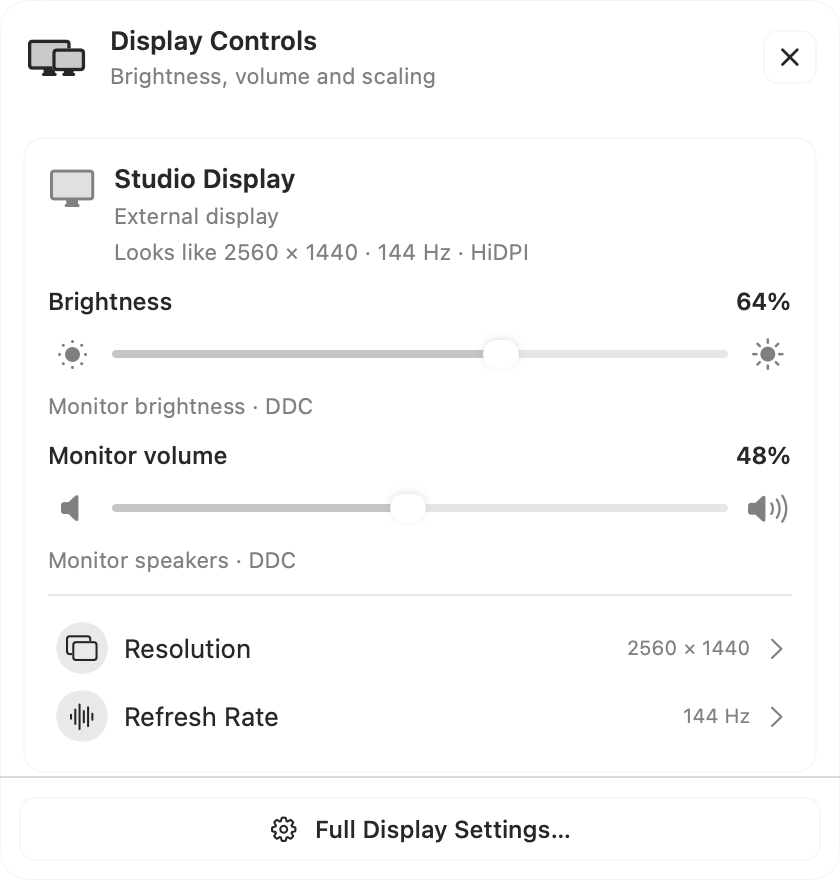
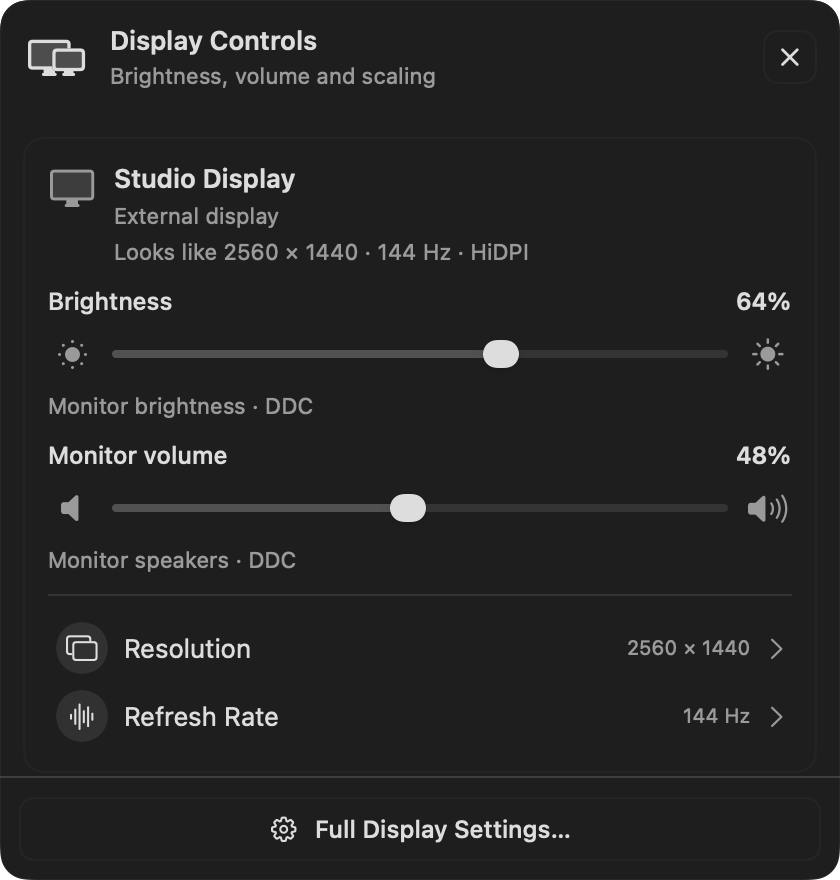
Enable Display Controls in Settings → Displays, then add the Display dock widget or enable its menu bar button. Both open the same panel, with the display containing the clicked launcher first. Display Controls works independently of Dynamic Island; its Controls activity also offers a shared Display brightness section.
Each card identifies the built-in or external display, main display, current “Looks like” resolution, refresh rate, and HiDPI state. The panel scrolls when several monitors are connected and adapts when displays connect or disconnect. Full Display Settings opens the existing settings pane.
Adjust each display with native hardware brightness or DDC monitor control where supported. Software dimming provides a fallback by darkening the image; it does not lower the monitor’s backlight. The panel labels the active control method. Optional combined brightness adjusts several displays together, with a separate built-in brightness ratio.
Monitor volume sliders use DDC on supported external displays. Show or hide these sliders in full settings; the preference applies to the quick panel too. A Volume Control override lets compatible monitors accept volume changes even when they cannot report their current level; it cannot add capabilities a monitor lacks. For system output and application audio, use the Audio Mixer.
Choose supported resolutions and HiDPI modes, use the scaling slider where available, or expand Show all resolutions for exact modes. Refresh Rate lists fixed and variable refresh choices reported by the display; ProMotion appears on compatible built-in displays. Optional smooth scaling on compatible external displays may require administrator approval and a brief reconnect. A mode change can briefly blank the display; failures remain visible with Retry and Dismiss.
Auto Brightness follows a detected built-in display and adjusts external brightness as it changes. Keep display offsets preserves the differences you set between screens. Displays that support macOS ambient-light adjustment also offer Automatically adjust brightness. These controls depend on an available built-in display or the display’s ambient-light support.
Route brightness keys to the display under your pointer, all displays, or selected displays, and configure display shortcuts in full settings. Brightness and volume keyboard overlays are separate opt-in settings requiring Accessibility access. Feedback uses the Island on the affected screen or a standalone themed overlay; unsupported system audio outputs keep their macOS controls.
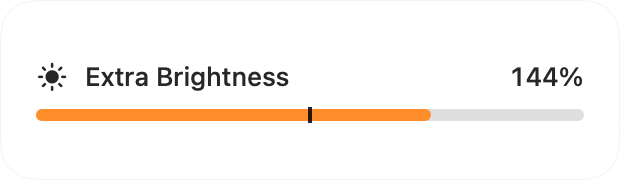
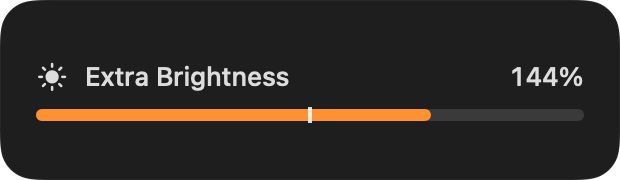
Compatible external displays offer an HDR toggle. Extra Brightness extends the brightness slider beyond 100% on eligible built-in XDR and external HDR displays; enabling it on an external display may also enable HDR. Availability and the resulting brightness depend on your display and its current mode.
Select ICC color profiles or reference presets offered by compatible XDR displays. Image adjustments include contrast, gamma, gain, color temperature, and individual RGB channels, with pause and reset controls; adjustments may affect HDR content. Save named display presets for resolution, brightness, and arrangement, and apply them again from the preset list or shortcuts.
Arrange displays, choose the main screen, and create or manage virtual displays. Enabled virtual displays remain active while Docktopus runs. On Apple Silicon, supported physical screens can be disconnected through software; they stay disconnected until you explicitly reconnect them in settings. Notch hiding uses an available display mode that excludes the notch area. Advanced display support varies with hardware and macOS.
Liquid Glass uses native sliders; CDE and Windows 95 retain their bevels and focus outlines, with light and dark presets. Retro sliders support arrow keys in 1% steps, Shift-arrow in 10% steps, and Home or End. Press Esc to close the quick panel or ⌘, to open full display settings. Keyboard interaction keeps the panel open until you close it or click outside.
Brightness changes are shared between the quick panel, full display settings, and Island controls. The quick panel and settings also share monitor volume. Controls refresh while visible; closing the panel stops its display refreshes while enabled automatic brightness and keyboard features keep working.
Audio Mixer
Choose your output device and balance supported apps independently. Keep music comfortable while a call or video gets the volume it needs.
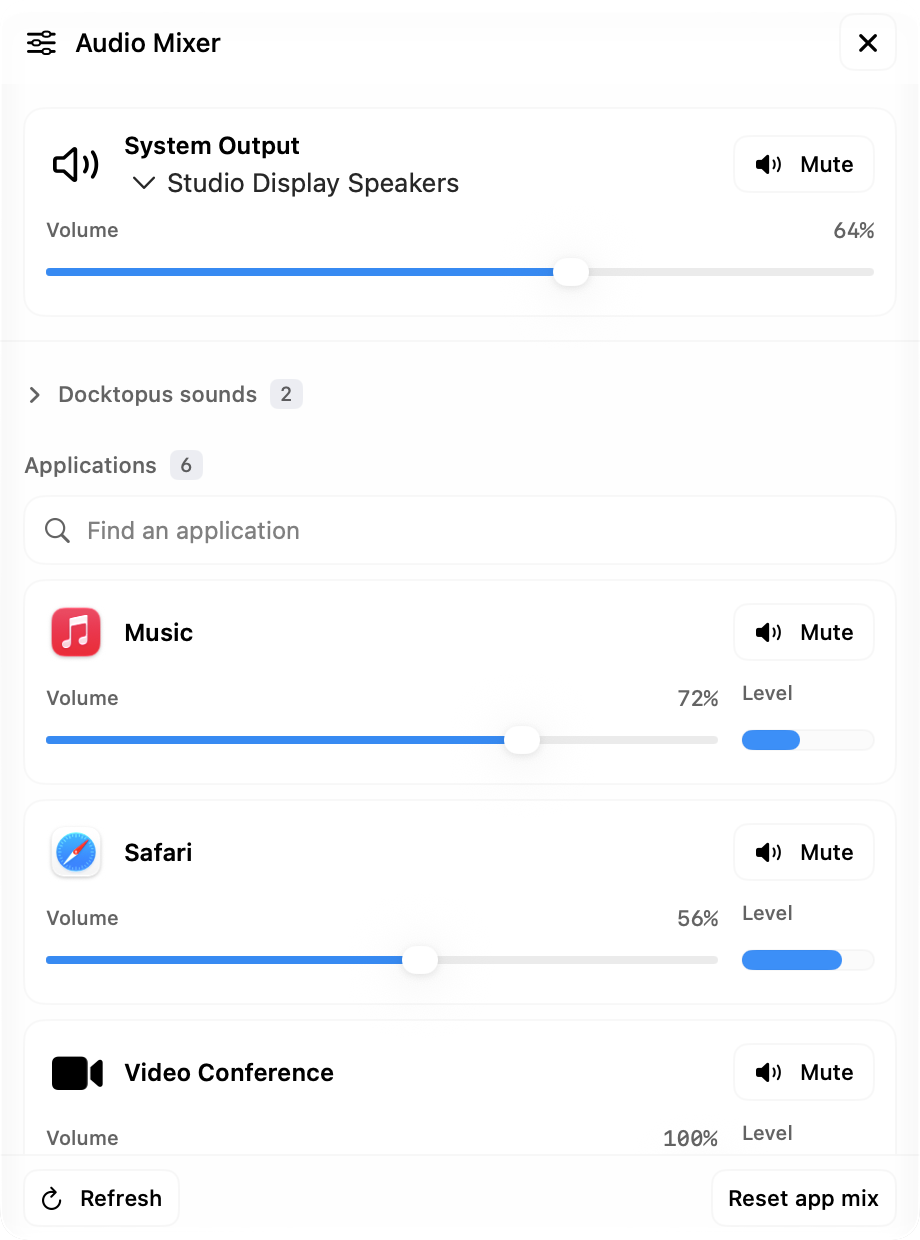
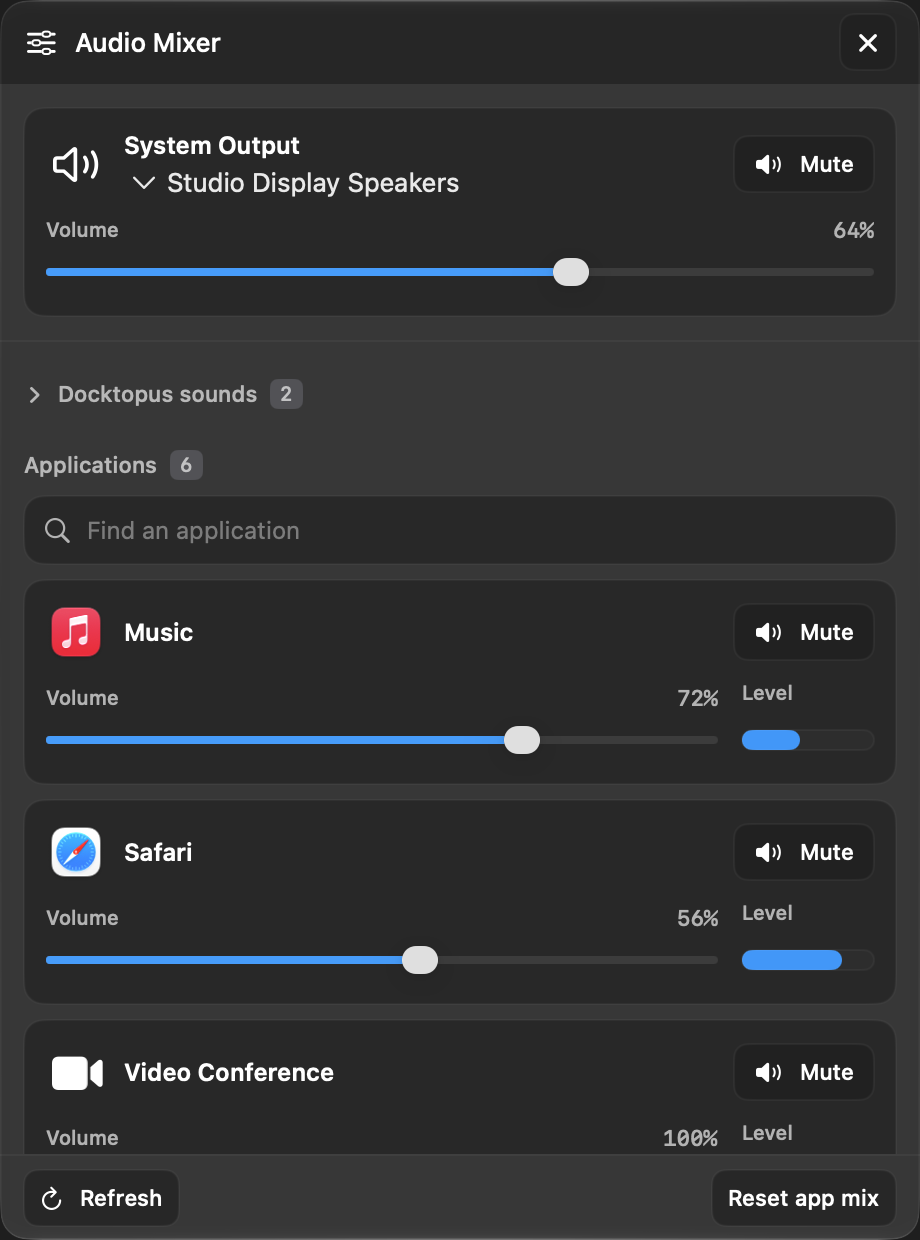
Open Audio Mixer from the dock widget, menu bar, or Dynamic Island to manage system volume and app audio.
Switch between available output devices, then adjust system volume or mute the output where the device supports it. Outputs without software volume control use the controls on the device itself.
Adjust volume or mute each application playing audio, watch its audio level, and search the list when several apps are active. Per-app audio controls require macOS 14.2 or later.
Adjust enabled keyboard and mouse soundpacks separately. Choose and preview packs in Sound settings; their volume and mute stay in sync with the mixer. Saved per-app volumes return automatically; restore one application to full volume or use Reset app mix to restore all saved application volumes and unmute them.
Coffee
Coffee prevents automatic idle sleep while you work. Add the widget to your dock or a submenu, or enable its optional menu bar item in Settings. All three offer the same durations, display preference, and sleep-restoration controls.

Click Coffee to start an indefinite session, or click again to stop an active session. Right-click or Control-click for durations and options. The dock, submenu, and optional menu bar item share the same Coffee state. Normal timed and indefinite sessions end when Docktopus quits.
Keep awake for 10 or 30 minutes, or 1, 2, 4, 8, or 12 hours. The menu marks your selected duration and shows the remaining minutes and finish time. Change the duration during a normal session without interrupting its sleep prevention. When the time runs out, Coffee turns off so normal sleep behavior can resume.
Turn off Keep Display Awake to keep your Mac awake while its display may sleep. Turn it on to keep the display awake during a Coffee session. The preference is saved for future sessions, is available in Settings and the Coffee menu, and can be changed during a normal session without resetting its timer.
Theme artwork and badges distinguish inactive, indefinite, timed, closed-lid, pending, and attention states. Hover Coffee for its current status; open the menu for the finish time, display behavior, and Show Error Details. Liquid Glass, CDE, and Windows 95 retain their own artwork and colors, with light and dark presets.
Keep Awake with Lid Closed is a separate indefinite mode that may require administrator approval for the Coffee helper. Coffee records the previous sleep setting before changing it and attempts to restore that setting when stopped or when Docktopus quits. If restoration fails, the state remains visible and Retry Sleep Restoration is available. An outstanding restoration setting is checked again at the next launch.
Activate a focused dock Coffee control with Return or Space. Use Shift-F10 on a focused dock or submenu Coffee control to open its options. VoiceOver has a Coffee Options action for the dock, submenu, and menu bar item, along with the current state and error details. Opened menus also reflect changes to the shared Coffee state.
Focus Blur
Soften the desktop around the window you are using. Your work stays clear, and you can click through to switch windows as usual.
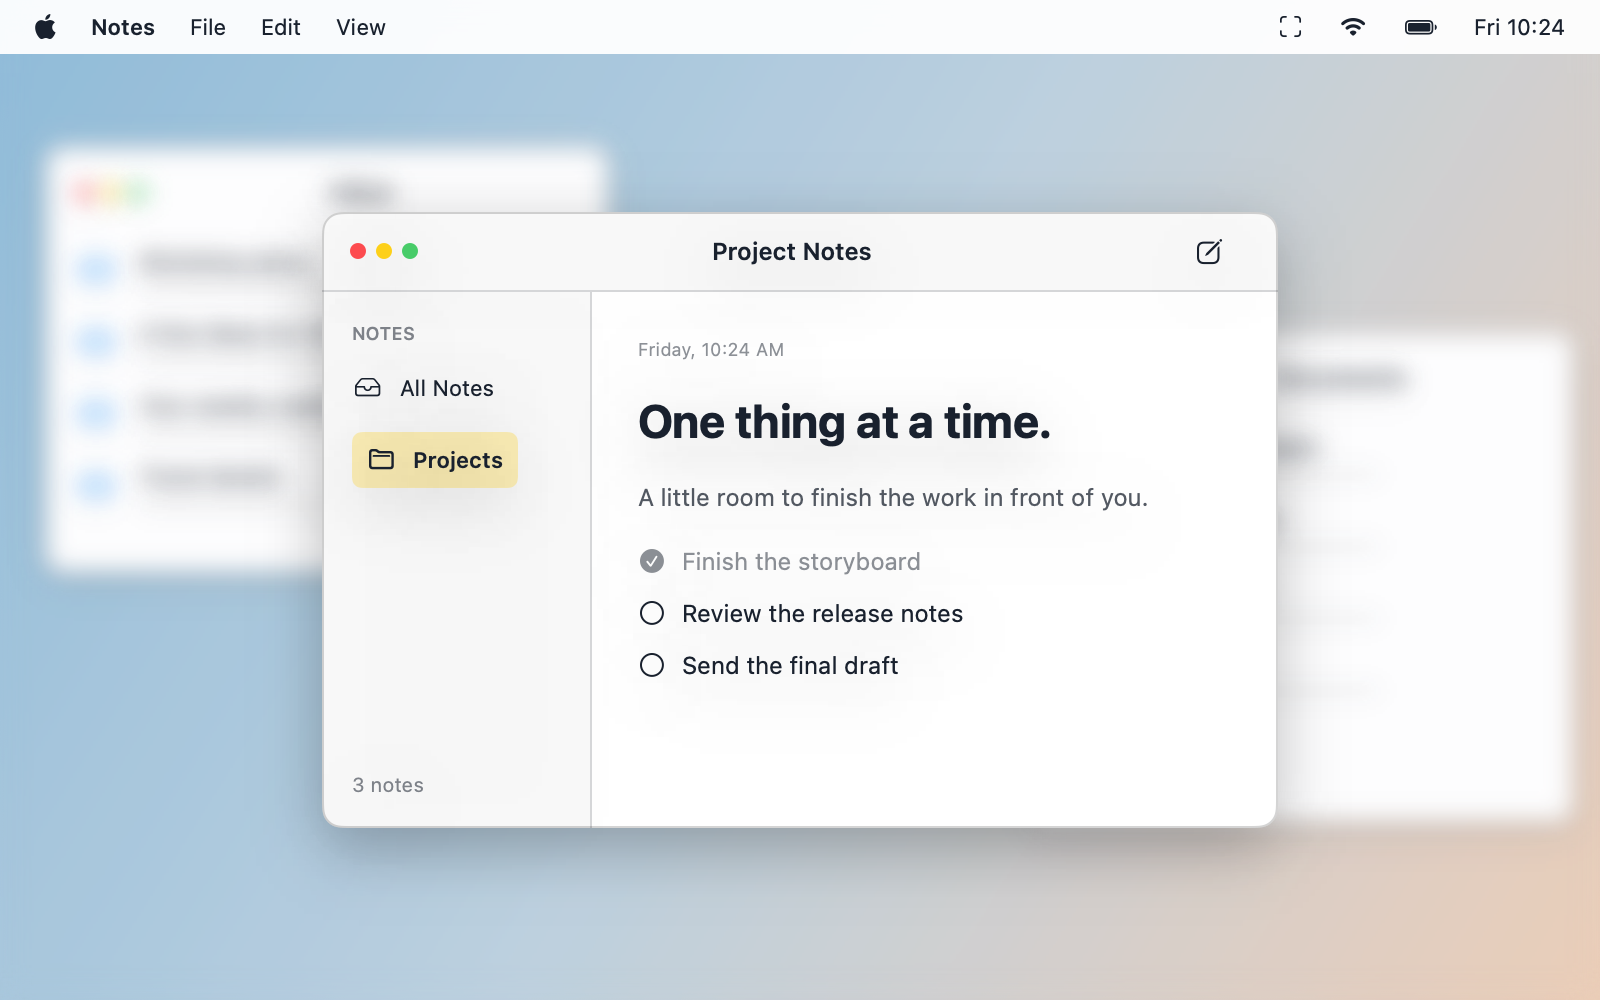
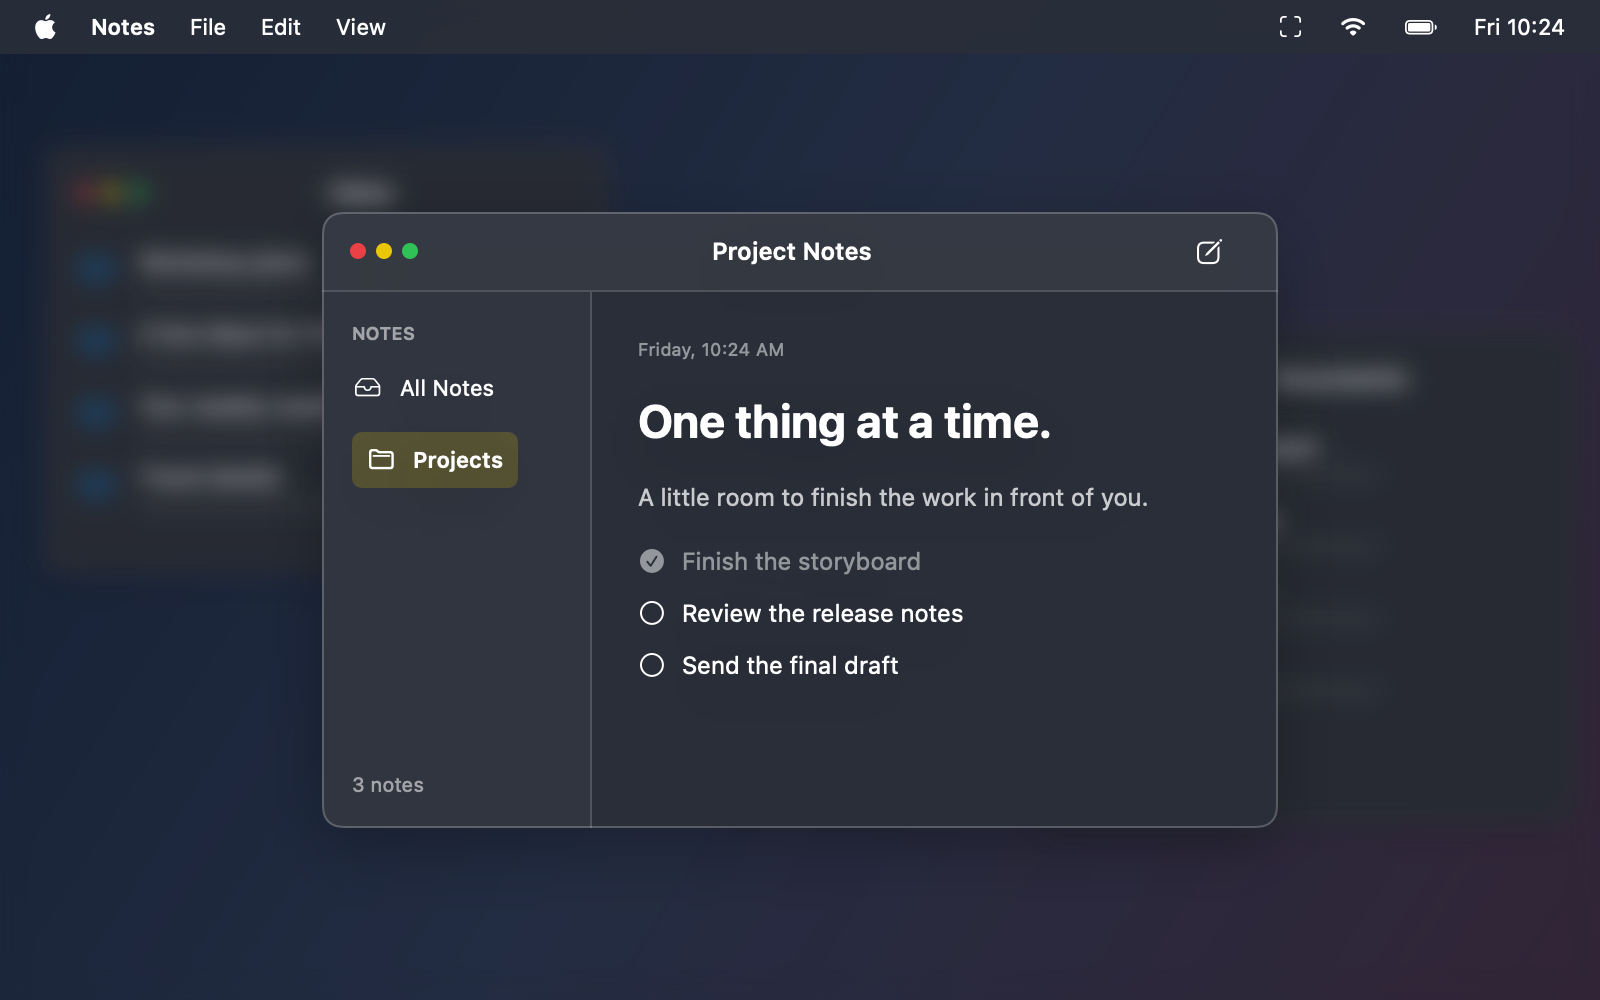
Toggle Focus Blur from its dock widget or optional menu bar menu, or press Command + Shift + B by default. Change the shortcut and enable the menu bar toggle in Settings → Window Switcher → Focus Blur.
Set Effect Strength from 25% to 100% in the same settings. Lower values reveal more of the background; higher values make the focused window stand out more.
The effect and dock glyph match Liquid Glass, CDE, and Windows 95, including light and dark appearances. With macOS Reduce Transparency enabled, Focus Blur uses a simple tint.
Focus Blur pauses in Mission Control and on displays covered by a full-screen window, so other displays can keep their focus effect. It returns when those conditions end.
Clock
Local time, world clocks, and alarms in one place. Choose an analog or digital face, then open the panel to compare cities or start a focus timer.
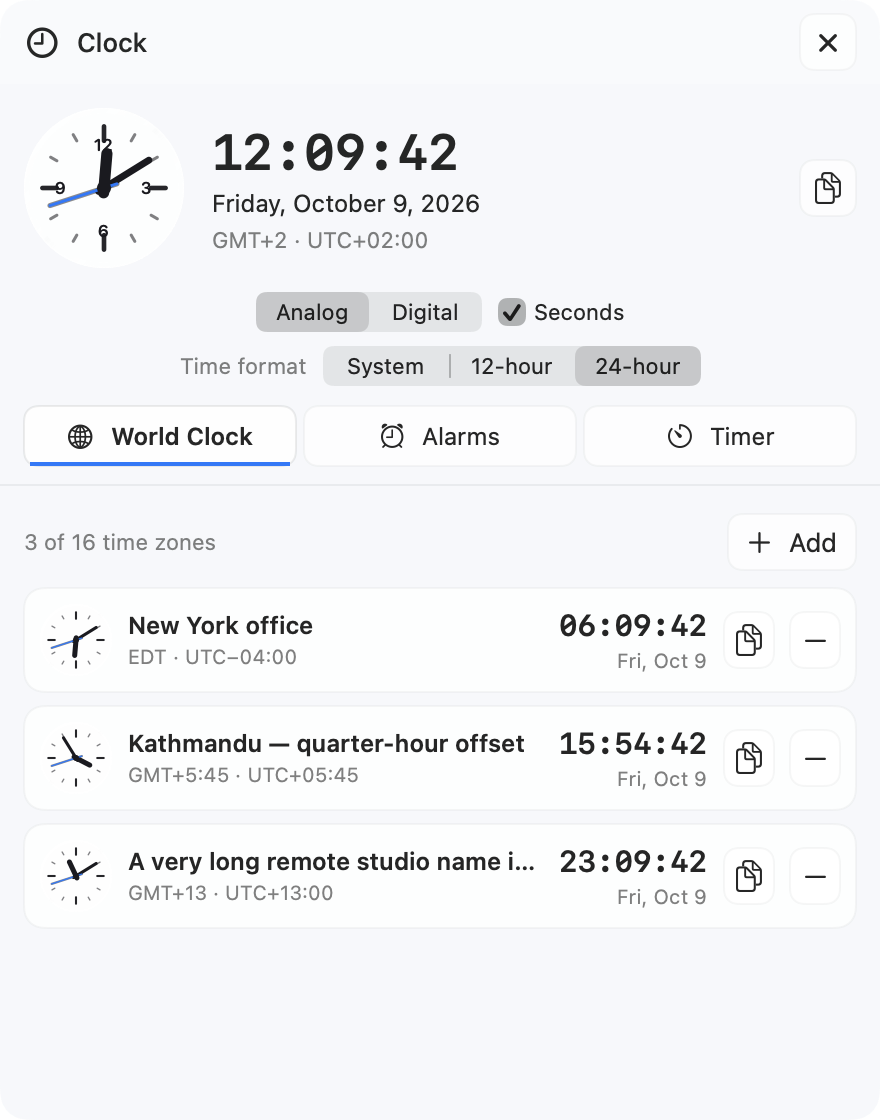
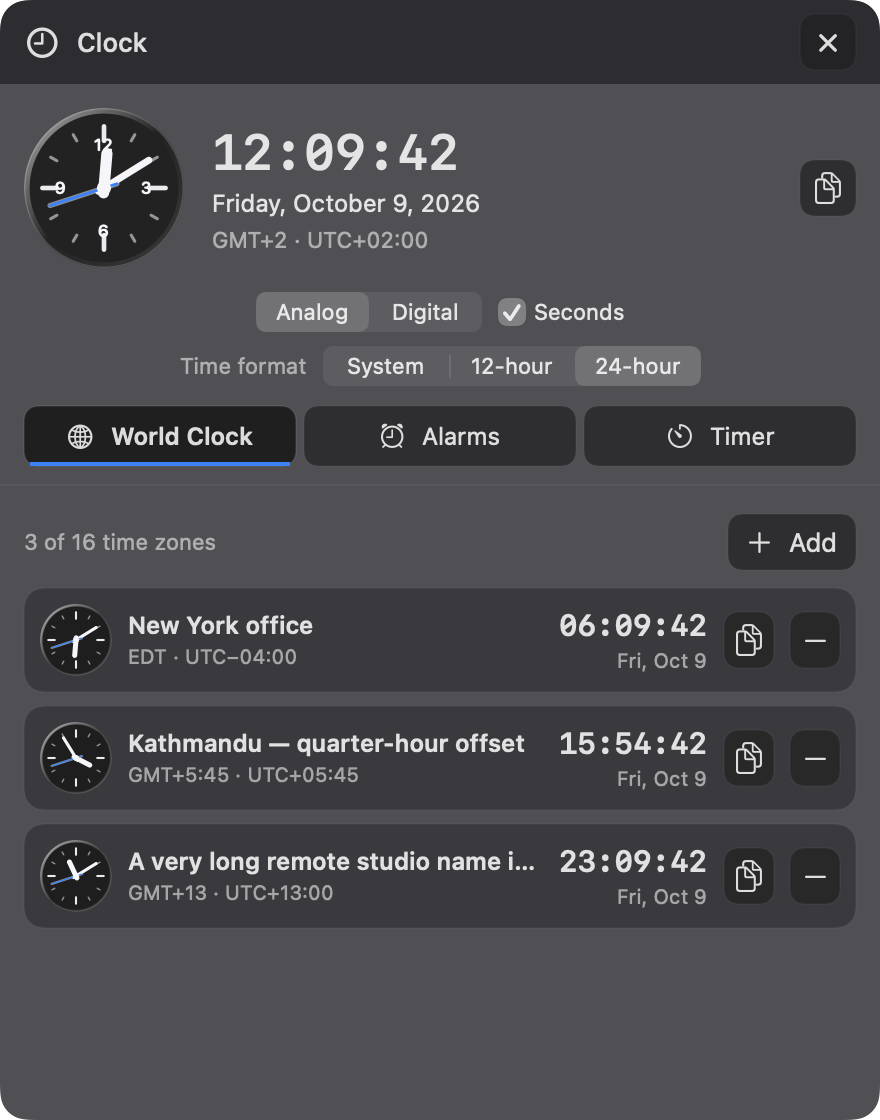
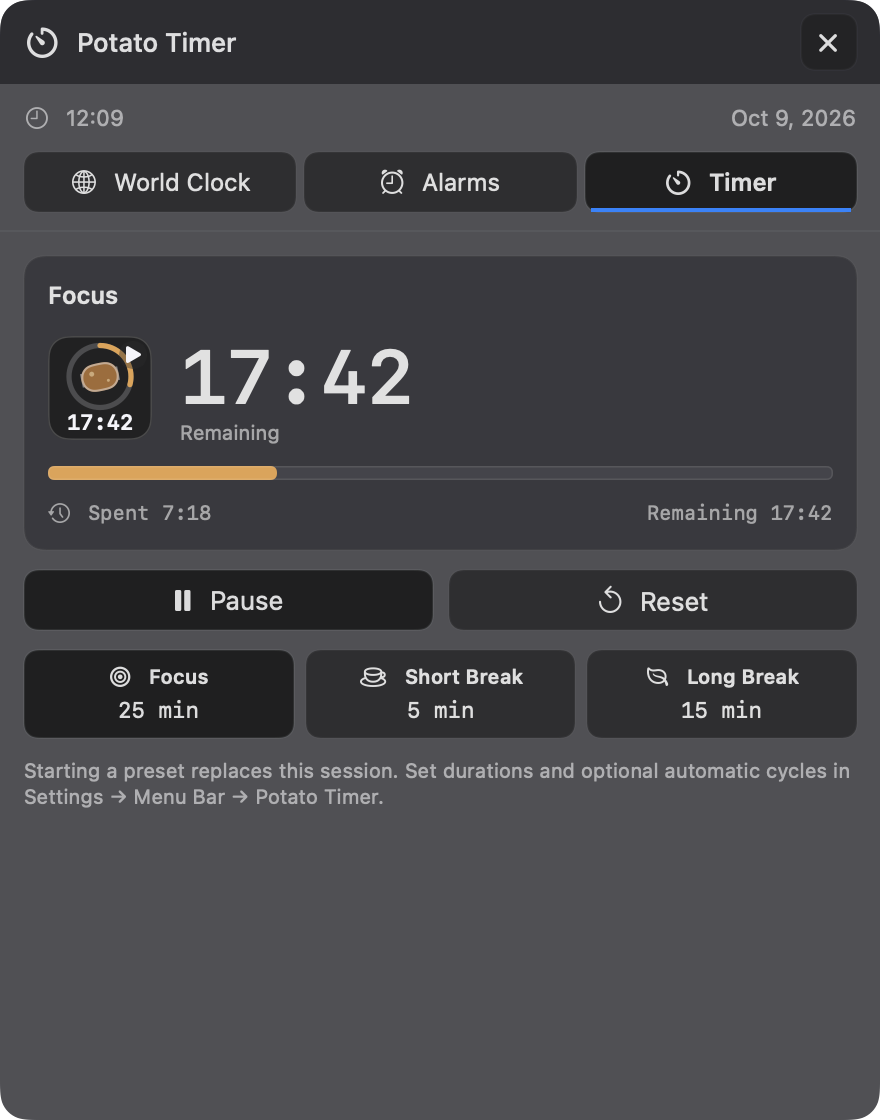
Analog with seconds is the default. Switch the dock face to digital, follow your Mac’s time format, or choose 12-hour or 24-hour time. Show or hide seconds in both the dock and panel; hiding seconds changes clock display updates from once a second to once a minute. The panel also shows your local date, time zone, and UTC offset.
Save up to 16 world clocks. Search by city, region, or time zone, add your own labels, and compare each clock’s time, UTC offset, and date. Day differences help when another city is ahead of or behind your local date. Copy a city’s time or remove it directly from its row; saved clocks return when you relaunch Docktopus.
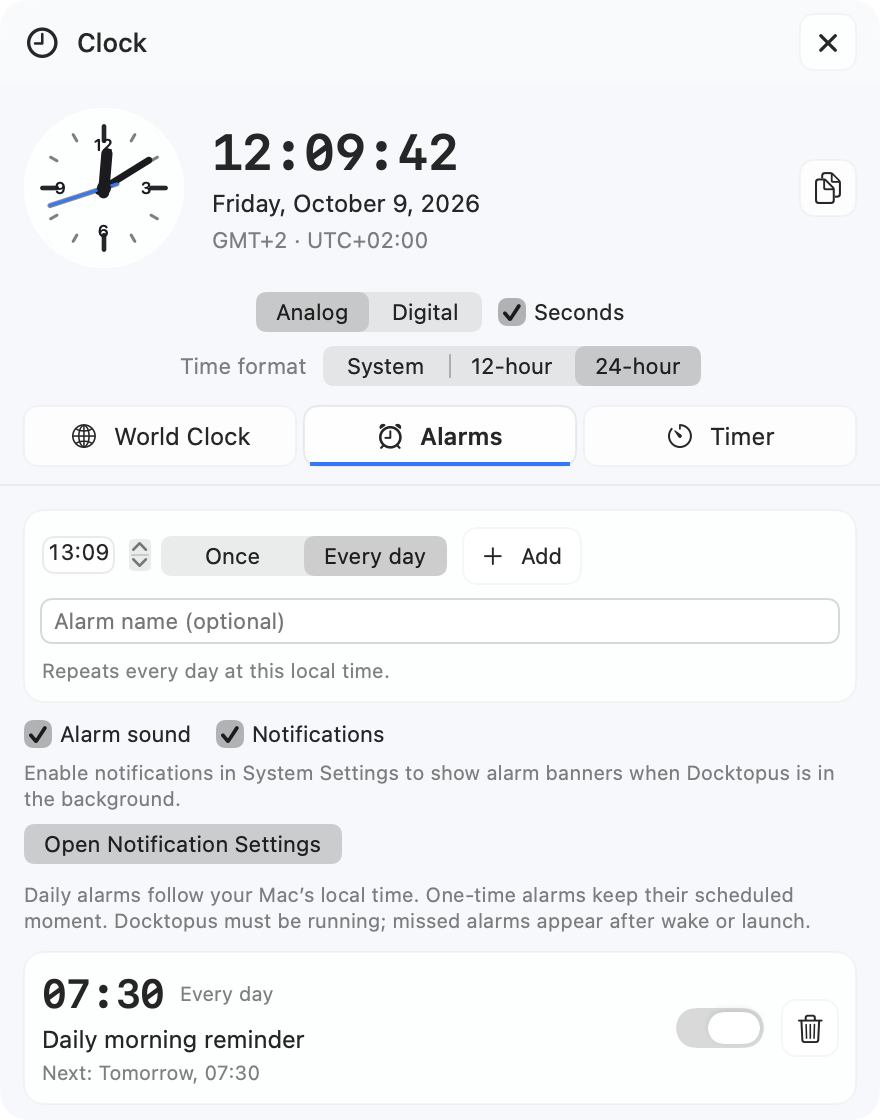
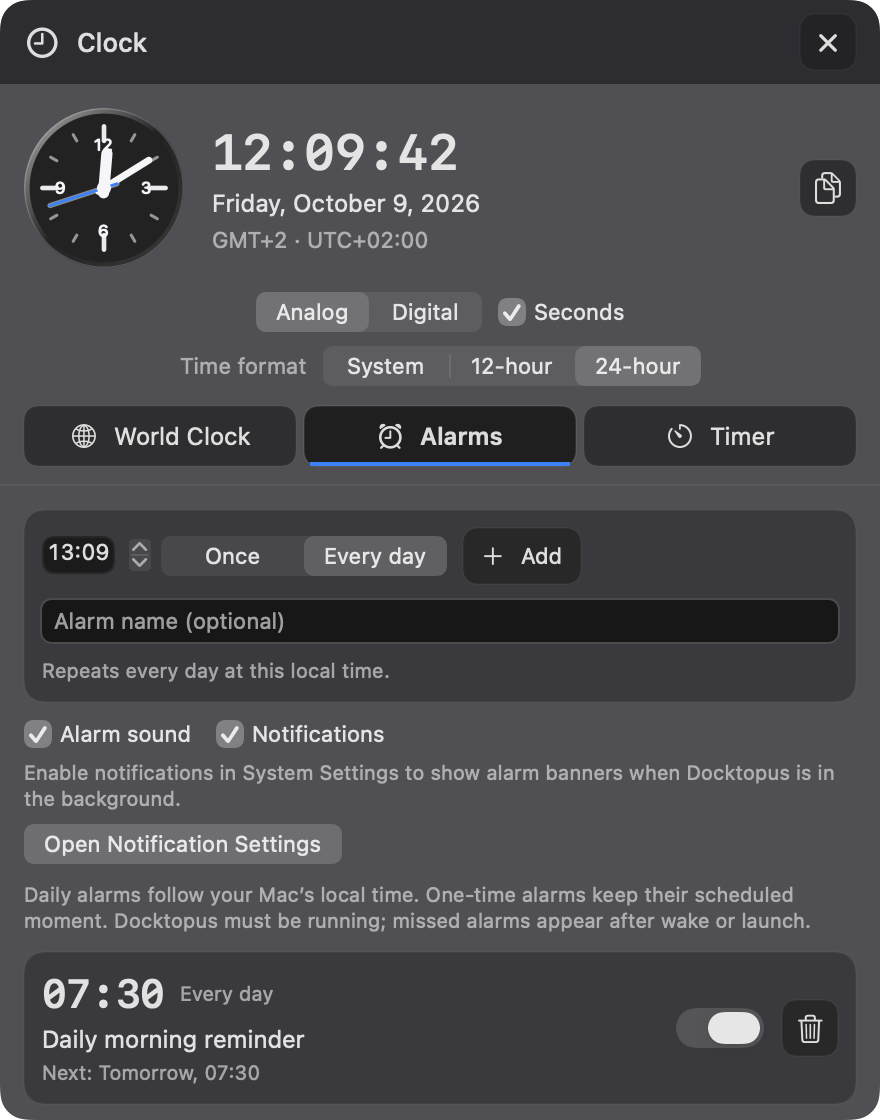
Add up to 32 named alarms and see the next due time. Choose Once for the next occurrence of the selected time, or Every day for a daily reminder. Daily alarms follow your Mac’s local time; one-time alarms keep their scheduled moment if your time zone changes. Enable, disable, or delete alarms from the list.
Due and missed alarms stay in the panel until you dismiss them or snooze for 5 minutes. The dock badge counts pending alarms. Alarm schedules and pending reminders are saved, with missed alarms reconciled after wake, a clock change, or launch. Alarm sound and macOS notifications have independent controls, with a link to Notification Settings when access is blocked.
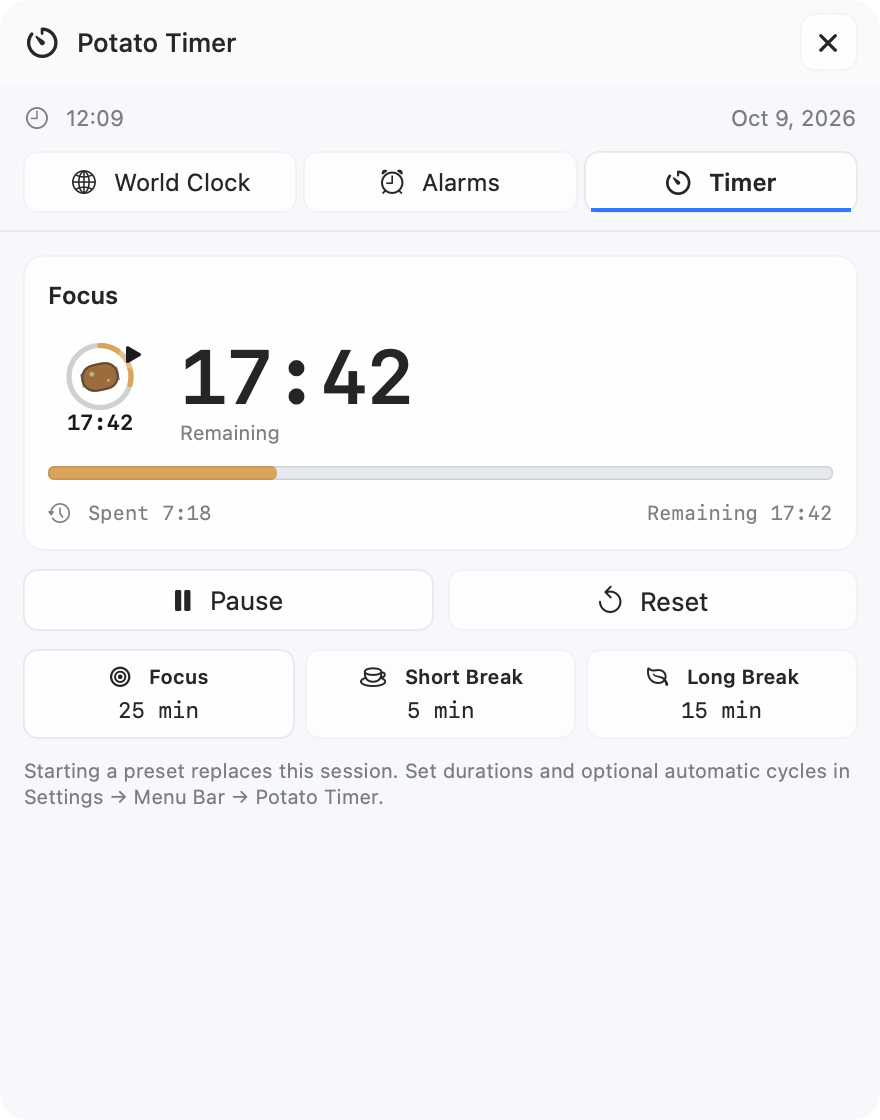
Start with the 25-minute Focus, 5-minute Short Break, and 15-minute Long Break defaults, or set your own durations and optional automatic cycles. Pause, resume, or reset while spent time, remaining time, and progress stay visible. This is the same Potato Timer used by the dock widget and optional menu bar item. Choosing a preset replaces the current session; restoring timers after restarting Docktopus is opt-in in settings. Explore Potato Timer controls and cycles.
Copy local time or a world clock’s time in your selected format, with visible confirmation or an error if copying fails. Hover the dock clock for time and date; VoiceOver exposes the current time and pending-alarm count. Activate the focused dock widget with Return or Space, and press Esc to close the panel. Display and alarm preferences are saved in the existing settings.
Alarms require Docktopus to be running and do not wake a sleeping Mac. Missed alarms appear after wake or the next launch. macOS notification permission and system notification settings control banner delivery; the Clock panel remains available when notifications are blocked.
Calendar
Check your agenda, browse a month, or join the next meeting from the dock. Choose the calendars you want to see; macOS Calendar access keeps events under your control.
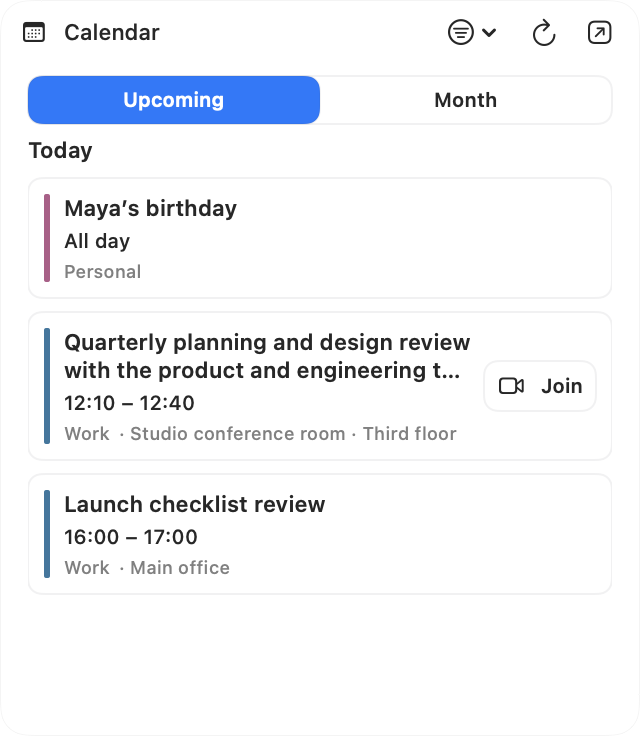
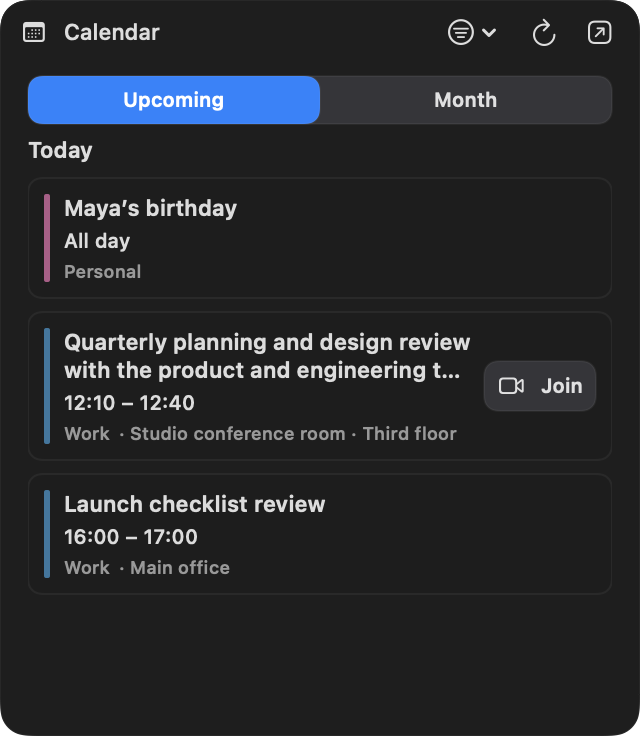
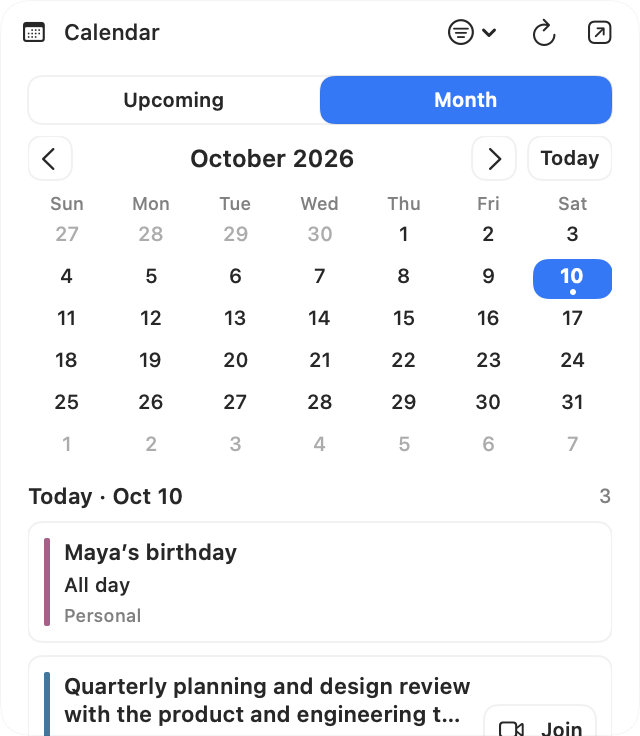
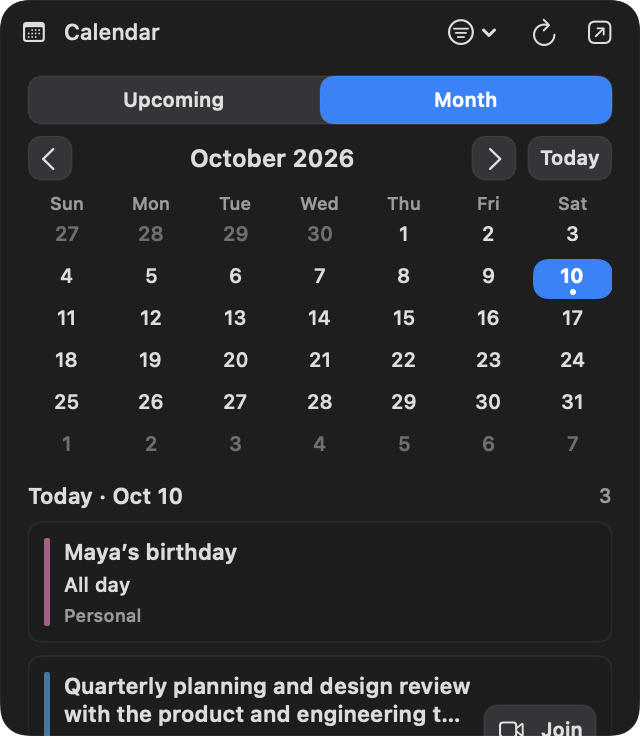
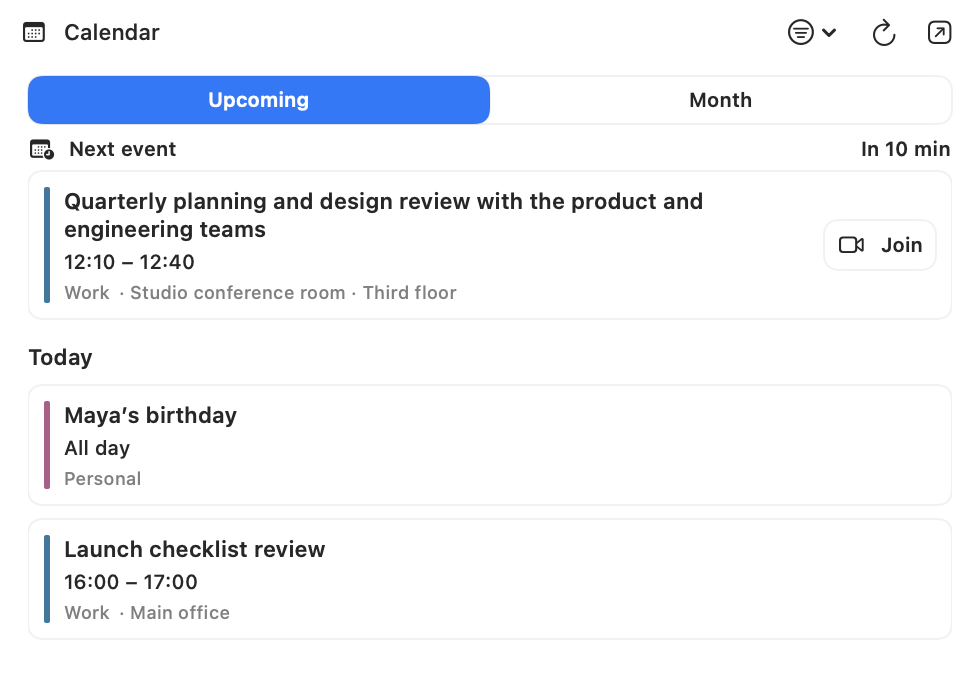
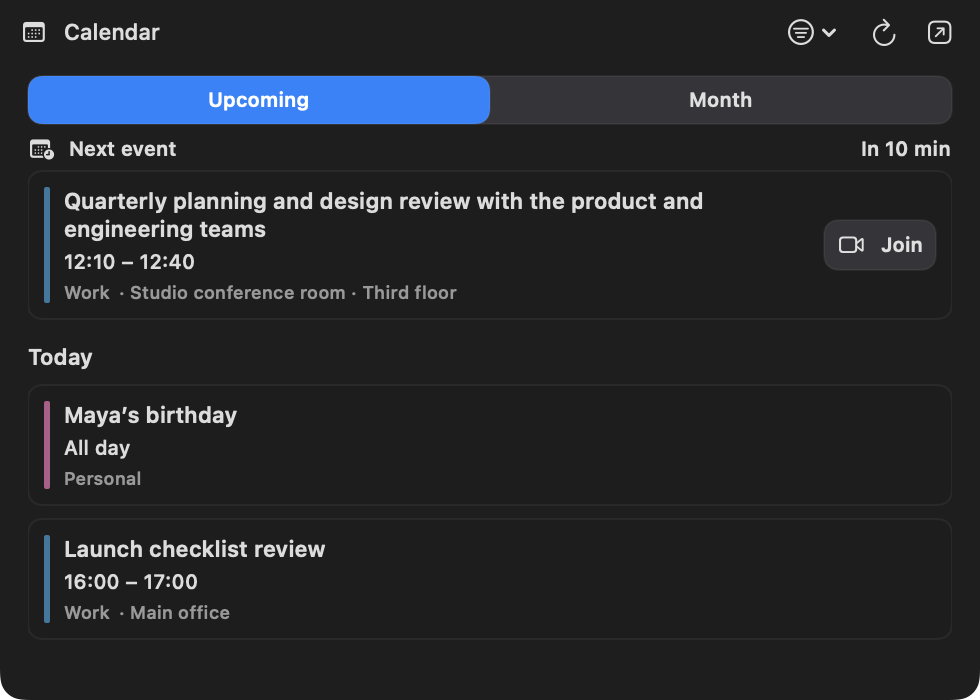
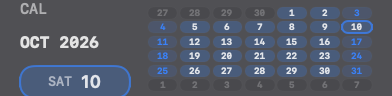
Upcoming groups the next two weeks by day, with all-day events, timed events, calendar names and colors, and locations where available. Month offers previous and next navigation, a Today shortcut, and day selection with event dots. Select a day to see events that overlap it, including multi-day events.
Use the source filter to include or hide individual calendars, or choose Show All Calendars to reset it. Your selection is saved and shared across the dock, menu bar, and Island. Cancelled events and invitations you have declined are omitted. Refresh checks for changes; updates also follow Calendar changes, wake, and local date or time-zone changes.
Click an event to open it in the macOS Calendar app, or use Open Calendar from the panel header. Join appears for recognized meeting links in an event’s URL, location, or notes, including Zoom, Google Meet, Microsoft Teams, and Webex. Recurring events open their matching occurrence when available, with the selected date as a fallback. Create and edit events in Calendar.
Enable Dynamic Island in Settings → Dynamic Island to show a compact countdown for an upcoming timed event. Calendar previews start 15 minutes before by default; choose 5, 15, 30, or 60 minutes, or turn them off. The strip shows Now while an event is in progress. Click it to pin the expanded Calendar activity, with event details, the agenda, source filters, and meeting actions.
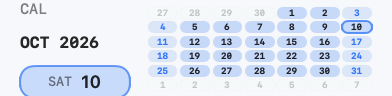
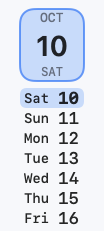
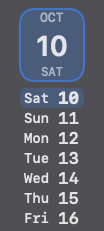
The compact Calendar Preview adapts to bottom and side docks; narrow Liquid Glass side docks show a seven-day list. Hover for a quick agenda, or click the Calendar tile or preview to keep the panel open. Focused dock widgets support Return or Space; Esc closes the panel. In a focused Island, ⌥7 selects Calendar.
Calendar reads events through macOS Calendar access. Choose Allow Calendar Access in the panel to request permission; if access is denied, use Open System Settings to enable Calendar for Docktopus. Opening individual events may also require macOS Automation permission for Calendar. Loading, empty calendars, empty filters, and failed actions have visible states, so you can refresh, restore sources, or try again.
All-day events remain in the calendar views and never trigger the compact Island countdown. Brightness or volume feedback and incoming notification previews temporarily take priority there. Calendar previews require Docktopus to be running and calendar access to be granted; Dynamic Island itself is off by default.




Now Playing
Keep the current track and playback controls beside your apps. Artwork, progress, and available commands follow the player reported by macOS.
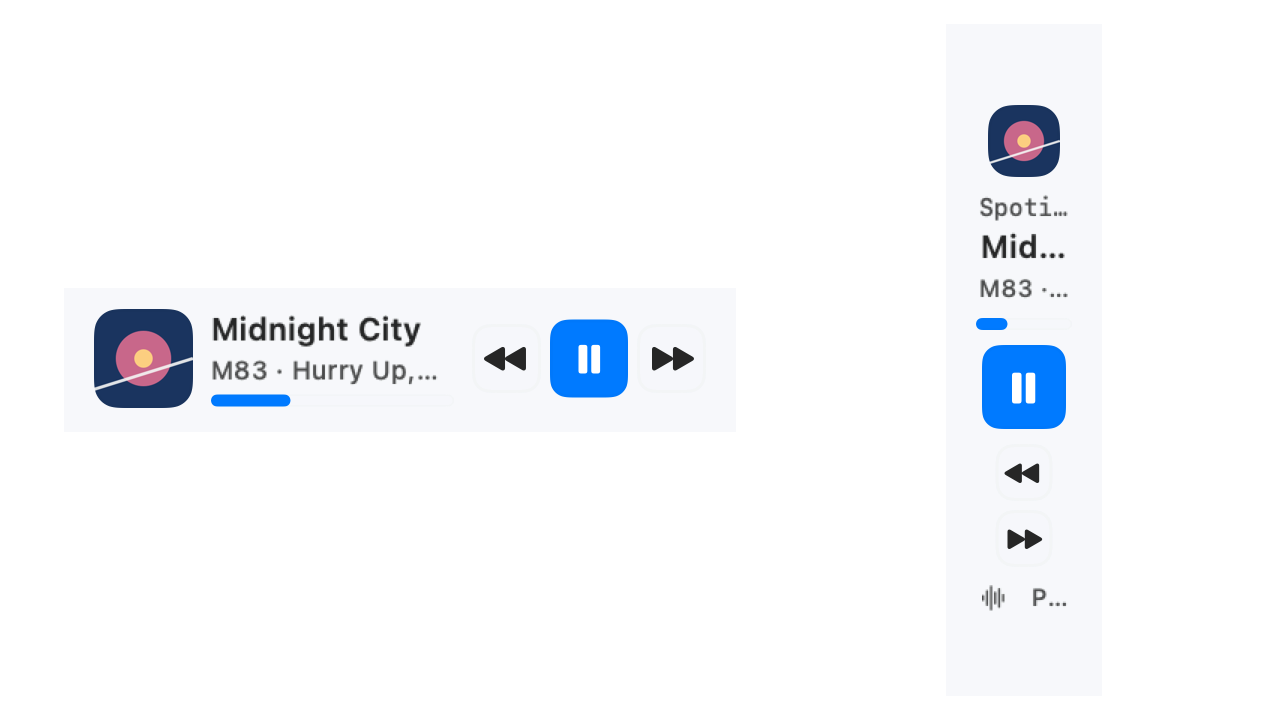
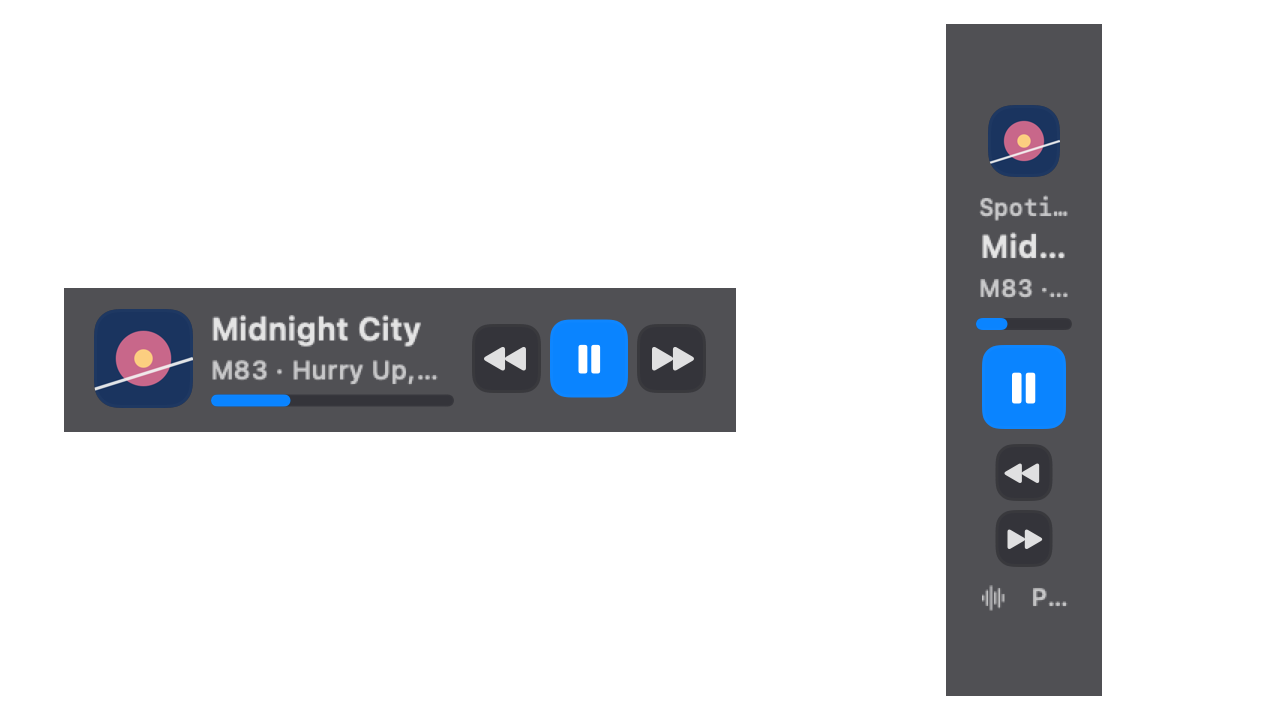
See the title, artist, album, and artwork when the source provides them. Now Playing works with audio and video apps that publish macOS Now Playing information; metadata and control support depend on the player. An app icon or media symbol fills in when artwork is unavailable.
Use previous, play/pause, and next where the current source supports those commands. Controls show an updating state while a command is being sent and prevent overlapping requests. While media controls are shown, a failed playback request is marked on play/pause; hover that control for details. Refresh media information to check the source before trying again.
A read-only progress bar appears when the source reports a duration and the layout has room. Roomier layouts also show elapsed time. Playback state remains available when duration is unknown; the progress bar does not seek or scrub through the track.
Click the artwork or title to bring the running source app forward. Hover shortened metadata for the full track details. Right-click for Open, playback commands, and Refresh media information. When nothing is playing or media information is unavailable, the widget provides a Refresh button.
Compact layouts keep playback controls available while larger slots show more metadata and artwork. Side docks arrange controls to fit their available width. Choose Now Playing in the panel editor, then adjust Now Playing Width in Themes → Widgets; this sets the widget’s width in a horizontal dock and its height in a side dock.
Liquid Glass, CDE, and Windows 95 retain their own styling in light and dark presets. The widget supports Increase Contrast and Reduce Transparency, with full metadata and playback progress, where shown, available to VoiceOver. Progress updates pause while hidden, and shared polling stops when no Now Playing surface is visible.
Desktop Switcher
Move between your macOS desktops from compact dock tiles. The current desktop stays easy to spot in horizontal and side layouts. Switching requires Accessibility access.

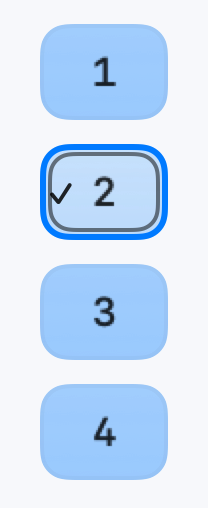

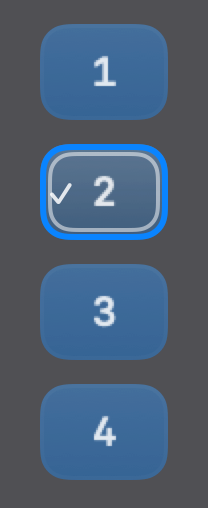
A checkmark and outline identify your current regular desktop. Click another tile to switch through Mission Control, including when a full-screen app is active. A progress indicator marks the desktop being selected while the switch is underway.
Horizontal docks arrange desktops in two compact rows, with scrolling and previous/more controls when the list outgrows the slot. Side docks show up to six desktops at a time in a scrollable column. The current desktop is brought into view when it changes.
Hover a tile for its full desktop name, including when a narrow tile shows only a number. Right-click the widget for a context menu with every listed desktop and Refresh Desktops to update the list after changing your setup.
With macOS Keyboard navigation enabled, focus a desktop tile and use the arrow keys to move between tiles. Press Return or Space to select the focused desktop. A separate focus outline keeps keyboard position clear.
If switching fails, the widget shows recovery actions such as Retry or Refresh. A Permissions action helps when Accessibility access is needed; enable access for Docktopus in System Settings, then retry the switch. Hover the warning for its full message.
Liquid Glass, CDE, and Windows 95 each keep their own tile styling in light and dark presets. Hover, selection, and keyboard focus stay distinct, with readable labels and full desktop names for assistive technology.
Xeyes
A small companion that follows your pointer. Choose Classic, Glass, Pixel, Robot, or Cat, with optional blinks and idle glances that respect Reduce Motion.
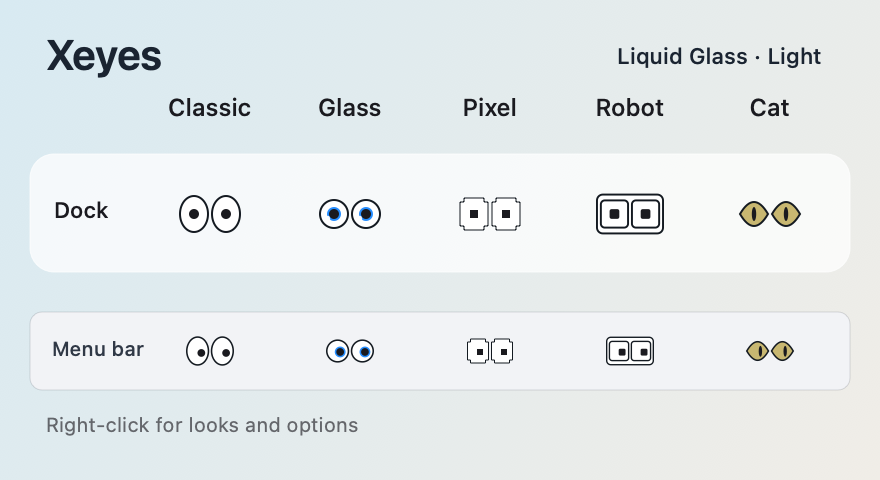
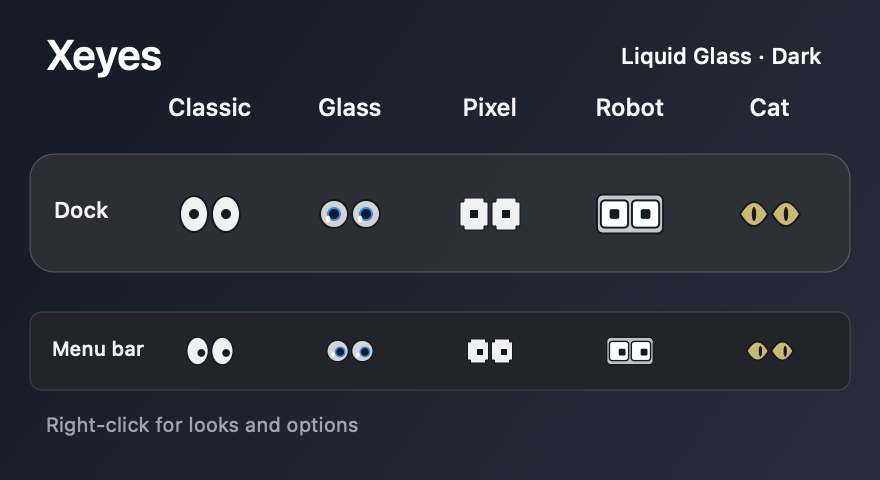
Dock and menu bar share the same look and theme colors. Right-click either to switch looks, pause pointer following, or enable occasional blinks and idle glances. Left-click stays decorative. Find shared preferences in Settings → Menu Bar → Xeyes.
07 / Make it yours
Start with a theme. Fine-tune the details, add a sound you like, and keep useful shortcuts within reach.
Choose a family to see it across this page. Every family includes light and dark app presets, its own icons, and matching controls.
Keyboard and mouse sounds
Give typing and mouse clicks a sound you enjoy. Preview soundpacks first, then choose separate volumes or mute them whenever you want.
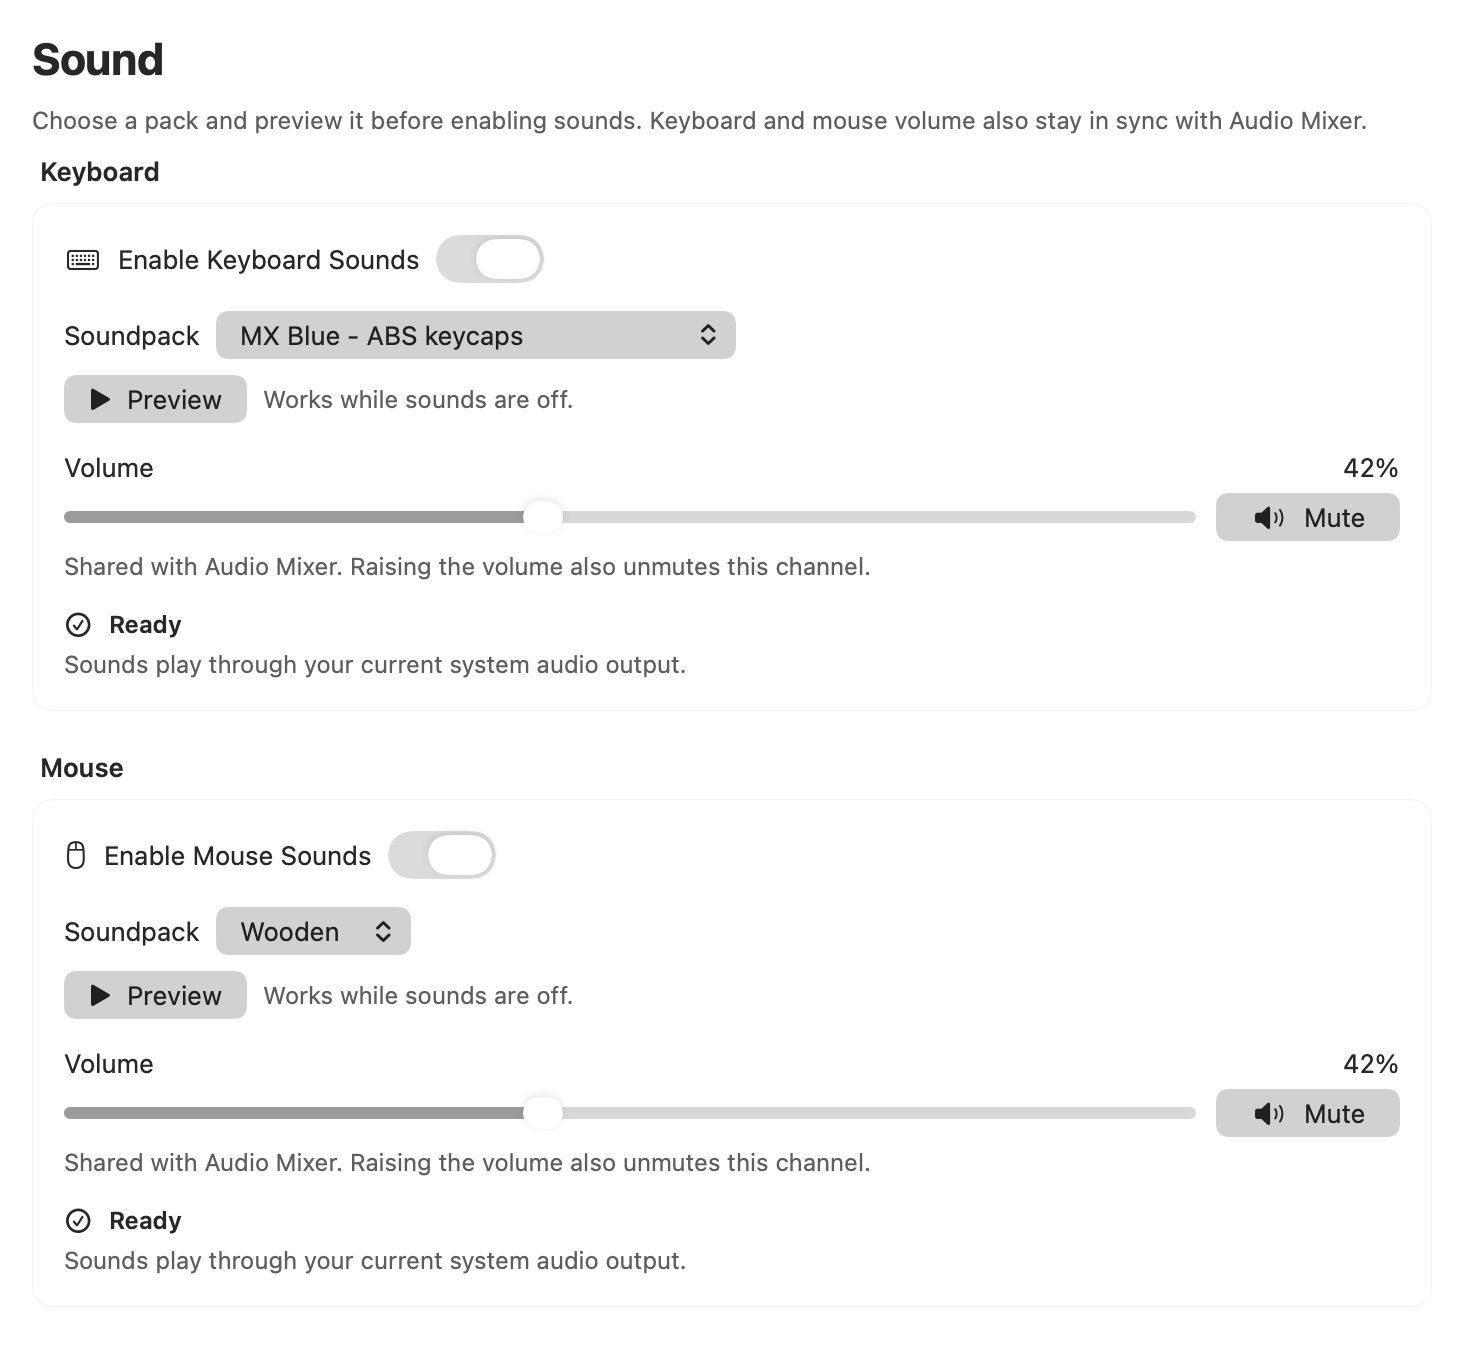
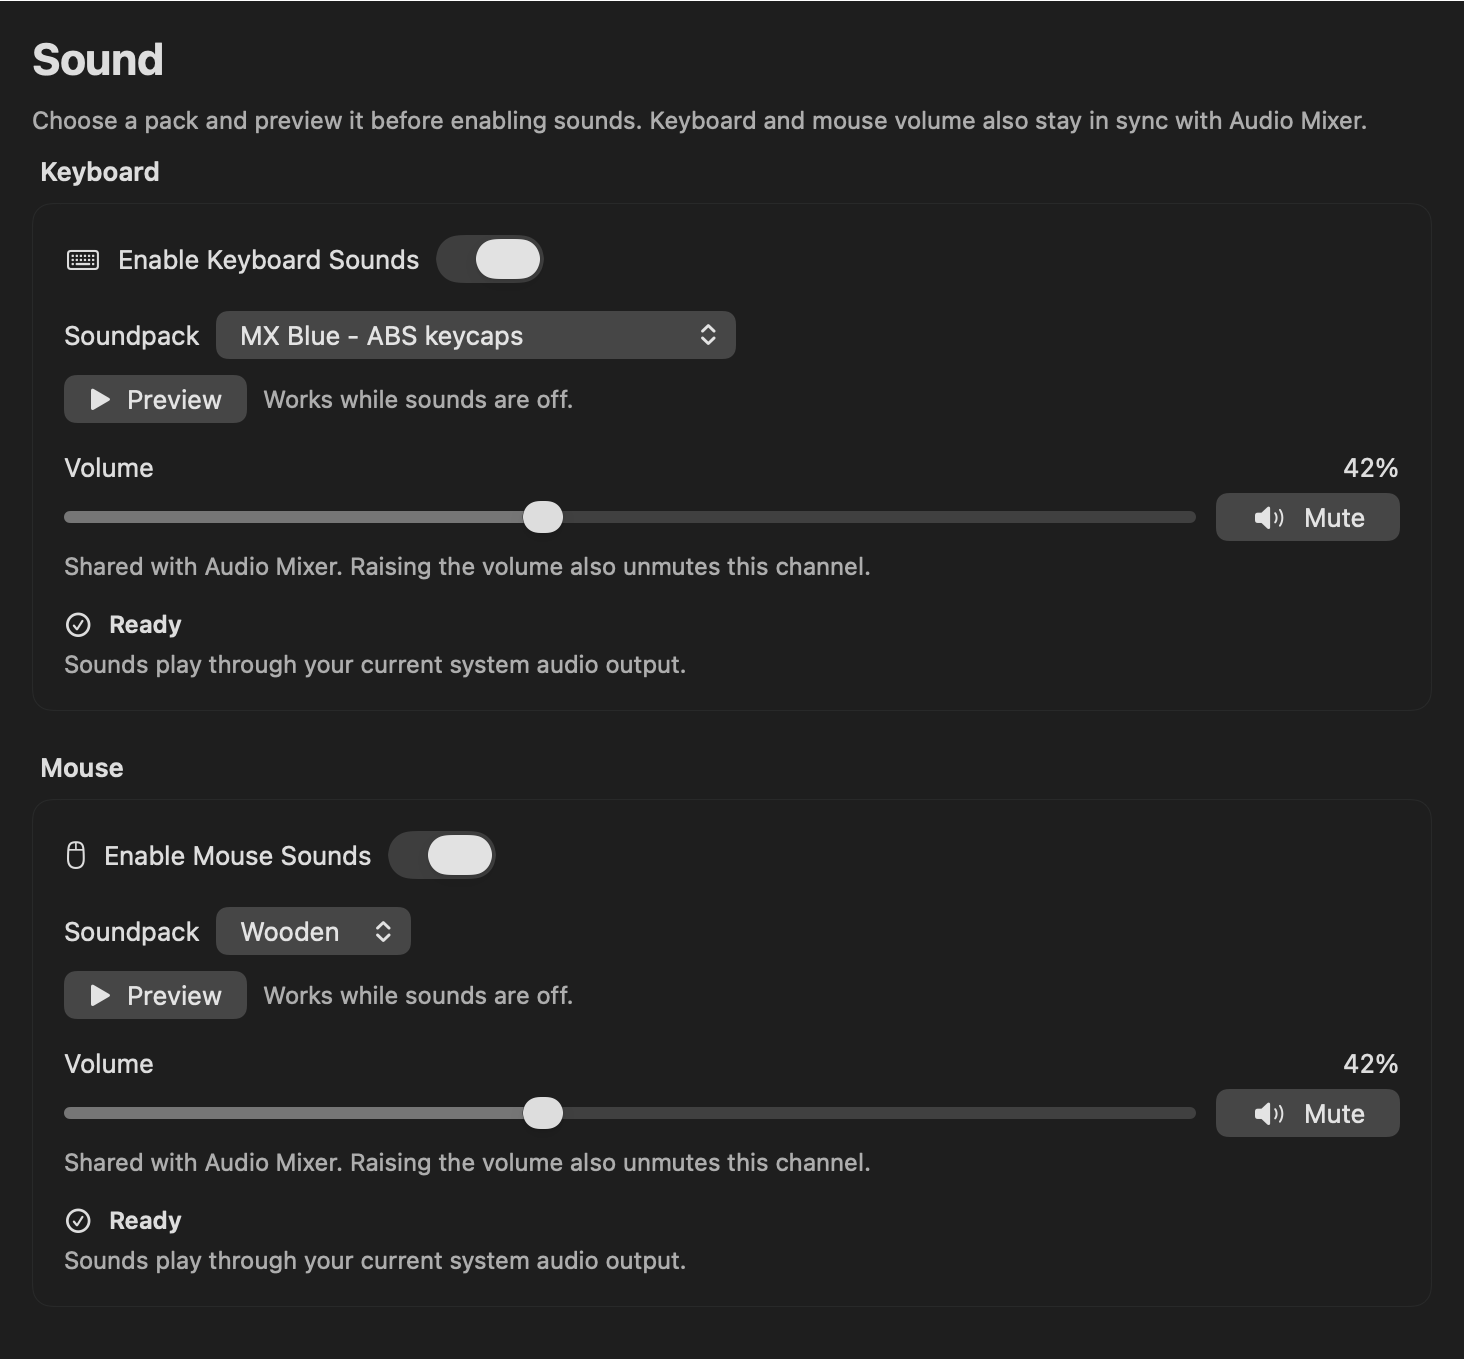
Open Settings → Sound to choose keyboard and mouse soundpacks.
Pick from 10 keyboard packs, including MX switch recordings with ABS or PBT keycaps, EG Crystal Purple, EG Oreo, and Topre Purple Hybrid. You can change the selected pack while keyboard sounds are off.
Choose from 4 mouse packs: Chat, Ping, Vibrate, and Wooden. Mouse sounds have their own pack selection and enable control, so you can use keyboard sounds, mouse sounds, or both.
Use Preview to hear a short keyboard or mouse sample, even with that channel off and without Input Monitoring permission. Stop Preview ends it early. Previews respect volume and mute and leave your saved enable settings unchanged.
Set each channel’s volume with a percentage slider, or mute and unmute it directly. These controls share their saved values with Audio Mixer. Raising the volume also unmutes the channel. Sounds play through your Mac’s current system output.
Enable keyboard and mouse sounds separately to hear your input across apps. Live input sounds require macOS Input Monitoring permission; Sound settings provide a shortcut to open it. Pack previews work without that permission.
Each channel shows whether it is off, loading, ready, muted, or needs attention. If a pack cannot load or input monitoring needs recovery, use Retry or open Diagnostics from the same card. Onboarding also offers a keyboard pack preview during setup.
macOS Tweaks
Make Finder, the Dock, screenshots, and other desktop details work your way. Browse 74 preferences across 18 categories, review pending changes, and apply them when ready.
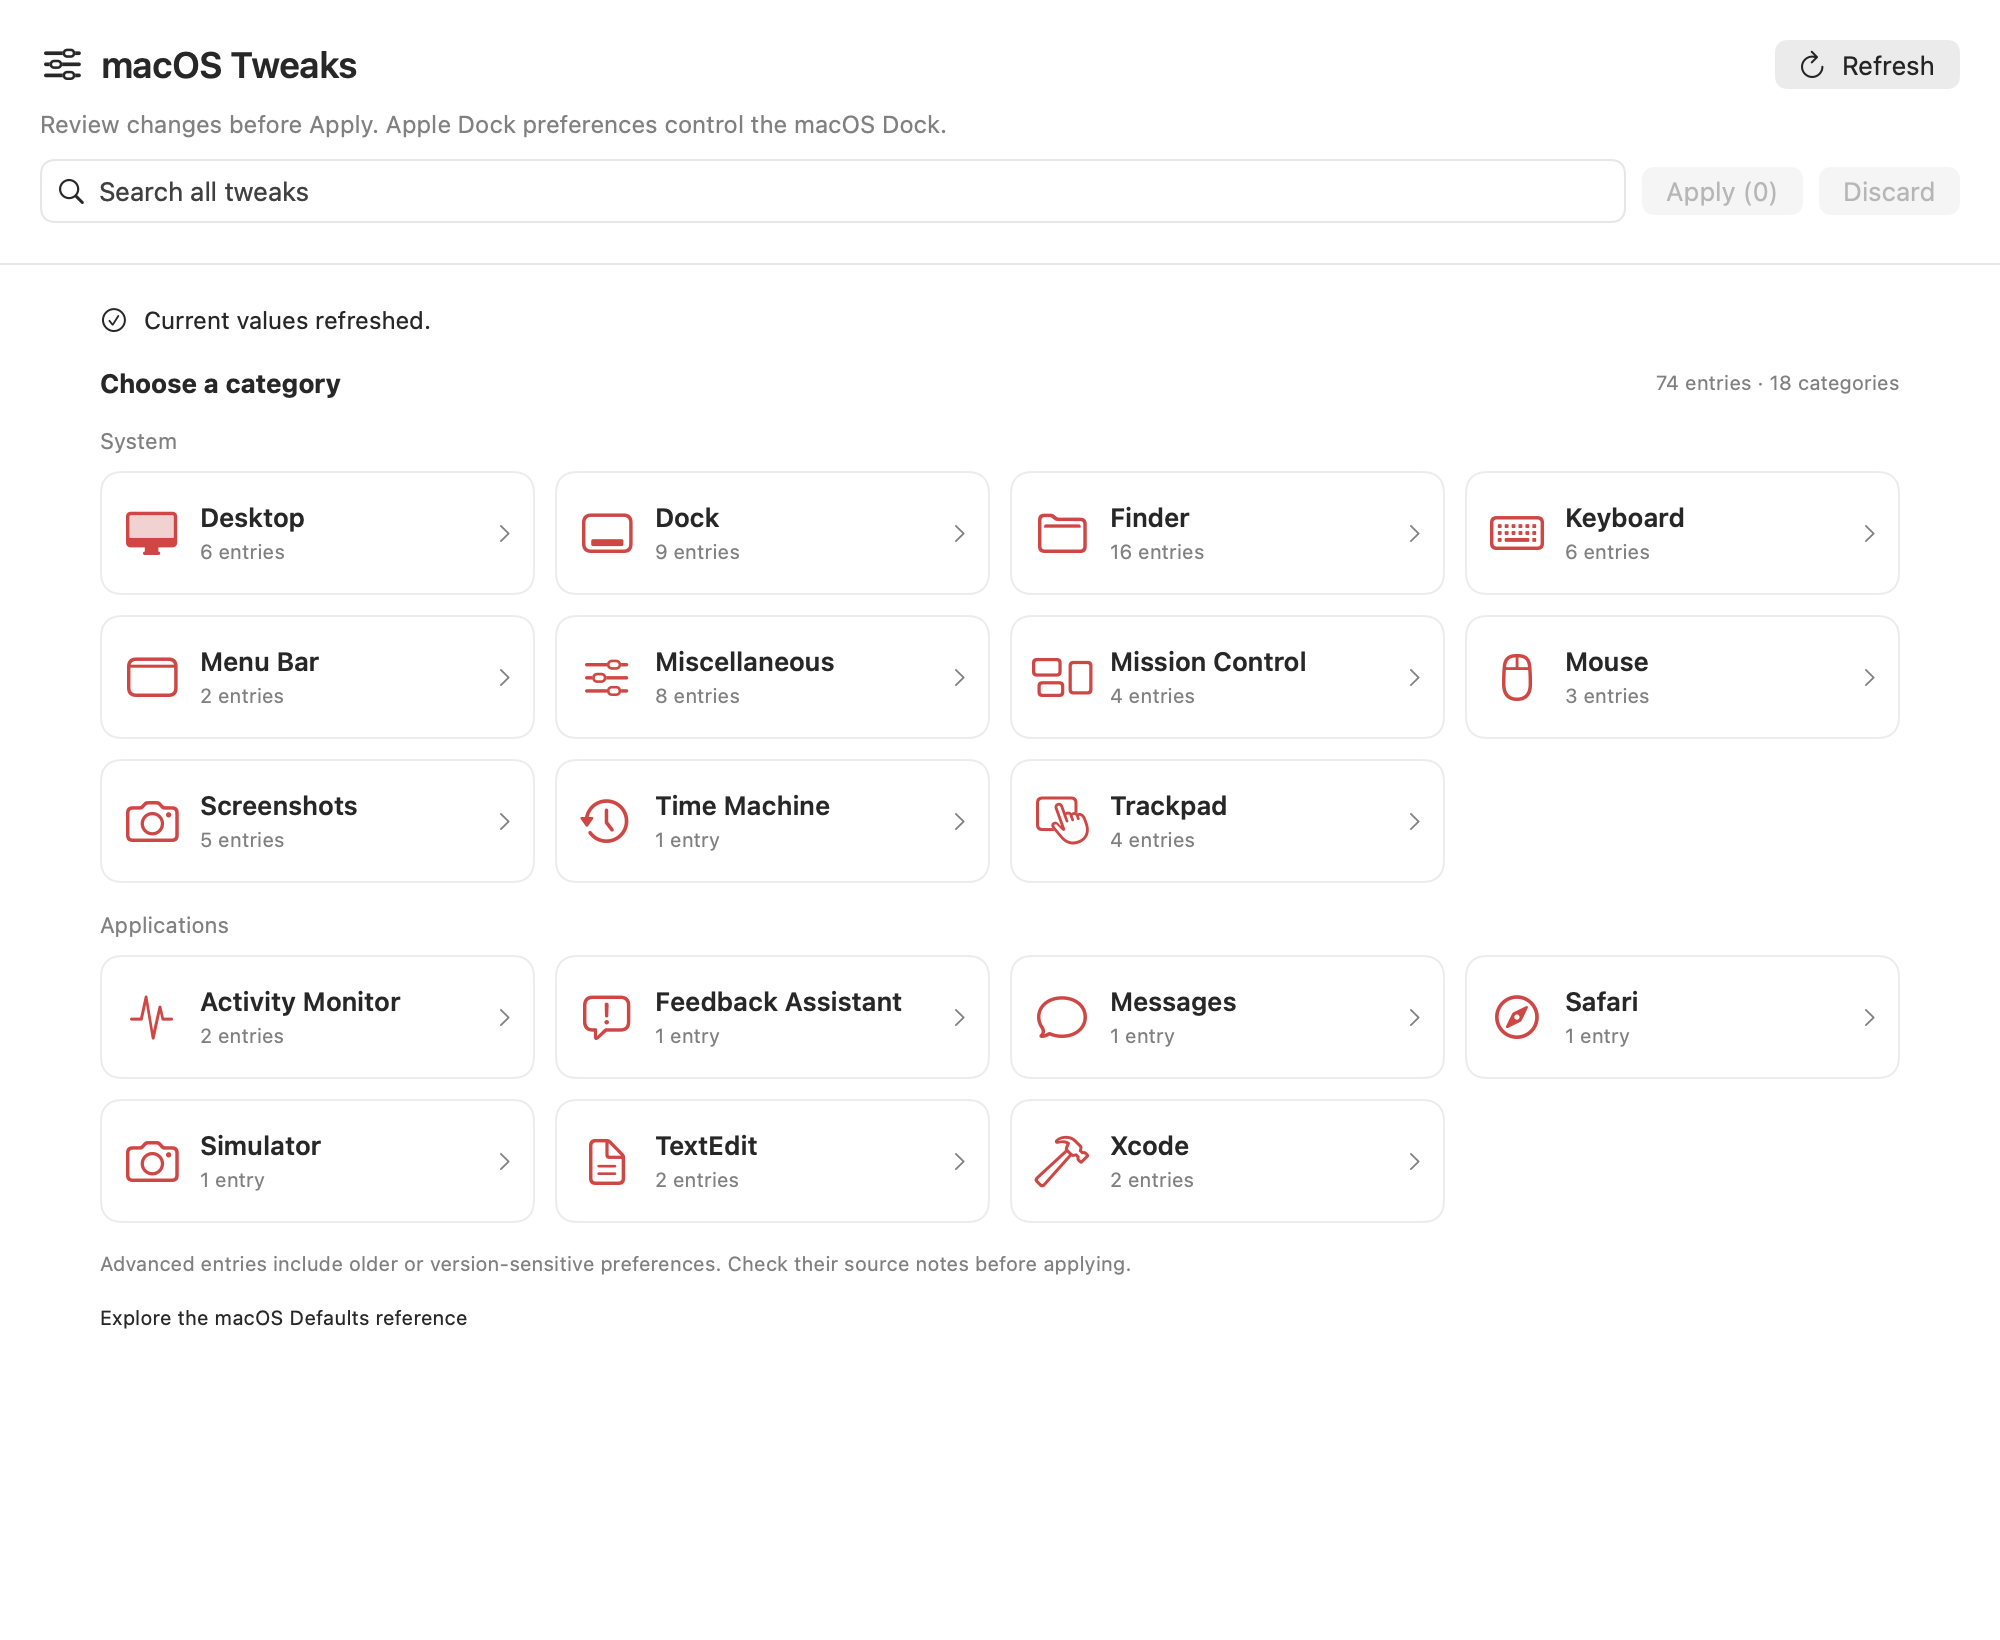
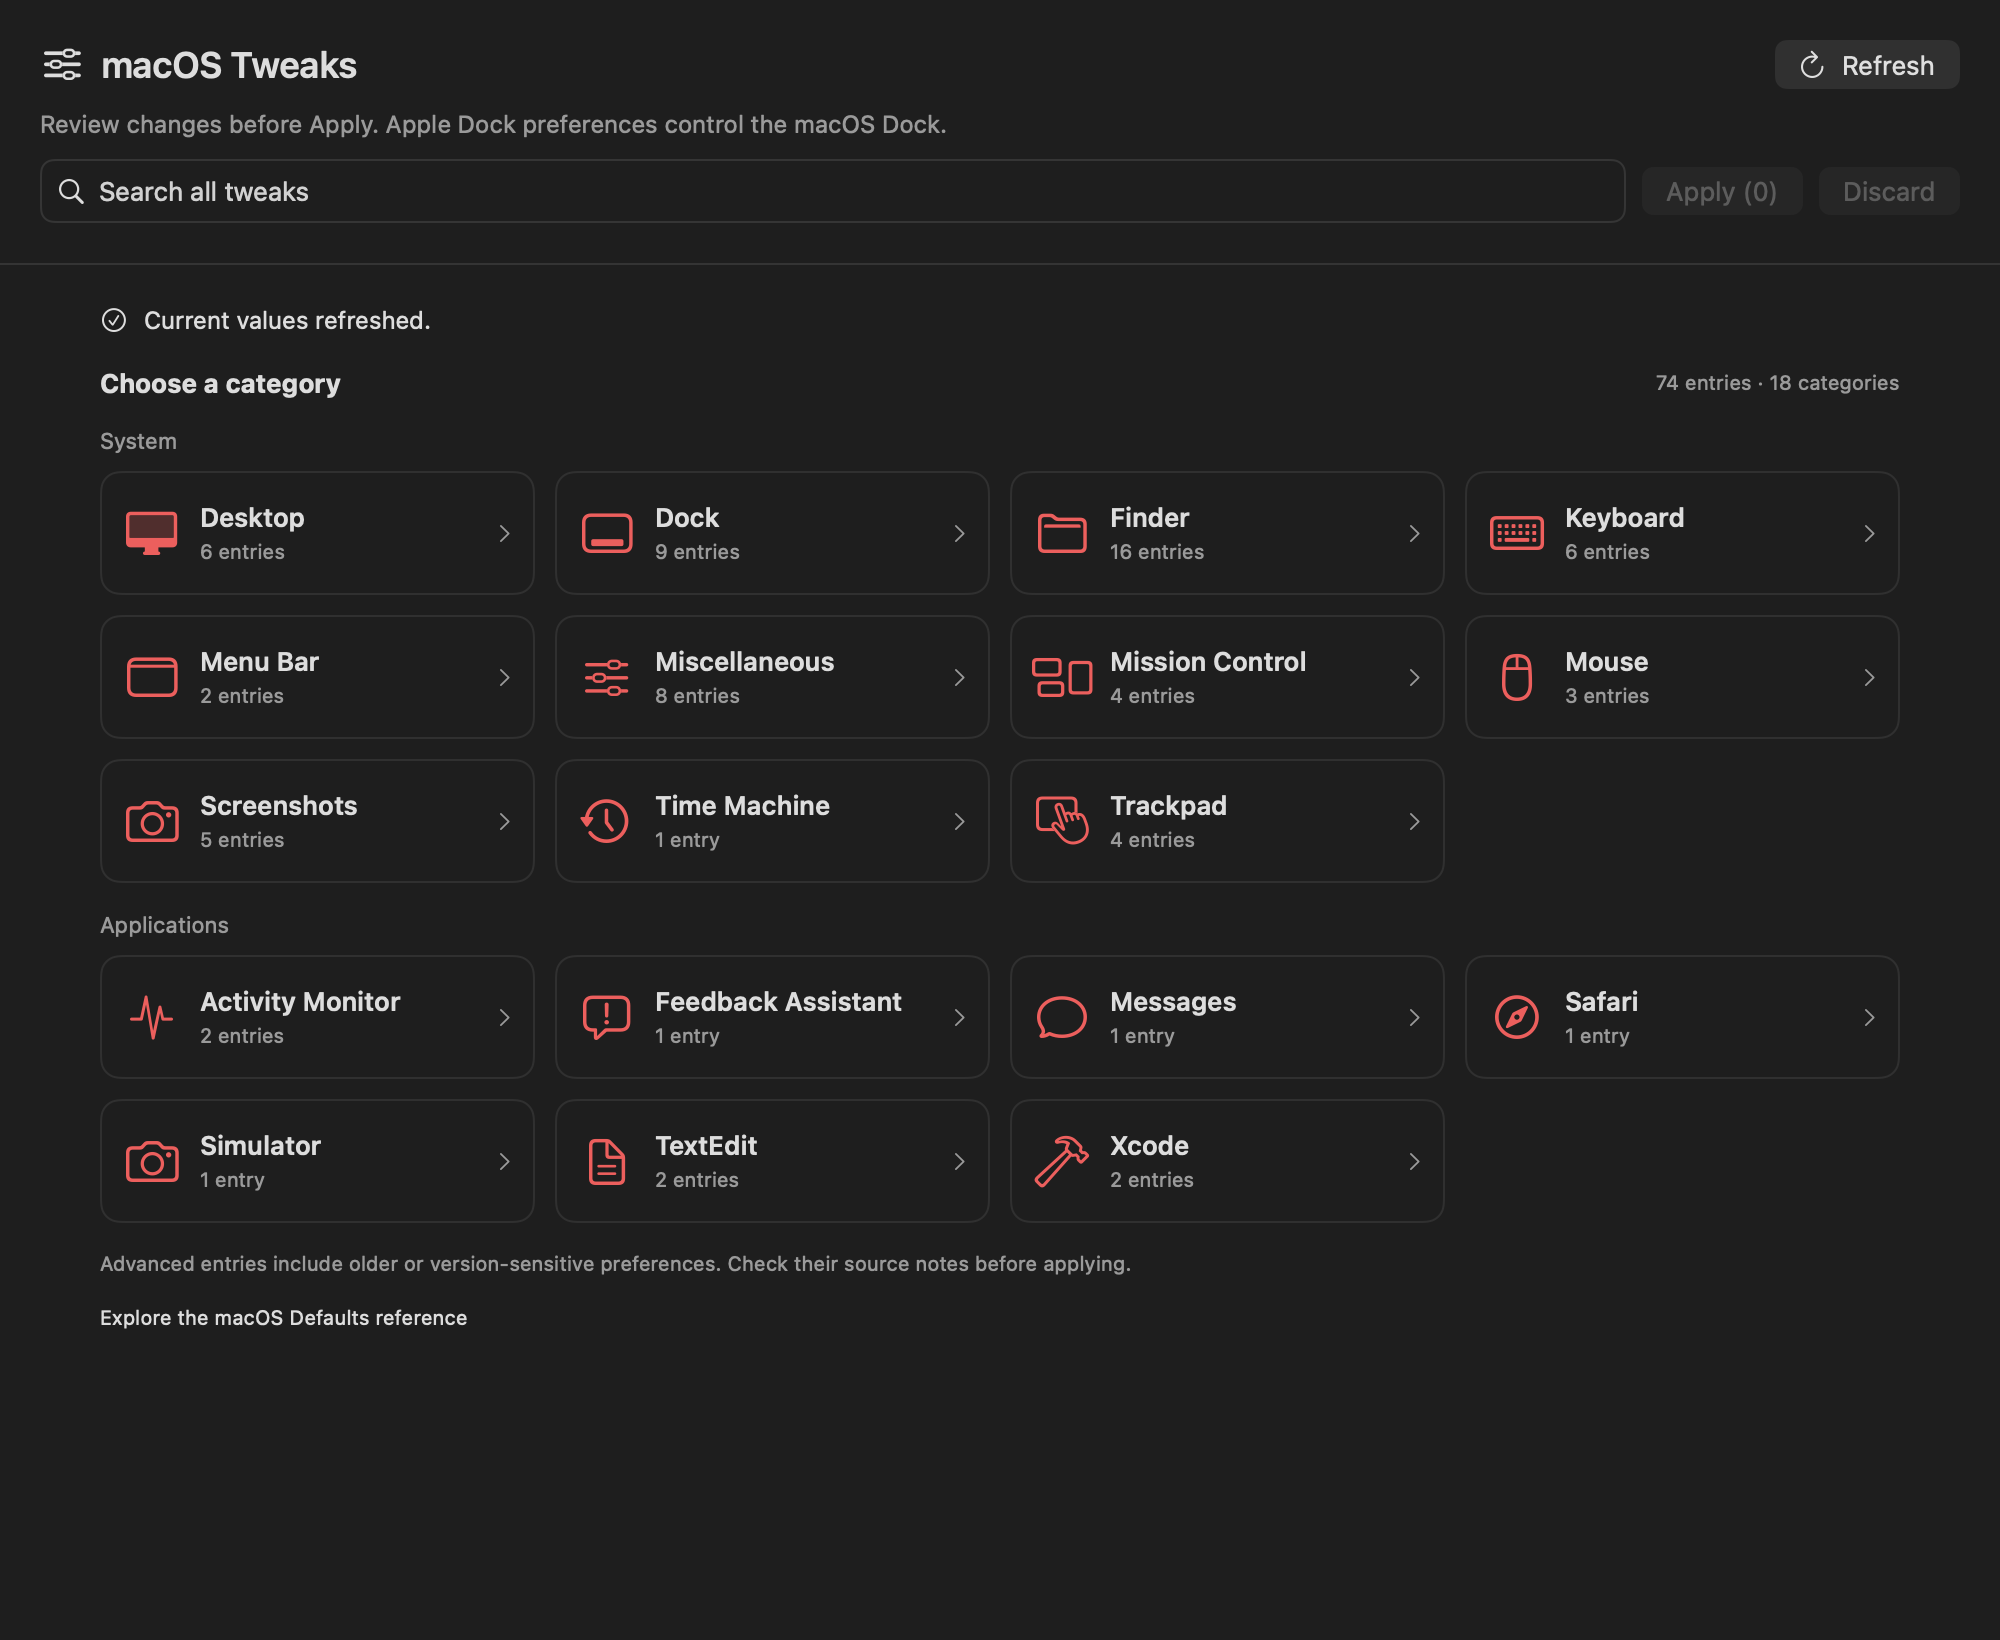
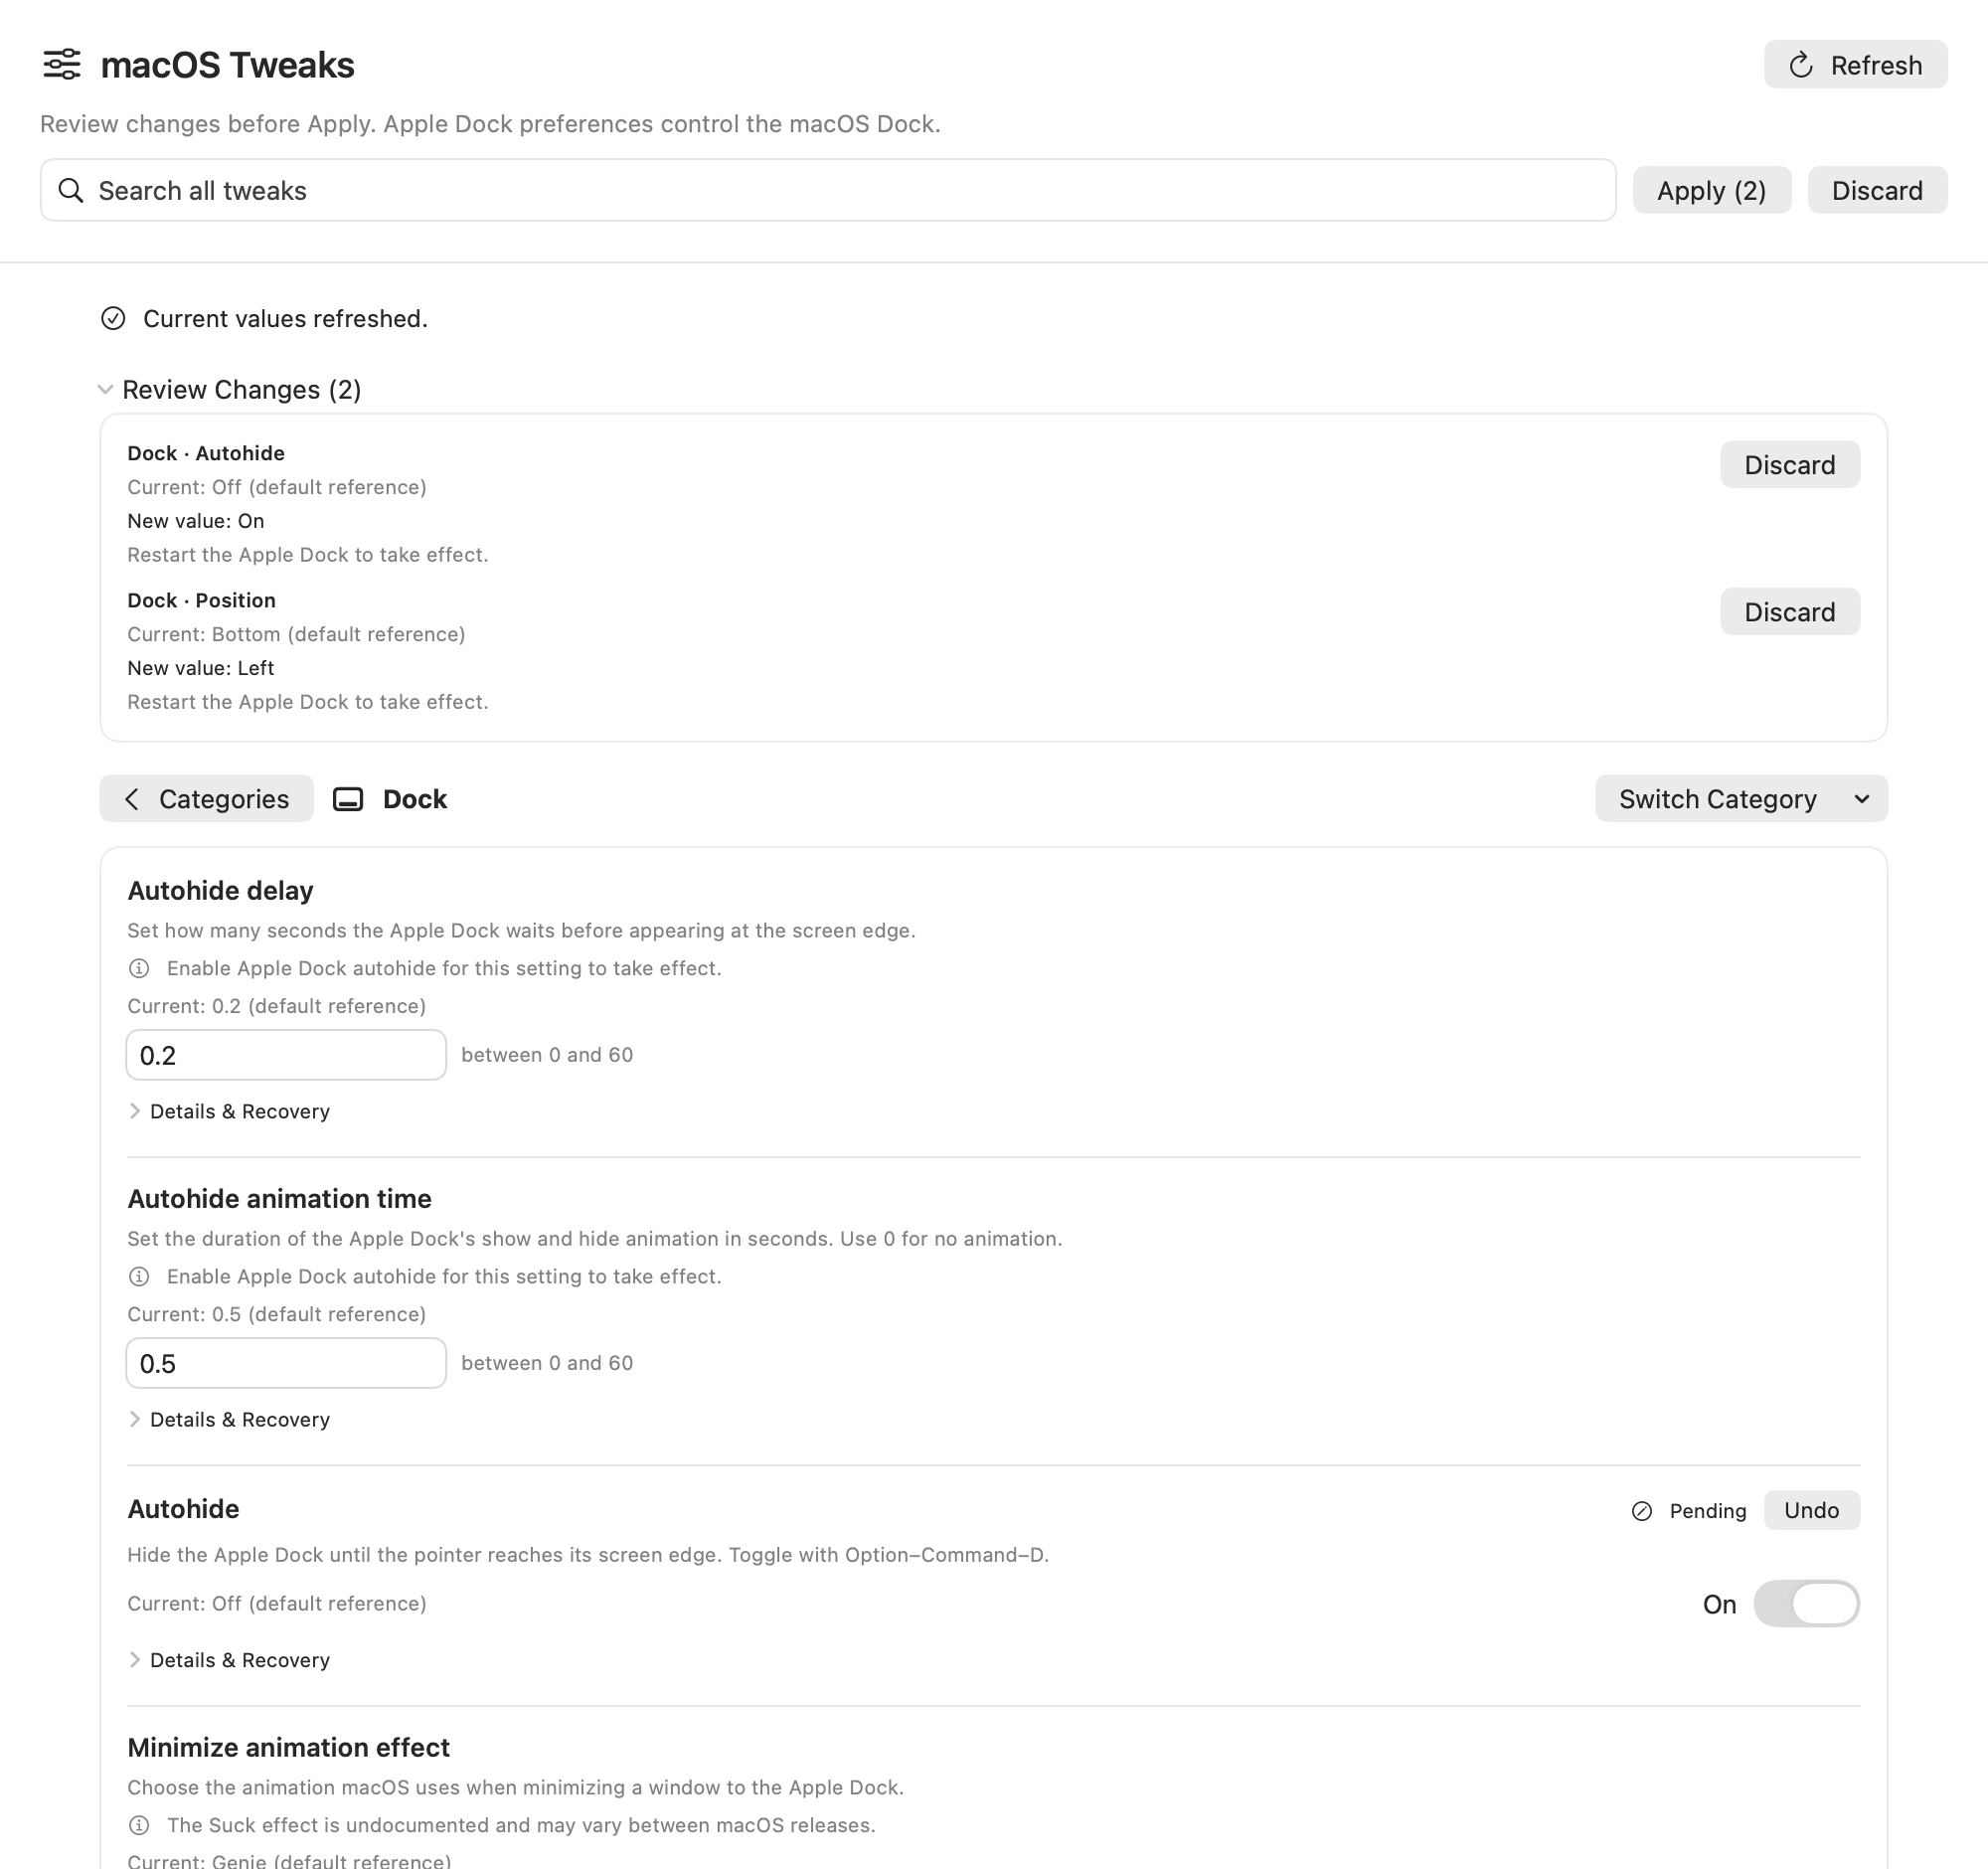
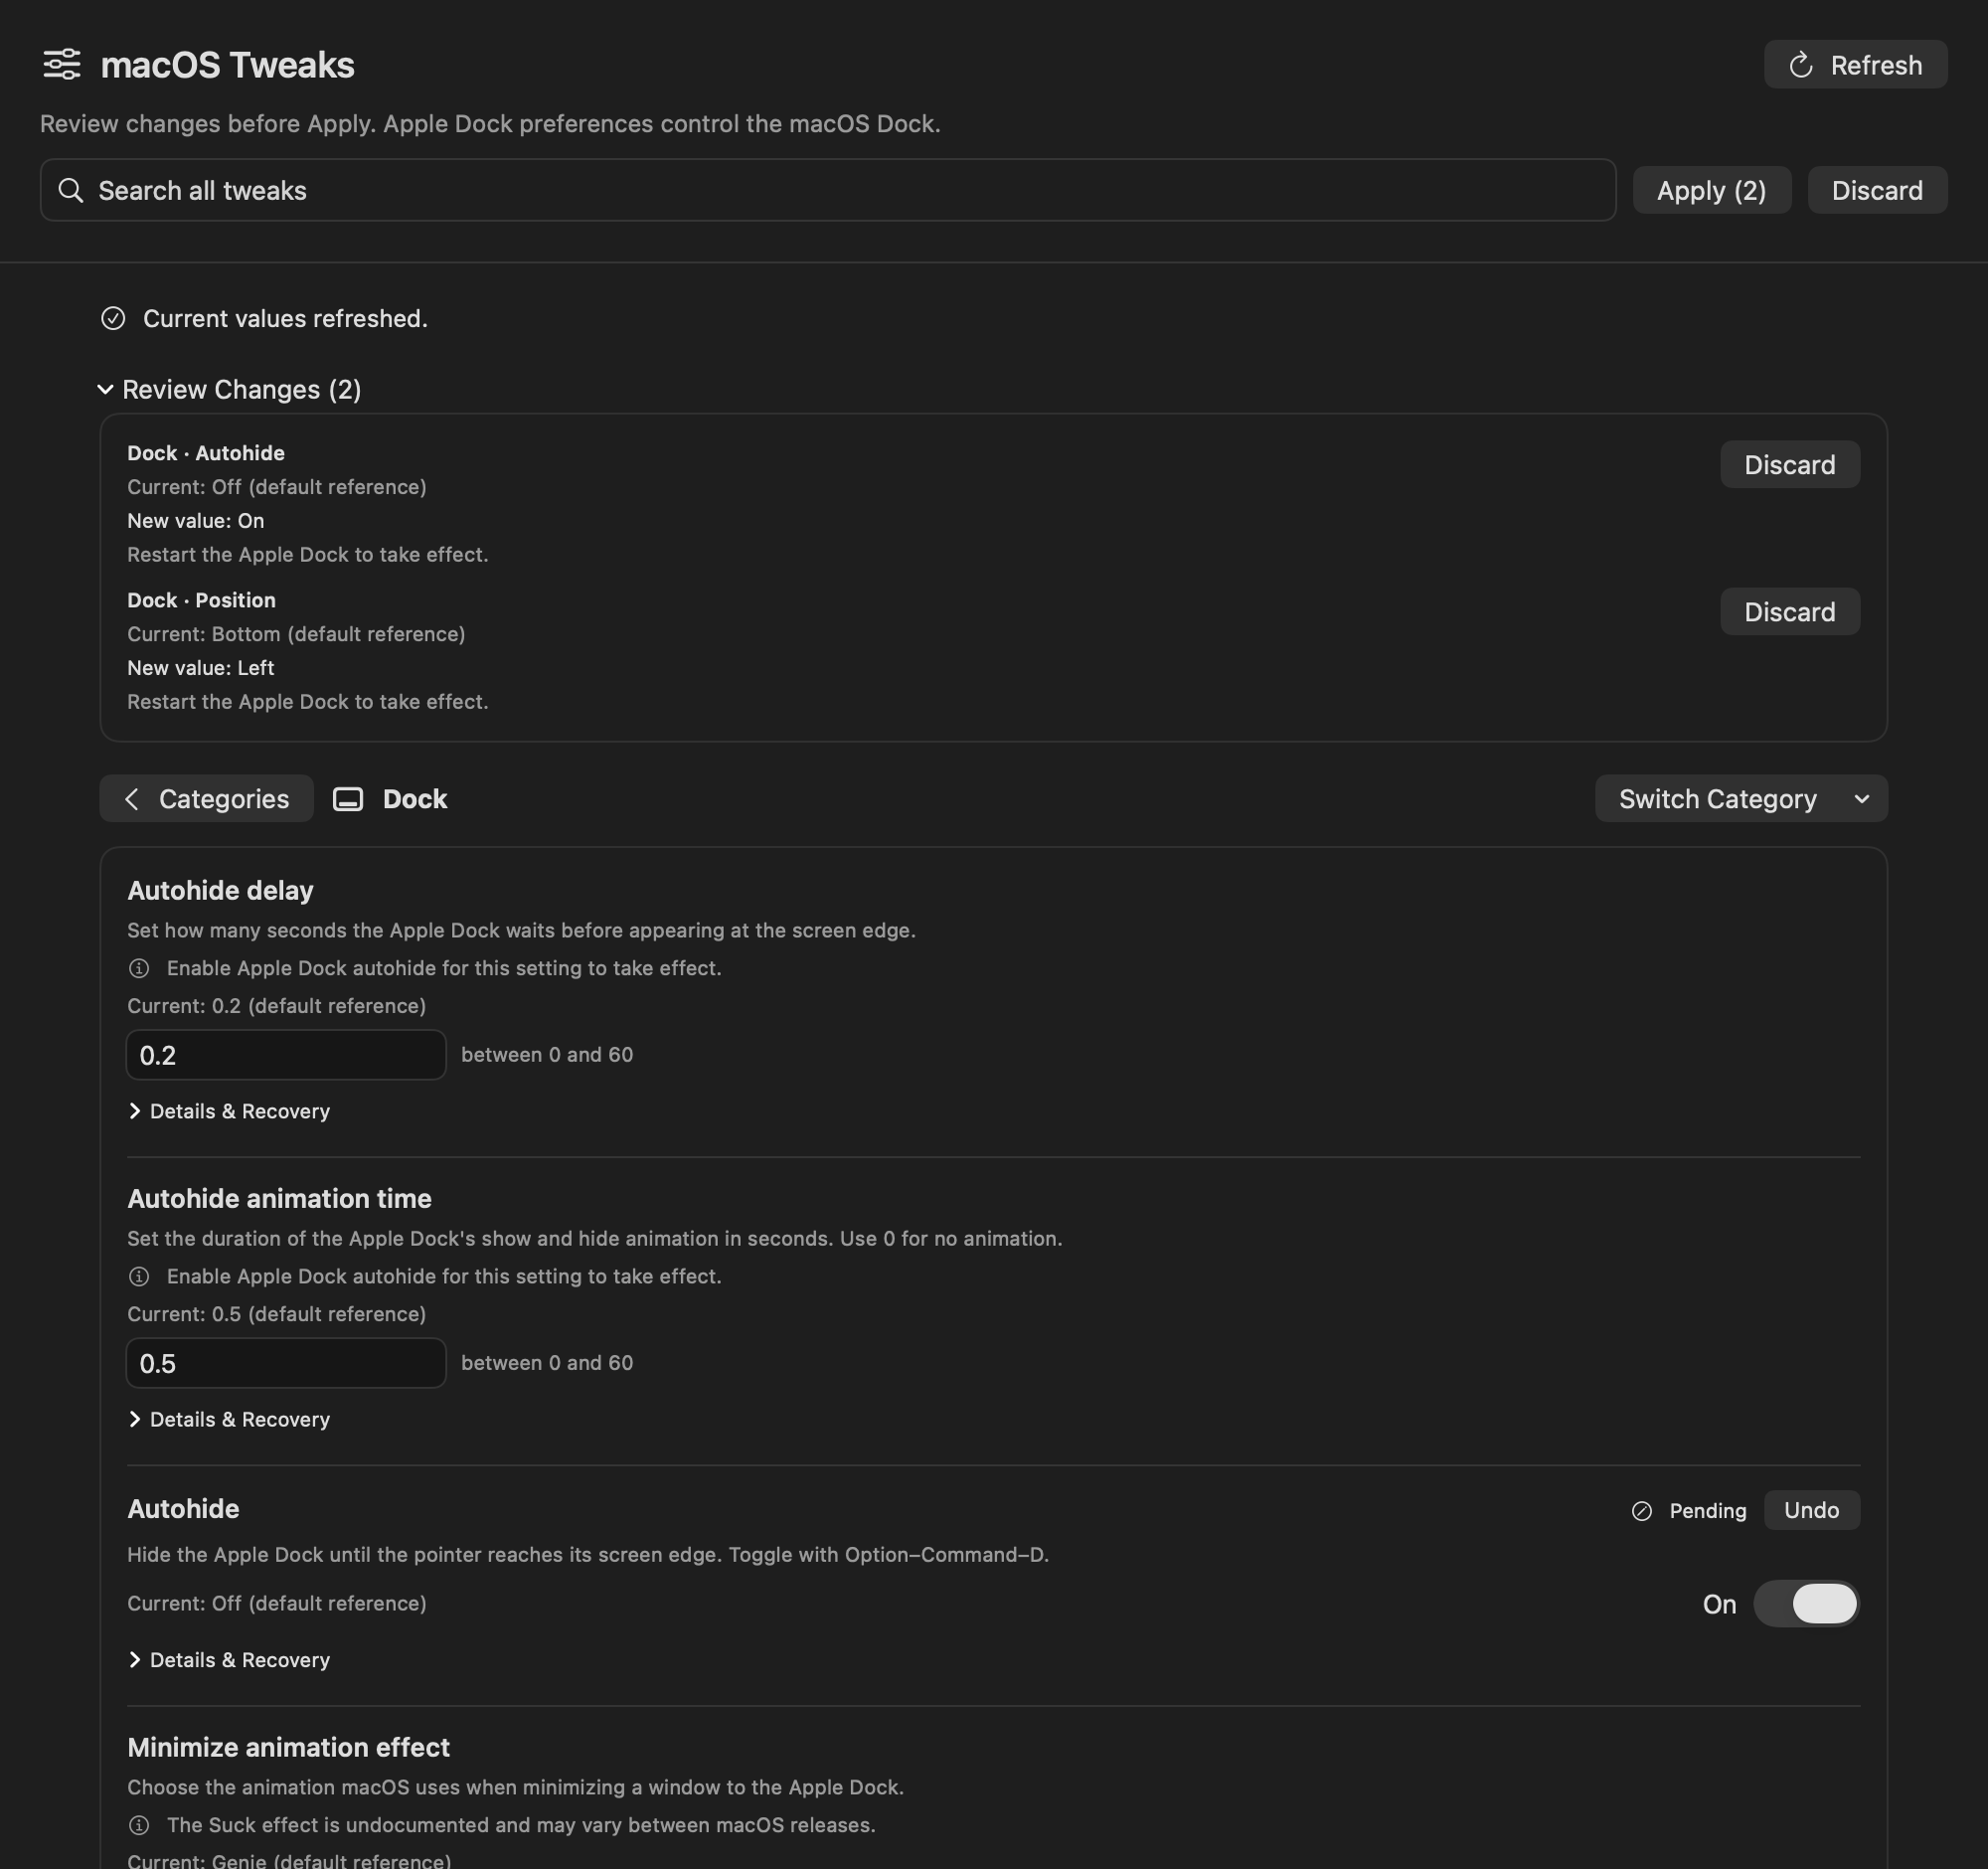
Open Settings → macOS Tweaks. Changes stay staged until you click Apply.
Show hidden files and filename extensions, keep folders first, choose Finder’s default view and search scope, and show its path or status bar. Control desktop icons, with advanced entries for disks, removable media, and connected servers.
Adjust autohide delay and animation time, icon size, screen position, minimize effect, recent apps, and scrolling to App Exposé. These preferences affect Apple’s macOS Dock. Docktopus panel appearance remains in its own settings.
Choose PNG, JPG, or HEIC, pick an existing save folder, include the date in filenames, and control the floating thumbnail and window shadow. Folder selection is built into the preference editor.
Choose the Fn/Globe action, standard function keys or media controls, keyboard navigation, and double-space periods. Adjust mouse speed and acceleration, trackpad click weight, and advanced dragging preferences. Focus Follows Mouse applies only between Terminal windows.
Control automatic Spaces rearrangement, switching to an app’s Space, and grouping windows in Mission Control. Advanced entries cover separate display Spaces and menu bar clock formatting. Details explain when logout or a component restart is needed.
Choose Activity Monitor’s Dock icon and update frequency, show the Messages subject field, and tune TextEdit’s format and smart quotes. Advanced entries include Safari’s full URL, Simulator’s screenshot folder, Xcode build durations and counterpart suffixes, and Time Machine’s new-disk prompt.
Each entry includes its description, source default reference, source-tested macOS version notes, effect notes, and documentation link. Older and version-sensitive preferences sit under Advanced; unavailable entries are identified and cannot be edited. The catalog’s 74 entries include those unavailable entries. Reference defaults and support can vary with your macOS version and hardware.
Shortcut Cheat Sheet
Find the current app’s menu shortcuts without memorizing them. Hold to open, pin to browse, and search for the command you need.
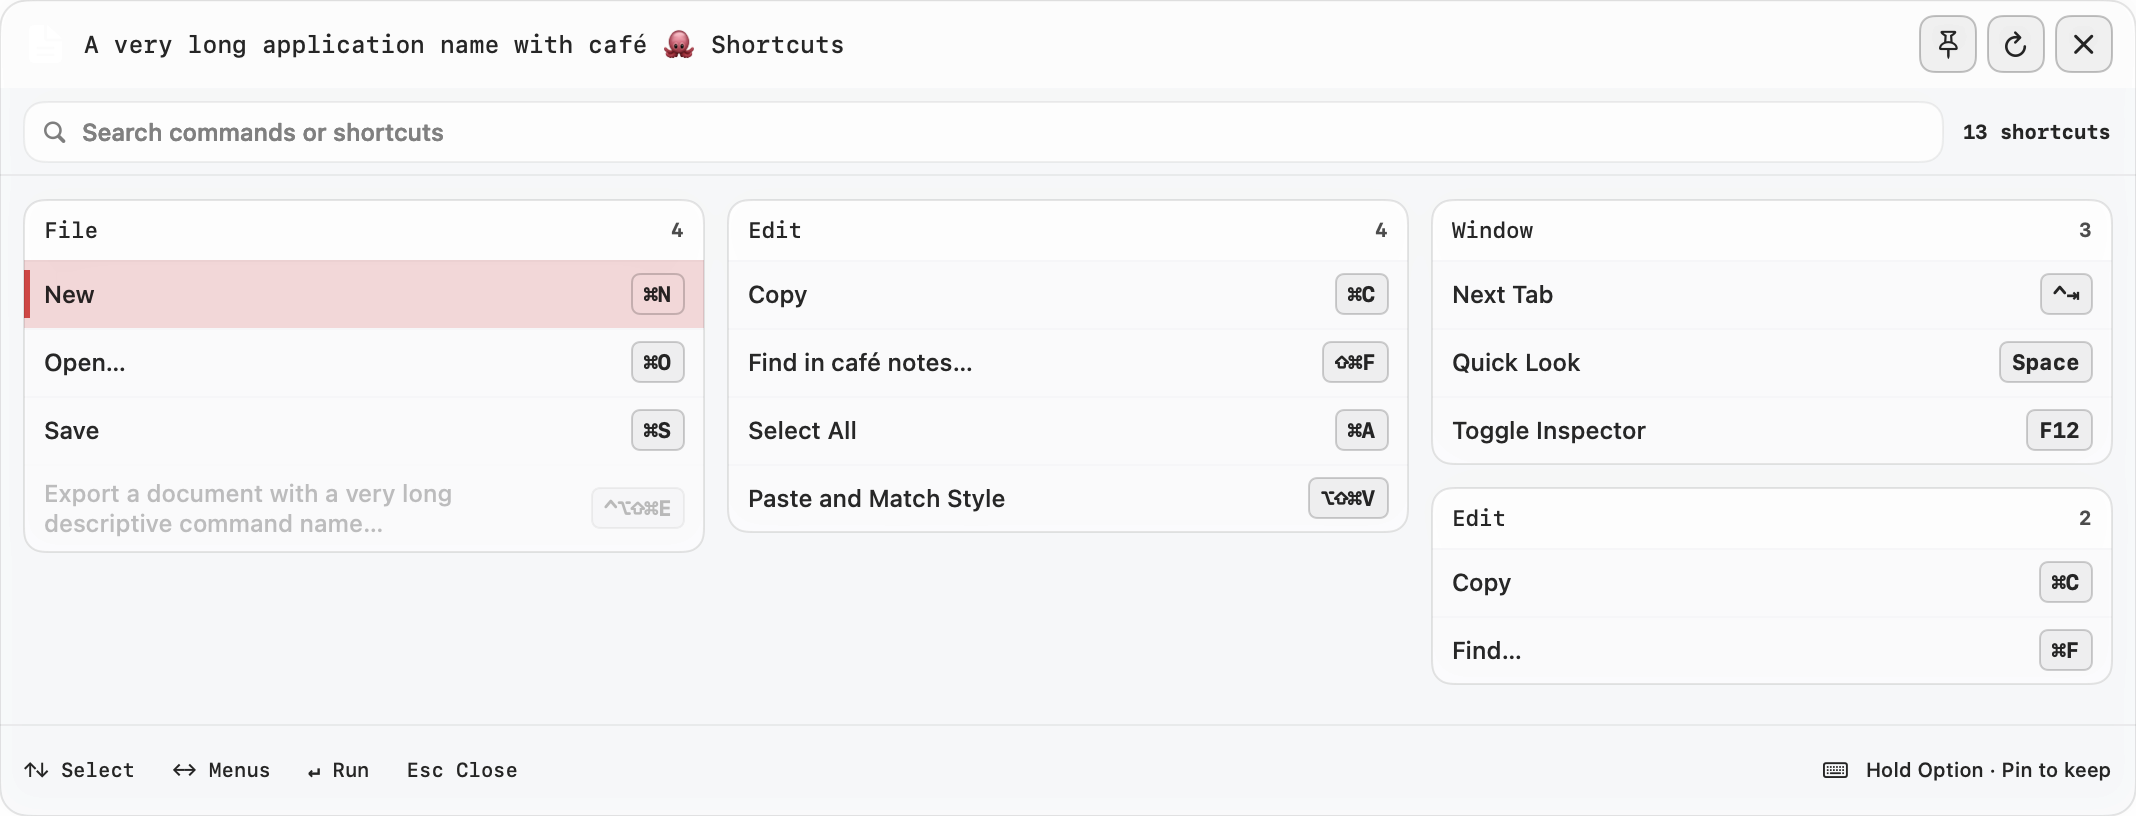
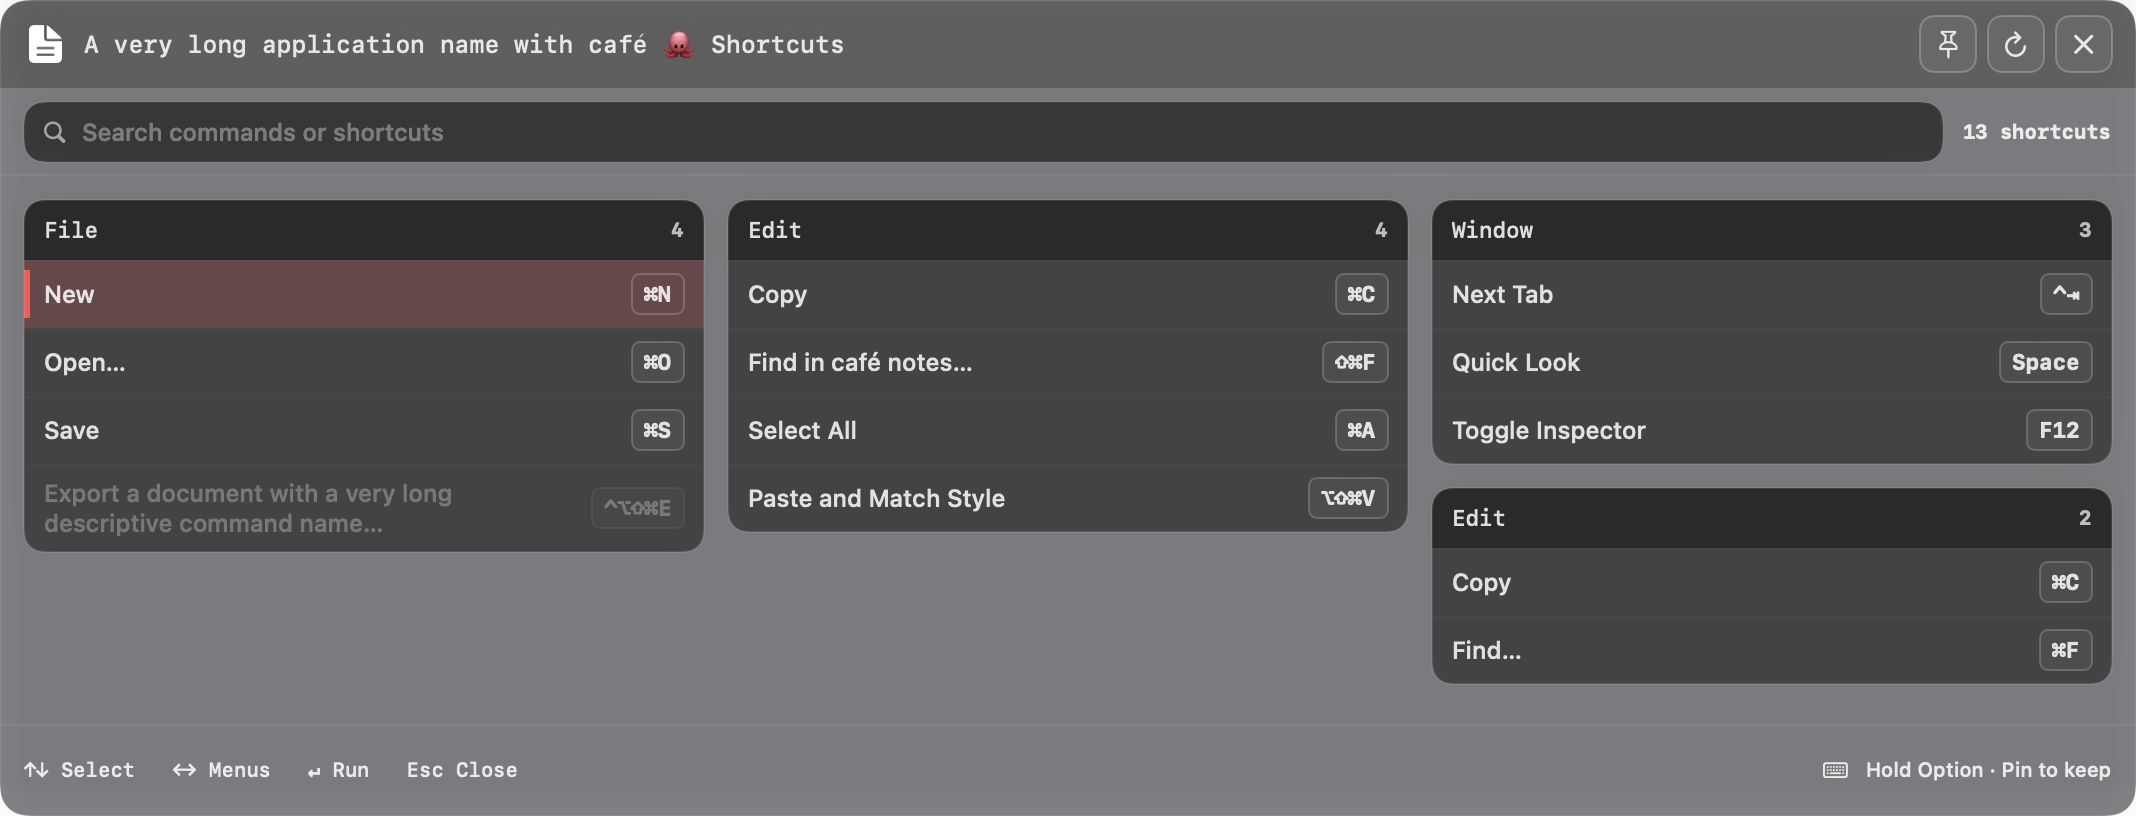
Hold Option for two seconds to open the sheet, or choose Command, Control, or Shift as the hold key in Settings. Release the key to close, or use Pin to keep browsing. Searching and refreshing also pin the sheet. Switching to another app dismisses it; open it again for that app’s menu shortcuts.
Type to filter command names, menus, and keyboard shortcuts. Combine several words in any order; search ignores case and accents and understands modifier names and aliases such as command/cmd, option/alt, and control/ctrl. Press ⌘F to focus the native search field for text editing, selection, and paste, or use the clear button to restore the full list.
Use ↑ and ↓ to select available commands. Outside the search field, ← and → move between visible columns, and Tab and Shift-Tab cycle through enabled commands. In search, left and right arrows move the text cursor. Selection scrolls into view. Press Return to run the selected command or Esc to close and return to its source app.
Click an enabled command or press Return to request it in the source app and close the sheet. Disabled commands remain visible and are skipped during keyboard selection. Docktopus checks a menu command’s availability again before running it; if a command is no longer available, the sheet provides feedback so you can refresh and try again.
Accessibility permission is required to read and run app menu commands. The sheet offers an Open Accessibility Settings action when access is missing. Custom or hidden shortcuts only appear when the app also exposes them in its menus. Loading, empty, unavailable-menu, and partial-result states explain what was found. Refresh rereads the app’s menus and availability, keeps your search, and pins the sheet.
Use Liquid Glass, CDE, or Windows 95 with light and dark presets, readable shortcut labels, and a visible selection marker. Small menus use a compact panel; larger menus scroll within the display’s visible area while search and controls stay in reach. The sheet respects Reduce Motion, Reduce Transparency, and Increase Contrast settings.
Get Docktopus
Try the app first. Buy when the dock has earned its place on your screen.
Download Docktopus and try it on your own desktop.
The next download will be available here. Please check back soon.
One purchase for a lifetime license. Receive your license by email and activate it in Docktopus.
Support and requests
Get help with your setup, tell us what could work better, or suggest your next favorite tool.
For license issues, activation trouble, update problems, permissions, crashes, or anything else blocking daily use.
Contact SupportTell us what feels good, what feels odd, which theme details need love, or where the dock gets in your way.
Send FeedbackSuggest widgets, menu bar extras, theme controls, shortcuts, integrations, or workflow ideas you want Docktopus to grow into next.
Request FeatureUse your ticket number and email address to check status and read public replies.